When setting up your account, you may need to add bookings that already exist before you started using Zeevou. These can include direct bookings, reservations from previous systems, or bookings from channels that are not connected yet.
Do you need this?
Yes - if you have direct or already checked-in bookings that need to be added manually.
No - if you don’t need to add any bookings manually, you can continue with blocking unavailable dates.
There are three ways to add bookings into Zeevou.
If you are setting up your Zeevou account for the first time and have more than 10 existing bookings, Bulk Import is the quickest way to add them. It allows you to transfer multiple reservations at once, including historical bookings.
Importing past reservations helps you:
Automatically create guest profiles in your CRM
Include historical booking data in your performance reports
Even if you use Bulk Import initially, we recommend reviewing the manual booking options so you know how to manually add phone, walk-in, or email bookings in the future.
Use bulk import when you have multiple bookings to add at once.
Step 1: Download & Prepare the Template
Download the Booking Import template.
Format ALL cells as Text (this is critical to avoid validation errors)
Step 2: Complete Required Fields
Fill in the following mandatory columns:
Channel, select from the dropdown (e.g., Direct-Web)
Collection Type
Hotel Collect – You collect payment
Channel Collect – The channel collects payment
Property / Unit Type / Unit: These must match Zeevou exactly (no extra spaces).
For single-unit properties:
Property name = Internal Name used during setup
Unit Type & Unit = The Unit Name selected in the property wizard
Booking Status, enter one of:
Booked
Checked-in
Checked-out
Cancelled
No Show
Check-in Type, enter one of:
Smart Lock
Code Entry
Mobile App
Concierge
Keynest
Key Pickup (from office)
Key Safe
Meet & Greet
Times: Use the 24-hour format (e.g., 15:00, not 3:00 PM)
Step 3: Optional Fields
Unit
Only required if assigning a specific unit.
Set not_move = Yes to lock the unit.
Non-refundable
Enter Yes if applicable.
Step 4: Upload & Validate
Go to Sales→Bookings → More → Import Bookings in Bulk (Excel)
Name your import
Select your file
Click Save and Close
Click Validate
Fix any errors (double-click highlighted cells)
Repeat validation until no errors remain
Click Transfer to Booking
If you encounter issues, email your file to [email protected].
The video guide below outlines how to create bookings:
Note: When you connect certain channnels (Airbnb, Booking.com) via API, we automatically import future bookings. You only need to manually add bookings arriving today or from other channels that do not support this via an API integration.
If you are on a mobile app, click here.
If you are on a computer or tablet, choose one of three ways outlined below:
The quickest method for creating bookings when you can see availability is by using the Drag & Drop option across the Booking Calendar. Follow these steps:
Go to Calendar
Drag across your desired dates on the calendar
Click Create a Booking
You'll skip directly to guest selection (accommodation already selected)
Skip Step 1, continue with Step 2
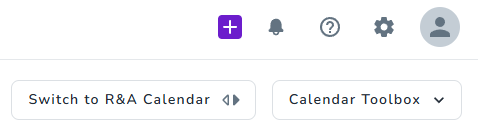
Click the purple + (plus) button on the top right from whatever page you are on
Go to Bookings → Create a Booking
Step 1: Select Accommodation
Note: To search for your preferred dates, please select one of the following options and complete the field: City, Region, Property, Unit Type, or Unit.
Choose your property
Use the calendar to select check-in and check-out dates
Enter number of guests
Click Search
Browse available unit types
Select your unit type, then your specific unit
Click Next
Tip: Need to change the unit after guest entry? Click Change Location in the Location section.
Step 2: Guest Details
Select guest by searching existing profiles OR Create New Guest Profile
Click Create a New Guest Profile
Fill in at least one field
Click Save and Close
Select channel from dropdown
Add Booking Channel No and Internal Note (optional)
Click Next
Step 3: Review Pricing
Review the general invoice
Click Price Down to view/edit rate plan details
Enter arrival and departure times
Confirm your selection and review all details
Step 4: Review Automated Messages
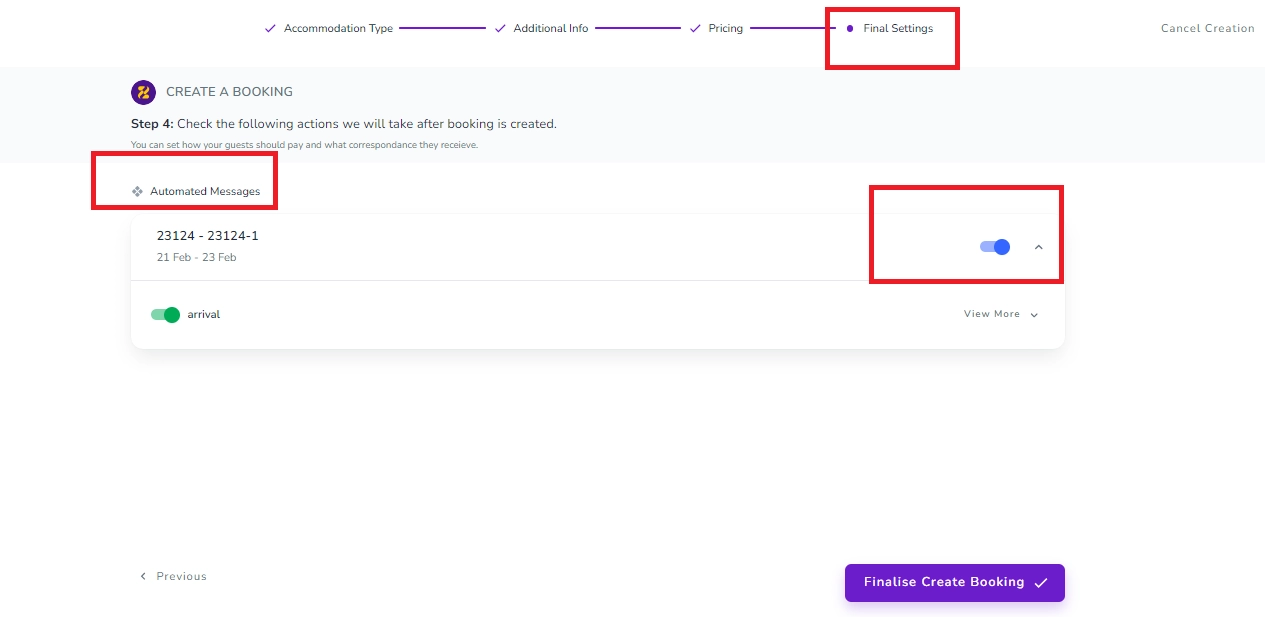
Sometimes, when you are creating a booking manually, you may not want the guest to receive all or some of the active automated messages. You can customise this at the last step of the booking creation. To do so, you should turn off the toggle for already active automated messages at the “Final Settings” stage of creating a manual booking.
Your booking is created - click Go to Booking Page to view it.
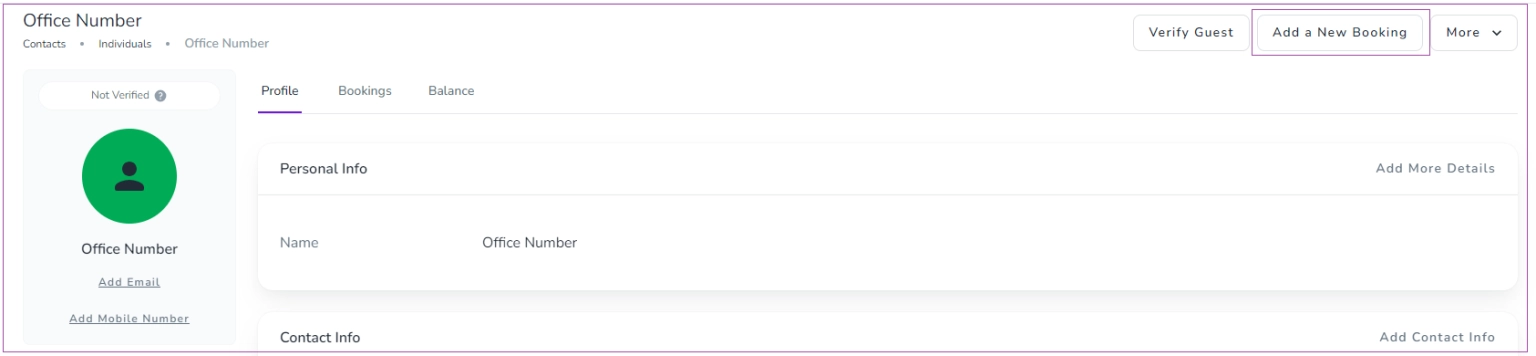
Click the + (Plus) icon to Create a Booking or go to Guest Profile and click on Add a New Booking.
A window opens for you to search based on the Location, Check-in, Check-out, and Guests by choosing from the Drop-down Menu.
Click on Search icon.
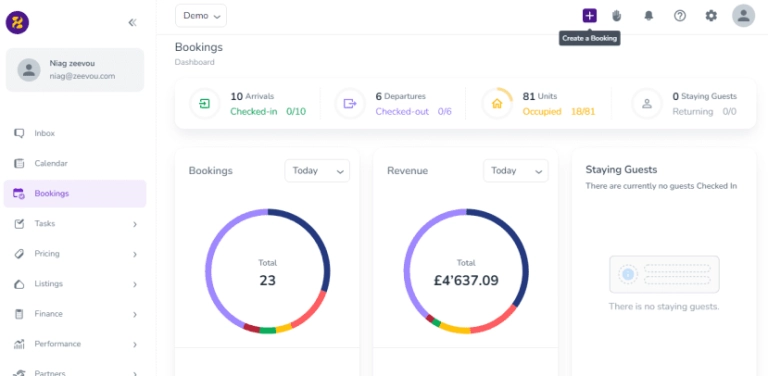
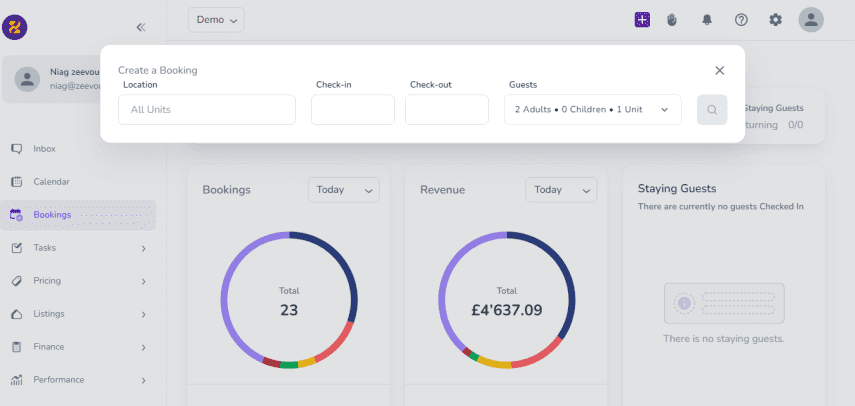
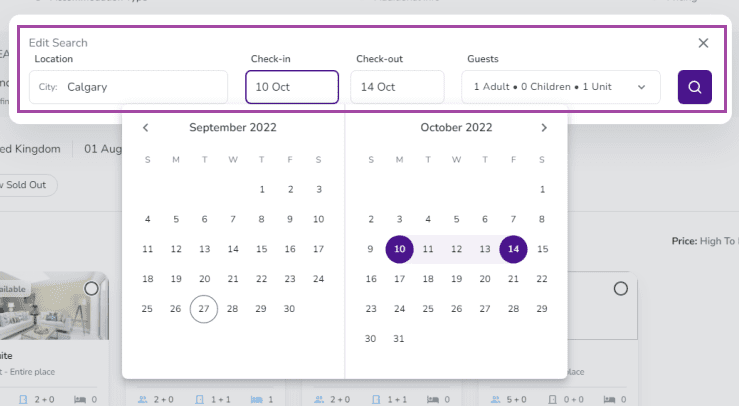
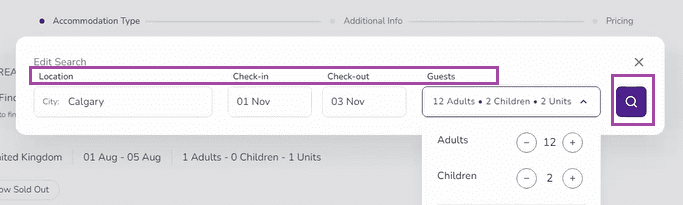
Search Bar: You can book more than one location via Group Booking. Tour requests or regular bookings are a couple of good examples.
You can create a (Group) Booking with the Booking Wizard in four steps:
Accommodation Type
Additional Info
Pricing
Final Settings
Step 1: You should find the Accommodation Type best suits the guests. All unit types based on your search details will be shown and you can select the one(s) you want based on the Location, Check-in, Check-out, and Guests.
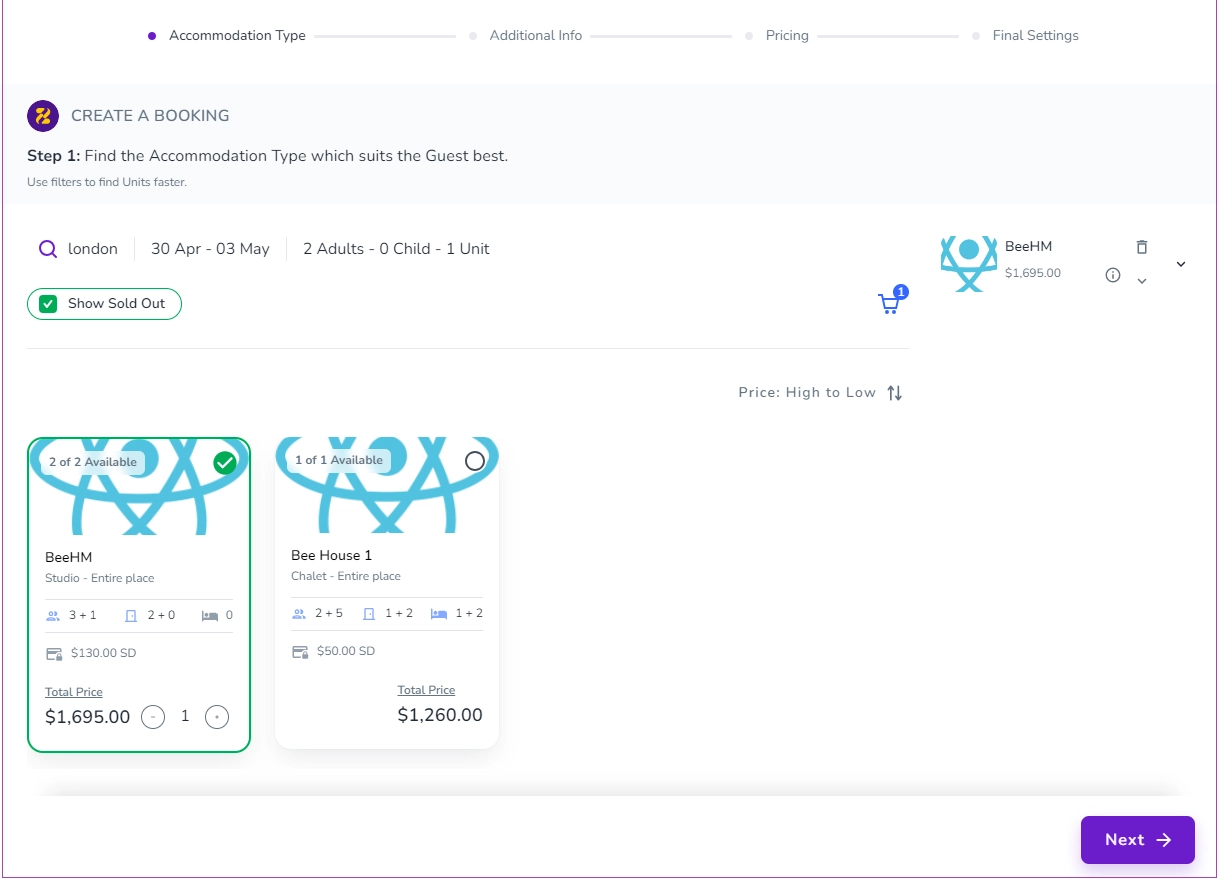
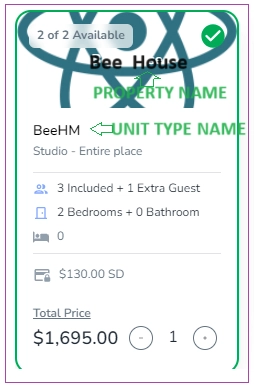
Note 1: If you hover over each Unit Type card, its property name will be shown and its details will be extended:
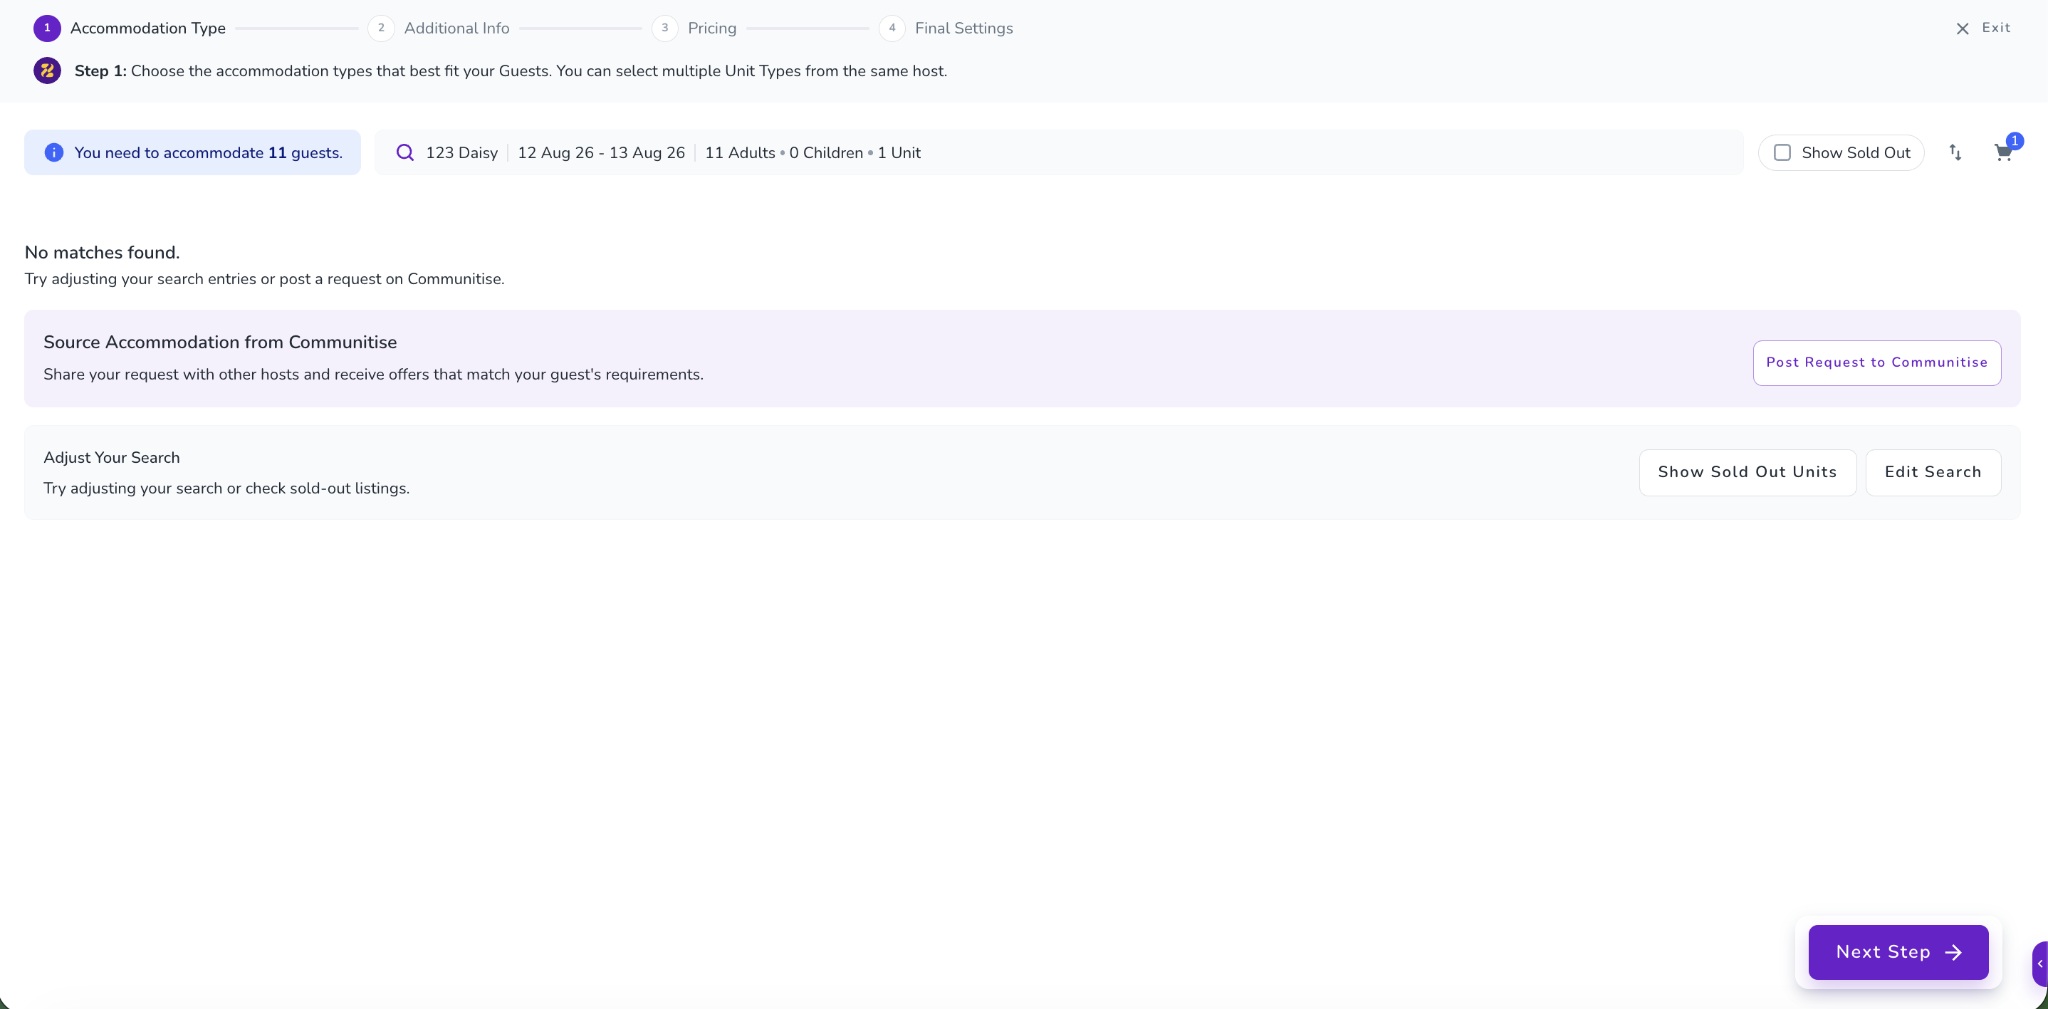
Note 2: If no matching accommodation is found in the Booking Wizard, you can post your request on Communitise. Other hosts can then view your request and offer suitable accommodation that matches your guest's requirements.
Step 2: Enter Person Booking details and Channels. You can either Select Person Booking from the drop-down menu or Create A New Guest Profile.
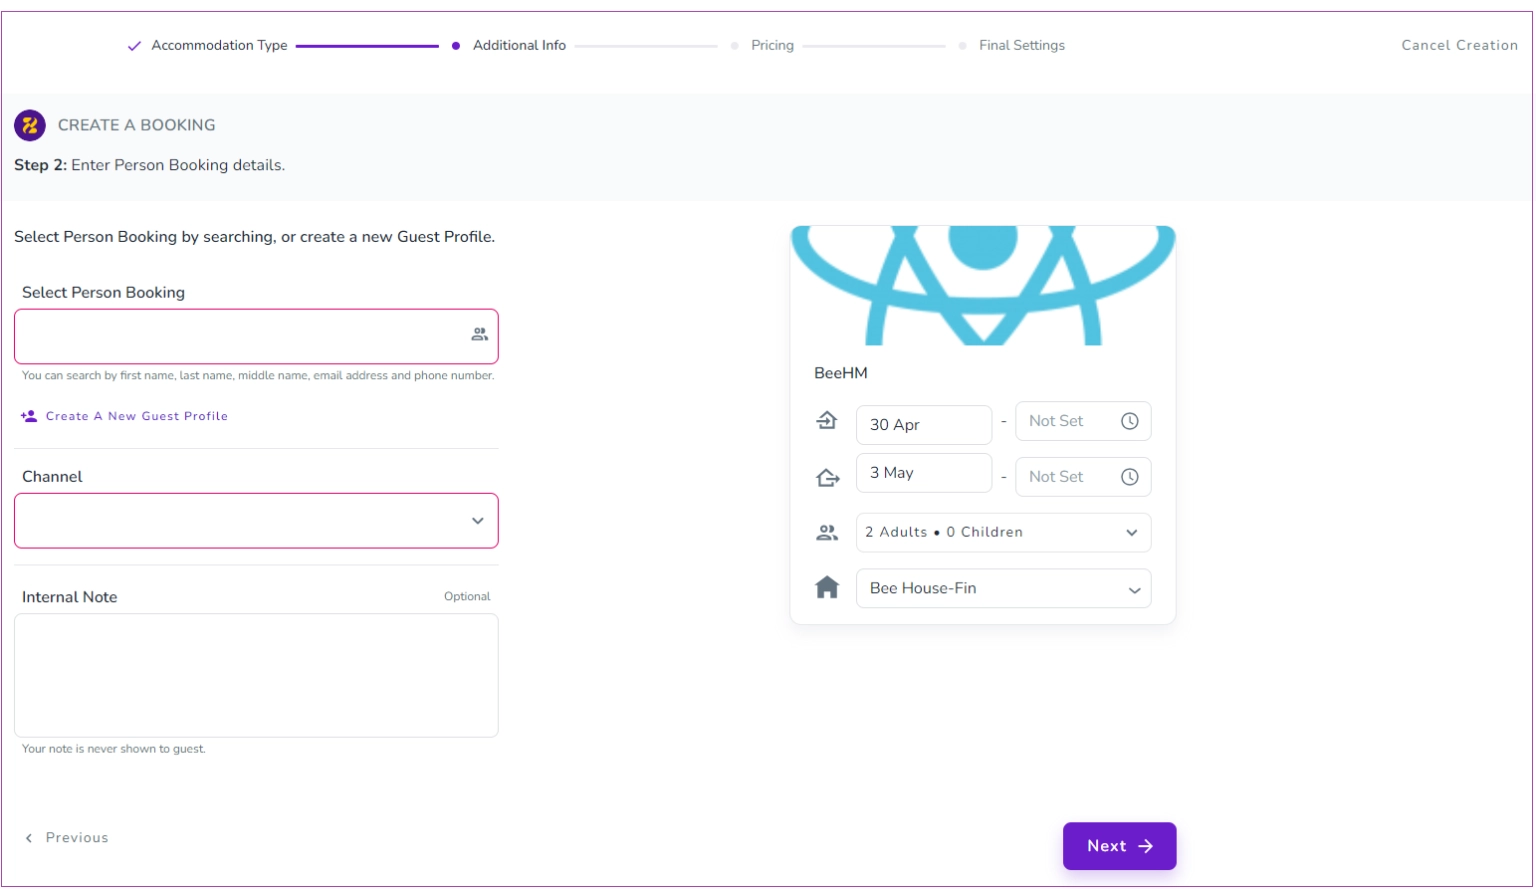
Note 1: If you click on Create A New Guest Profile, a window opens for you and you must fill out at least one of the fields. Then, Save and Close.
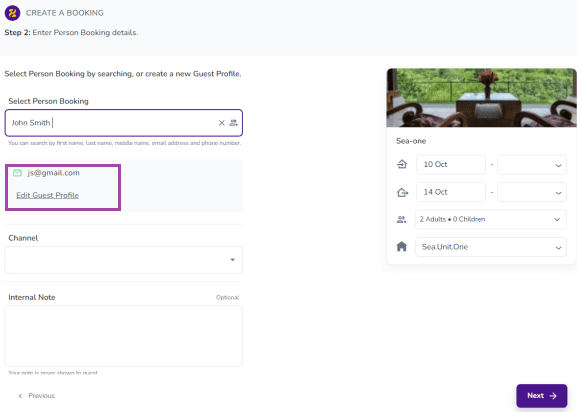
Note 2: When you Select Person Booking from the list, you can Edit Guest Profile.
Note 3: You can select the brand of your listing from the dropdown menu; otherwise, the default brand will be selected automayically during the booking.
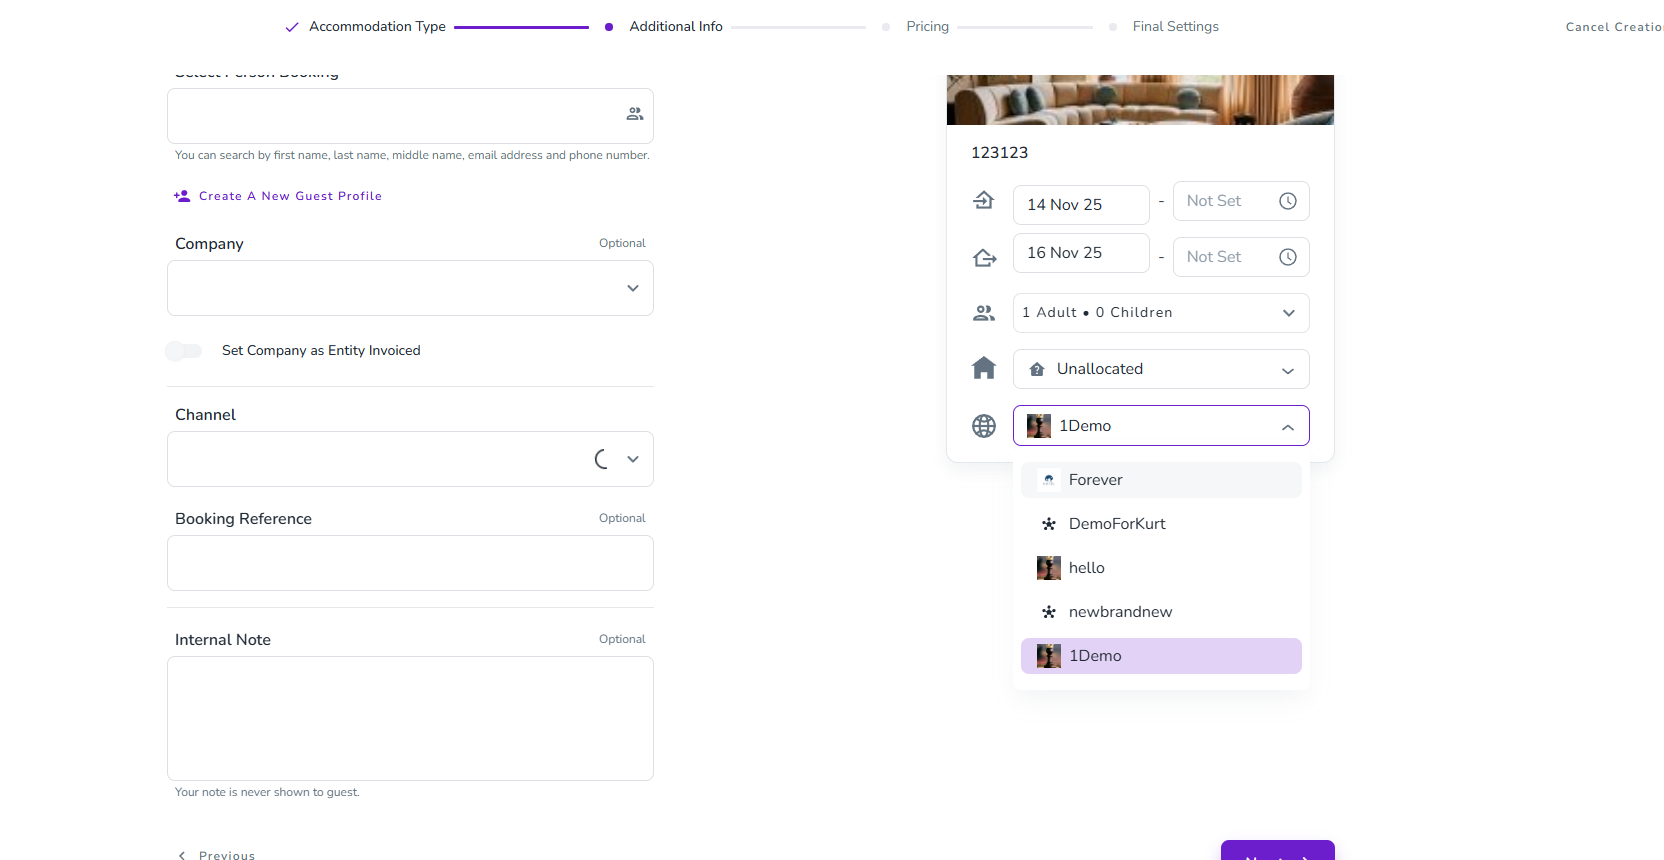
After selecting Person Booking, you can select the Channel and turn on either Host Collect or Channel Collect. Then, click Next.
Step 3: You can check the booking price breakdown.
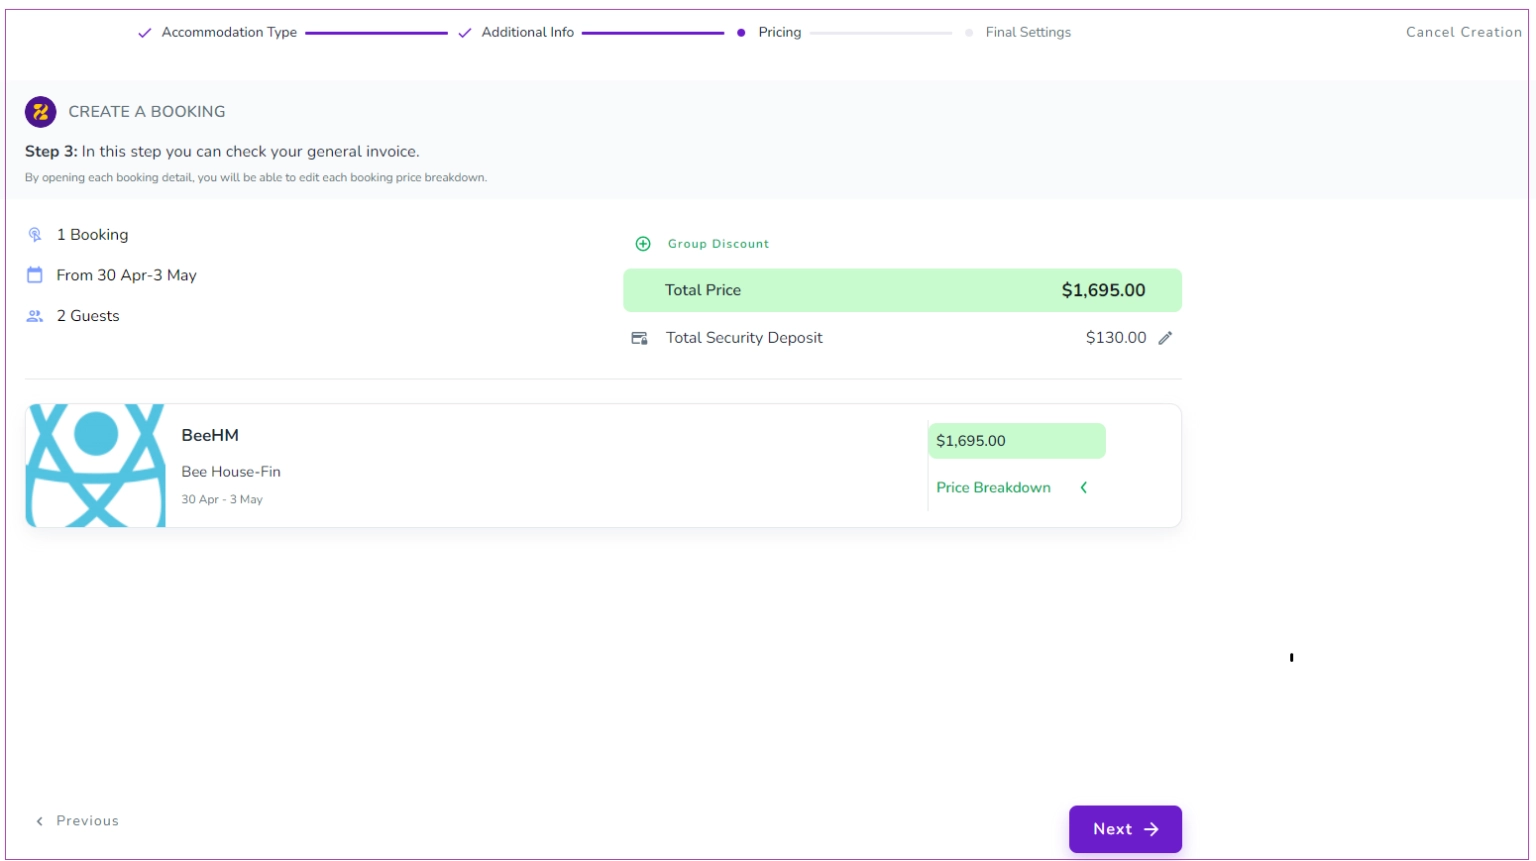
Note 1: You can apply Group Discount and also edit Total Security Deposit.
Note 2: You can view its details by opening each booking.
Step 4. You can set how your guests should pay and what correspondence they receive.
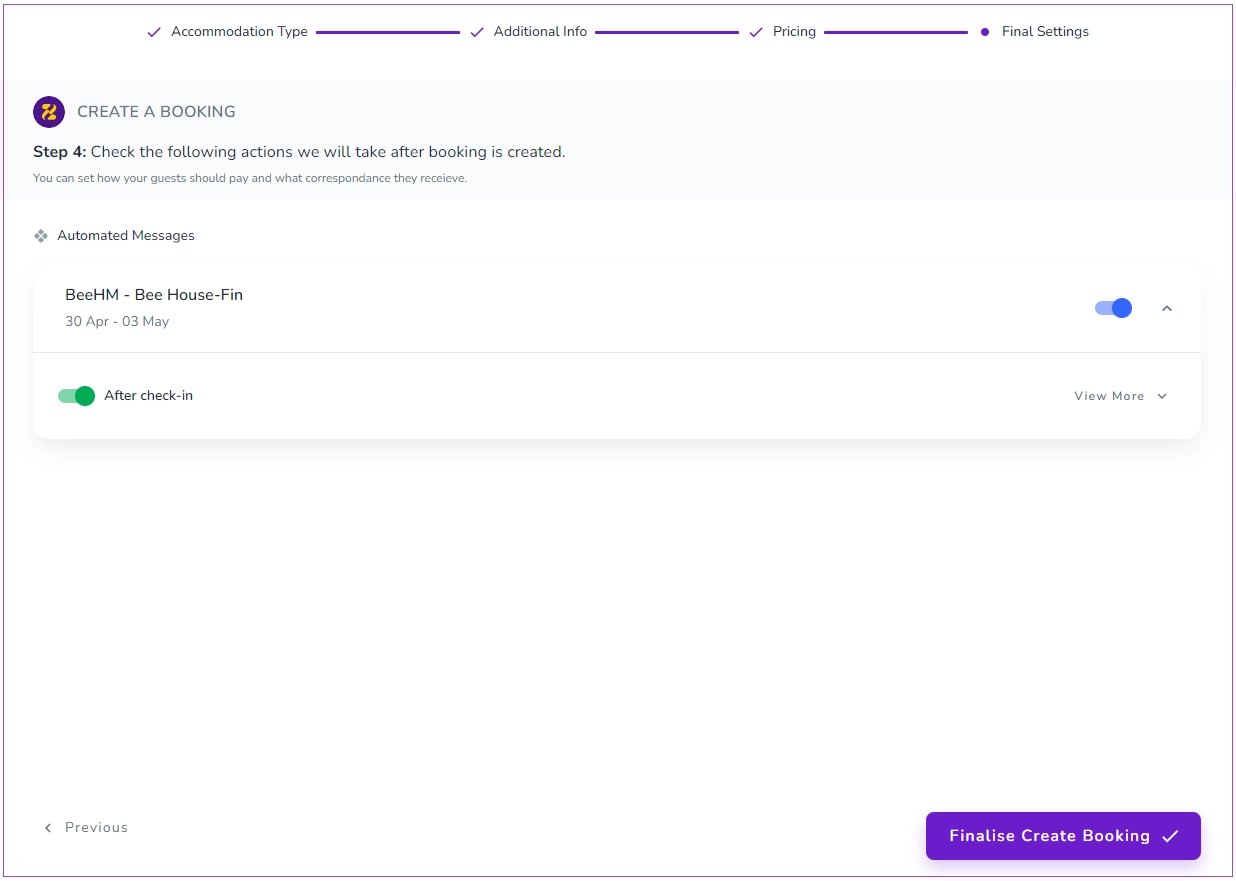
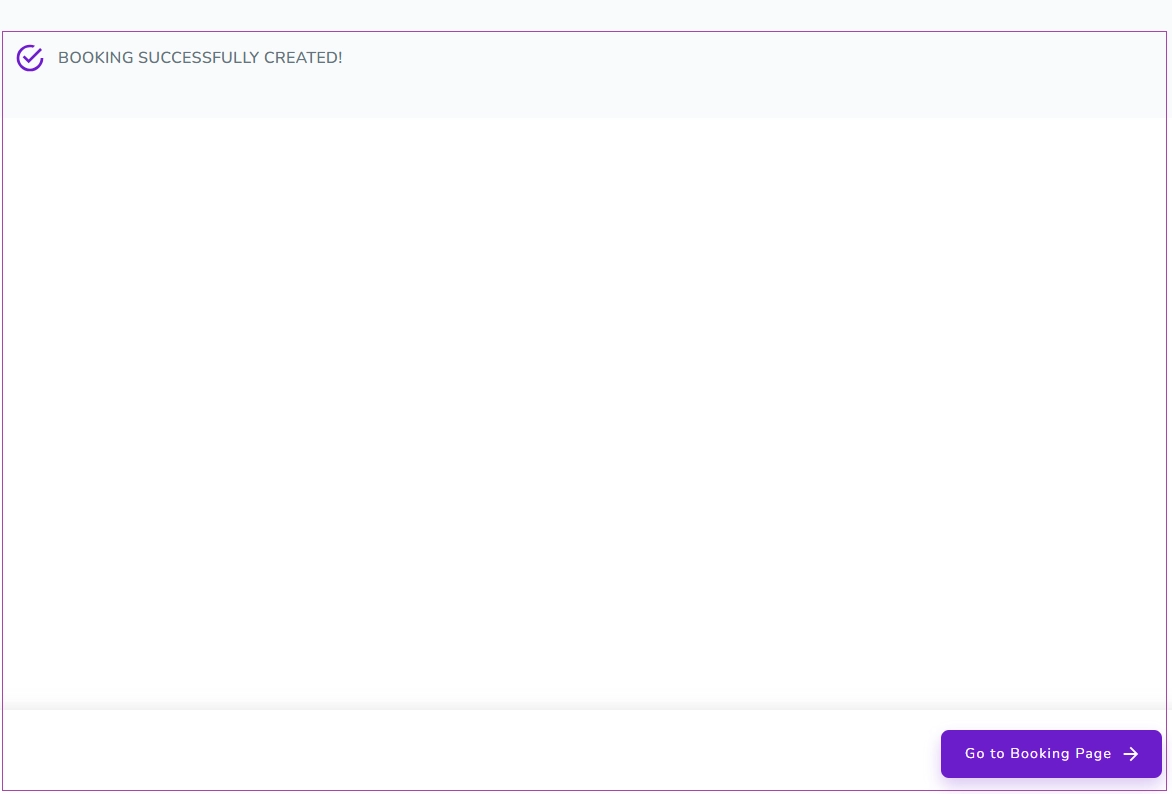
Finally, click on Finalise Create Booking to view Booking Successfully Created Message.
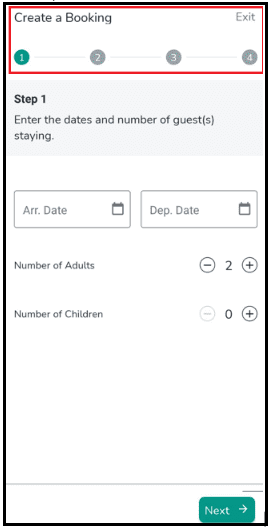
You can create a booking with the Booking Wizard on the mobile app in four steps:
Step 1: You should enter the arrival date, the departure date, and the number of guests, and finally tap Next.
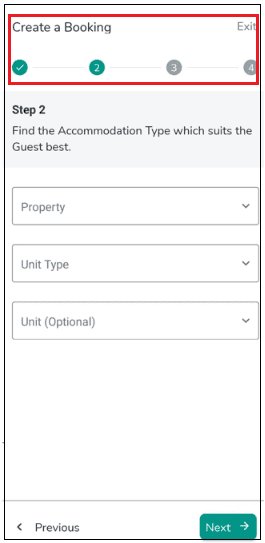
Step 2: Find the Accommodation Type which suits the guests best. You can select from the drop-down lists and then tap Next.
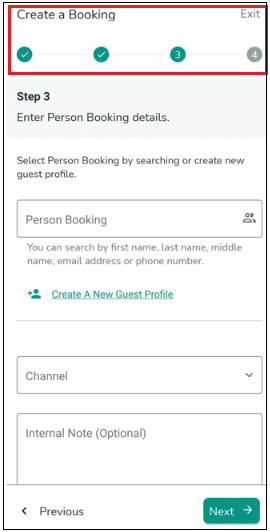
Step 3: Enter Person Booking details. You can either search for the Person Booking in the box or Create A New Guest Profile. After selecting the Person Booking, you can choose the Channel from the drop-down menu.
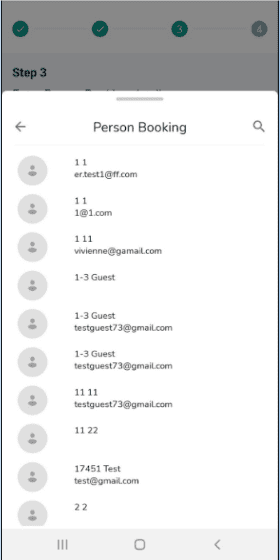
Note 1: When you select the Person Booking from the list, you can Edit Guest Profile.
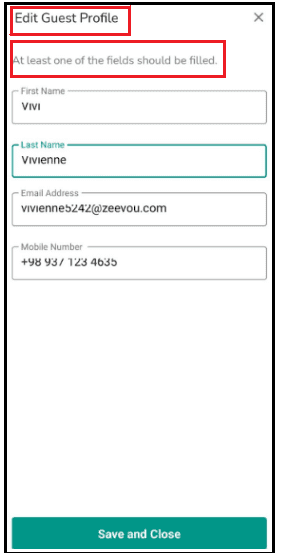
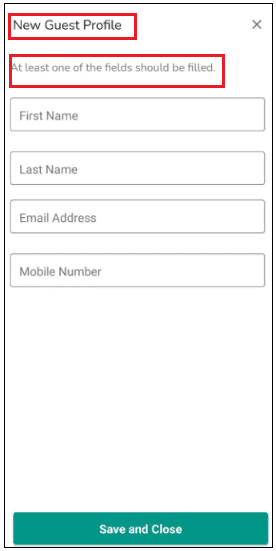
Note 2: If you tap on Create A New Guest Profile, a window opens for you and you must fill out at least one of the fields. Then, Save and Close.
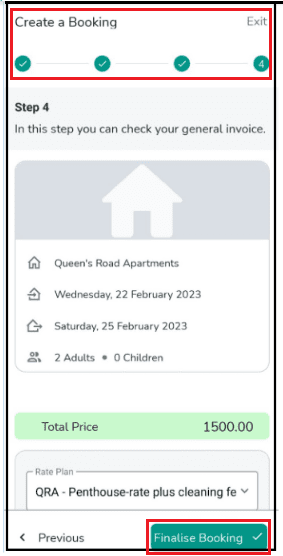
Step 4: You can view the summary of the booking and general invoice and tap on Finalise Booking to complete the booking.
Using Zeevou on iPhone: If you use an iPhone, you can add the Zeevou web app to your Home Screen for quick access. See Install the Zeevou Web App on iPhone.
Do you need this?
Yes - if you have recurring guests.
No - if you don’t have recurring bookings.
Cloning a booking allows users to quickly duplicate existing reservations. By following a few simple steps – accessing the booking overview, setting check-in and check-out times, and using the Booking Wizard – you can efficiently replicate bookings with minimal effort.
Step 1: Access the Booking Overview
Log in to your Zeevou account.
Navigate to Sas on the main menu.
On the Bookings dashboard, scroll down and select a booking from the list (alternatively, you can click three dots under Actions and select View).
Click Manage Booking arrow.
Select Clone from the drop-down menu.
Step 2: Set Check-in and Check-out Times
The booking reservation panel will open.
Choose the desired Check-in and Check-out dates and click on the Search icon.
Step 3: Use the Booking Wizard
After setting the times, you will be redirected to the Booking Wizard.
Since the booking is being copied, no changes are needed. Simply click Next through each step.
Step 4: Finalise the Booking Creation
Once you reach the final step, click on Finalise Create Booking.
Your booking is now successfully cloned and created.
Note: You can update any settings during the process if needed.
If you have added all of your bookings, you can continue with blocking unavailable dates.
