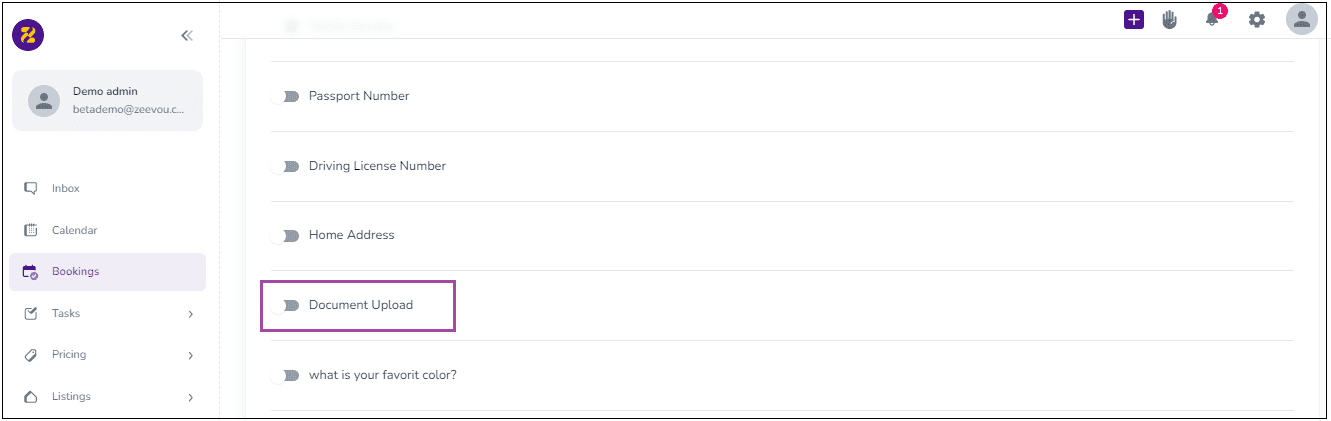
You can add fields with custom descriptions to collect IDs from guests. To do so:
Go to General Info -> Person Booking and turn on Document Upload.
Note: You can also go to Guest Info to turn it on for Lead Guest or Additional Guests (Adults/Children).
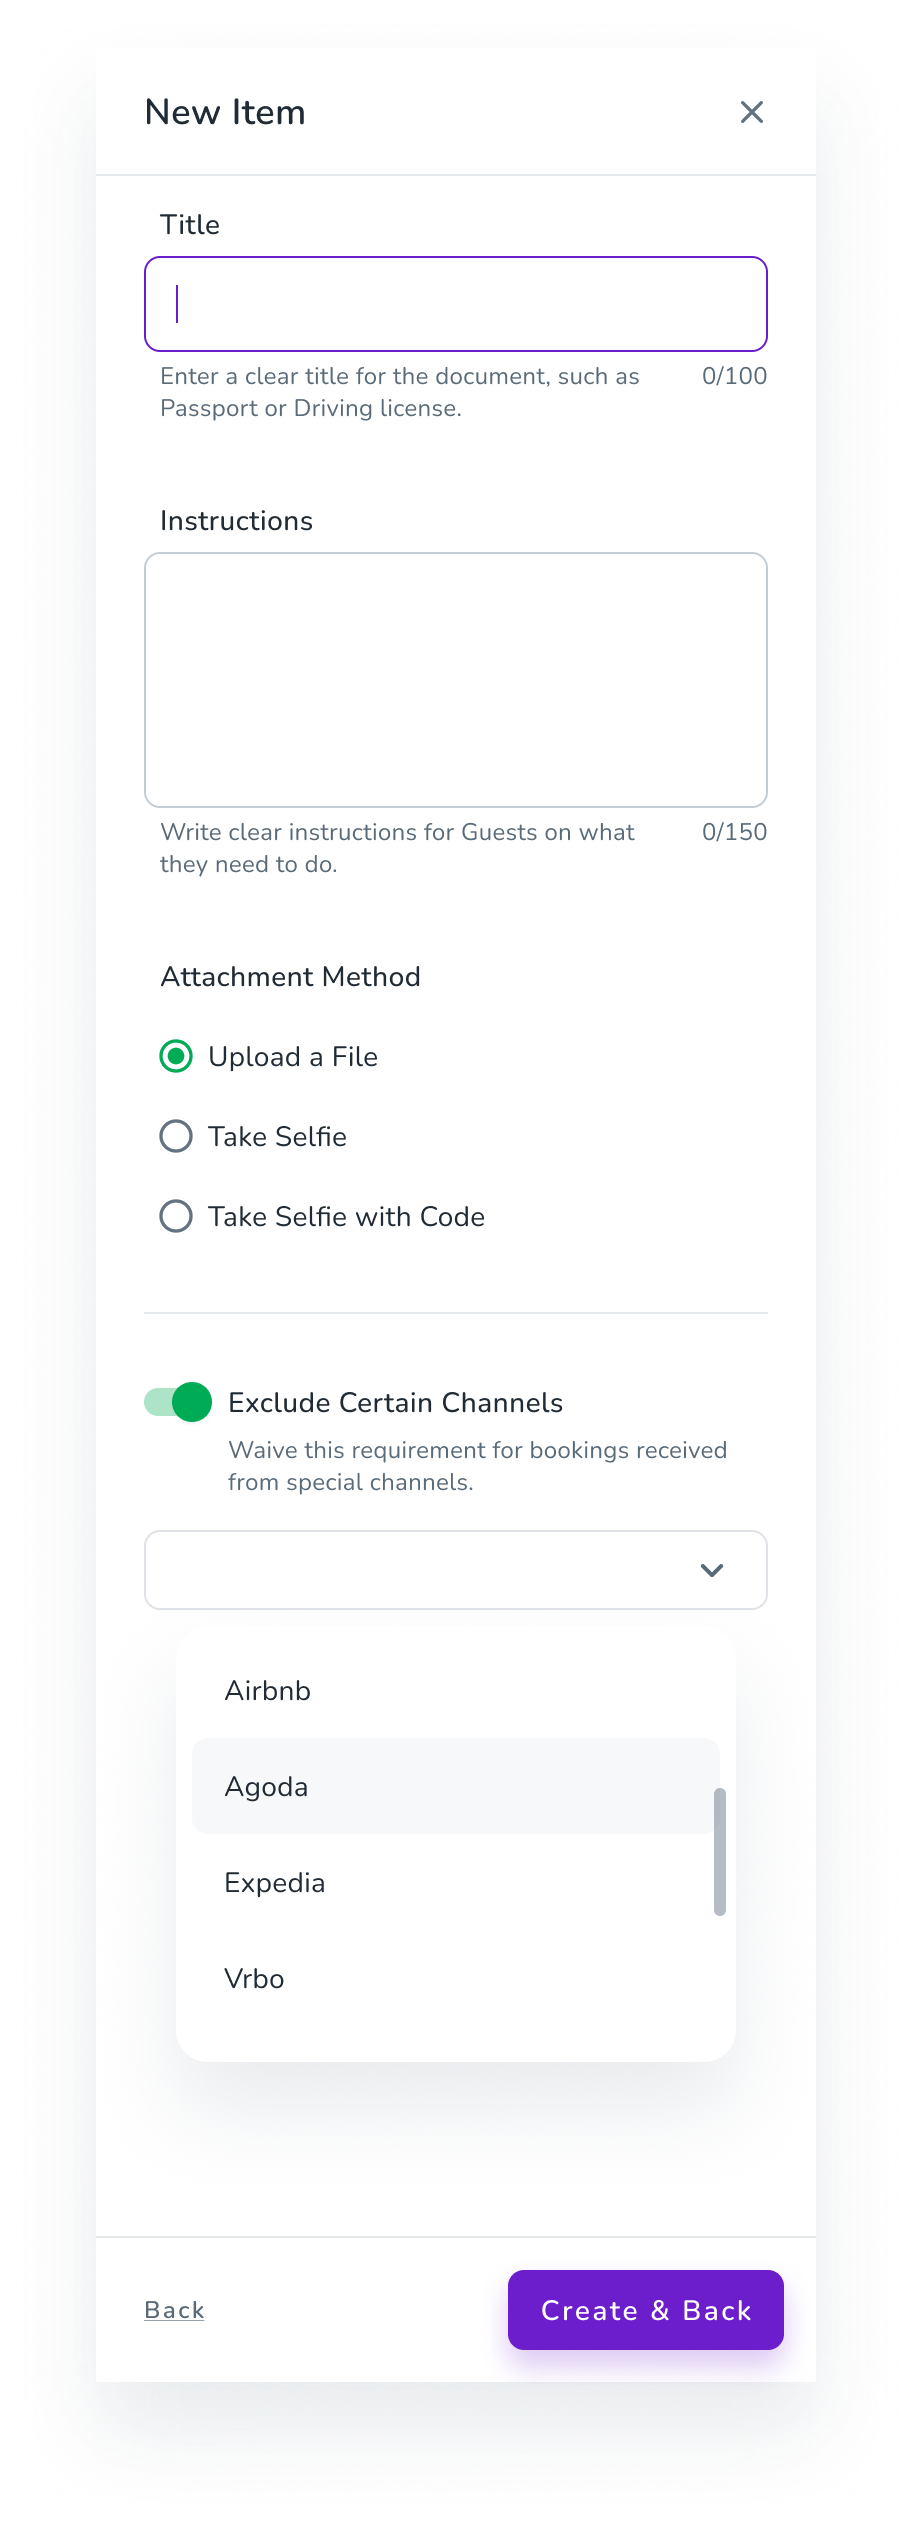
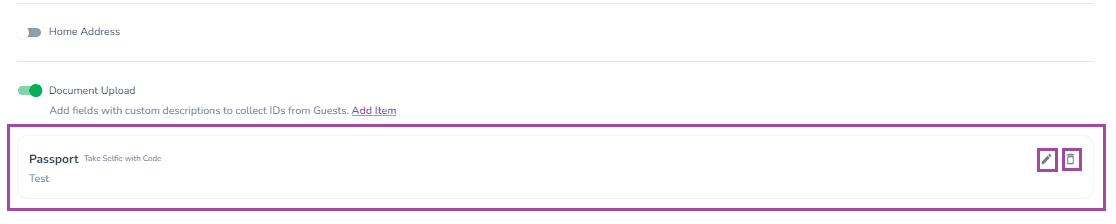
When you click Add Item, a drawer opens in which you can insert the Title, its Instruction, and its Attachment Method. You may turn on the toggle of” Exclude Certain Channels” to choose which booking channels should request and receive ID uploads by selecting the relevant channels from a dropdown. Finally, click Create & Back.
The result will then be displayed, and it can be edited or deleted by clicking the pen or bin icon.
Watch this tutorial video on how to ask your guests to upload their documents during the Booking Process:
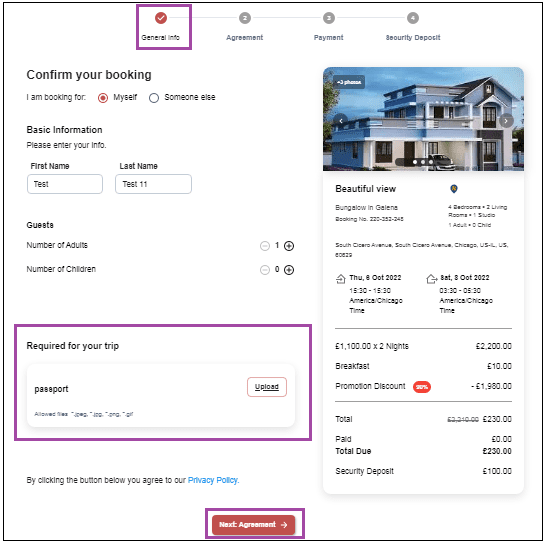
As soon as the Document Upload is set on the confirmation page settings, it will be placed as part of the online check-in process. So, the guests must upload the required document(s) to continue and click Next: Agreement.
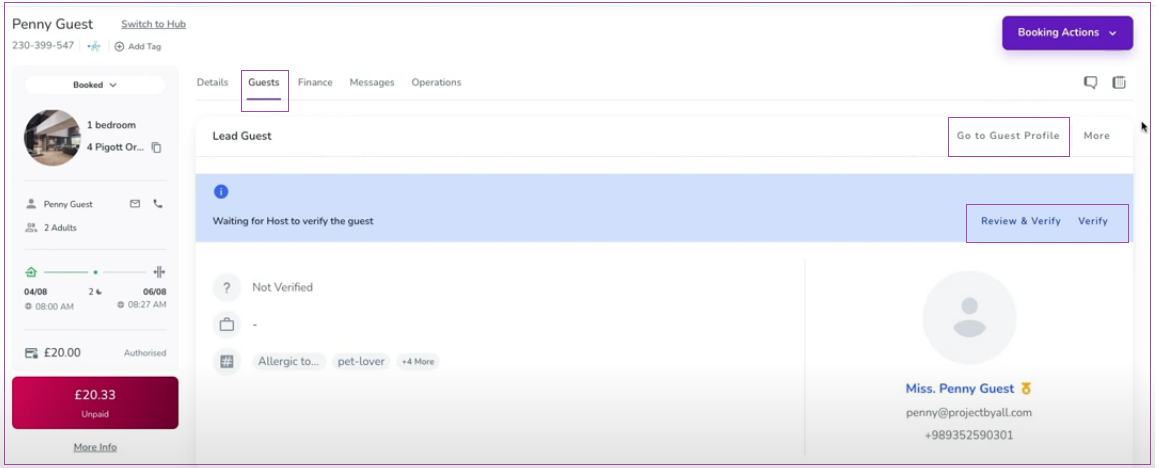
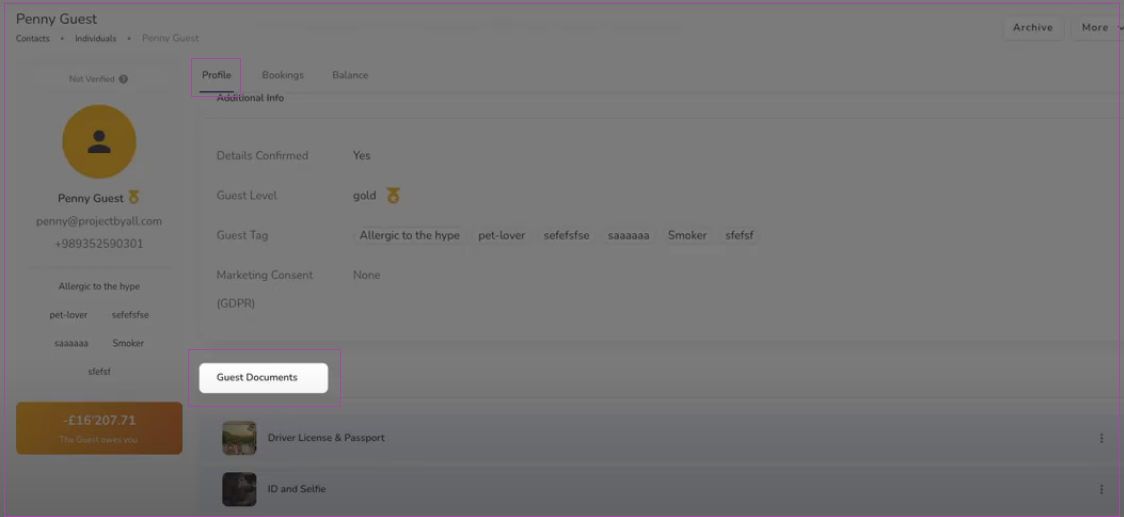
If you click on the Lead Guest’s name on Booking’s Overview, you will be redirected to the guest page to see the document(s).You can also click Review& Verify or Go to Guest Profile to view the document details.