Check-in Ready helps you ensure that the required steps are completed before a guest arrives.
The flexibility to define these conditions ensures that each host can tailor the check-in process to their specific needs.
You can choose which conditions must be met for a booking to become Check-in Ready. Depending on your setup, these may include:
Guest information has been completed.
Terms & Conditions have been signed.
The guest has been verified.
Payment has been received.
The security deposit has been paid.
Once all selected conditions are met, the booking is marked as Check-in Ready.
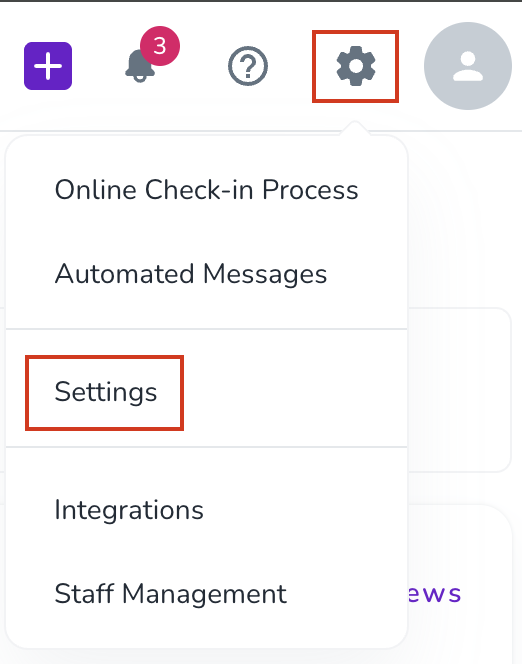
Click the gear icon in the top-right corner.
Select Settings.
Choose your Brand.
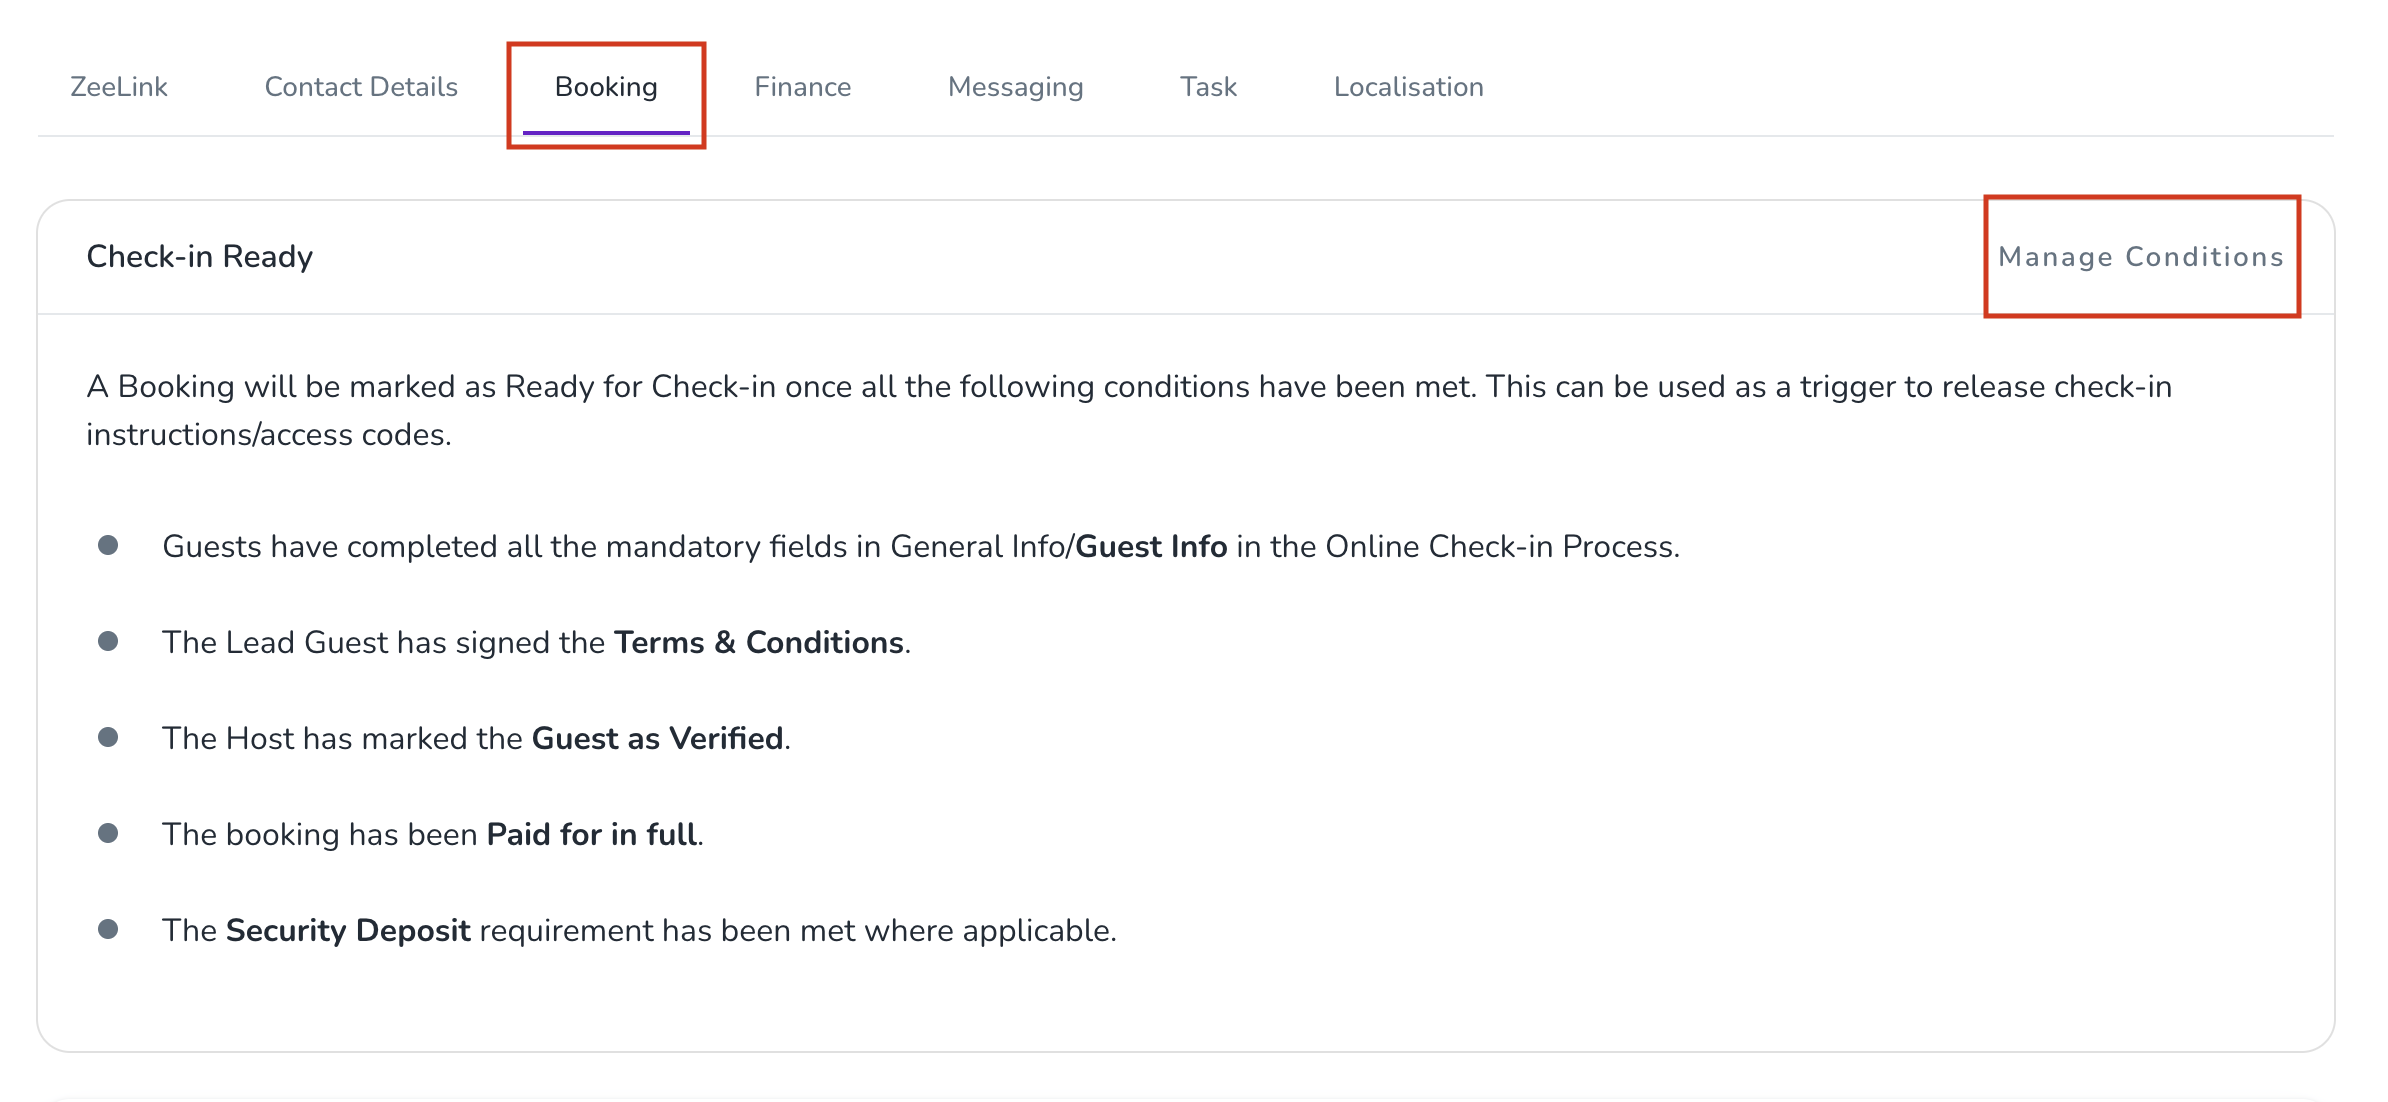
Go to the Bookings tab.
On the Check-in Ready card, click Manage Conditions.
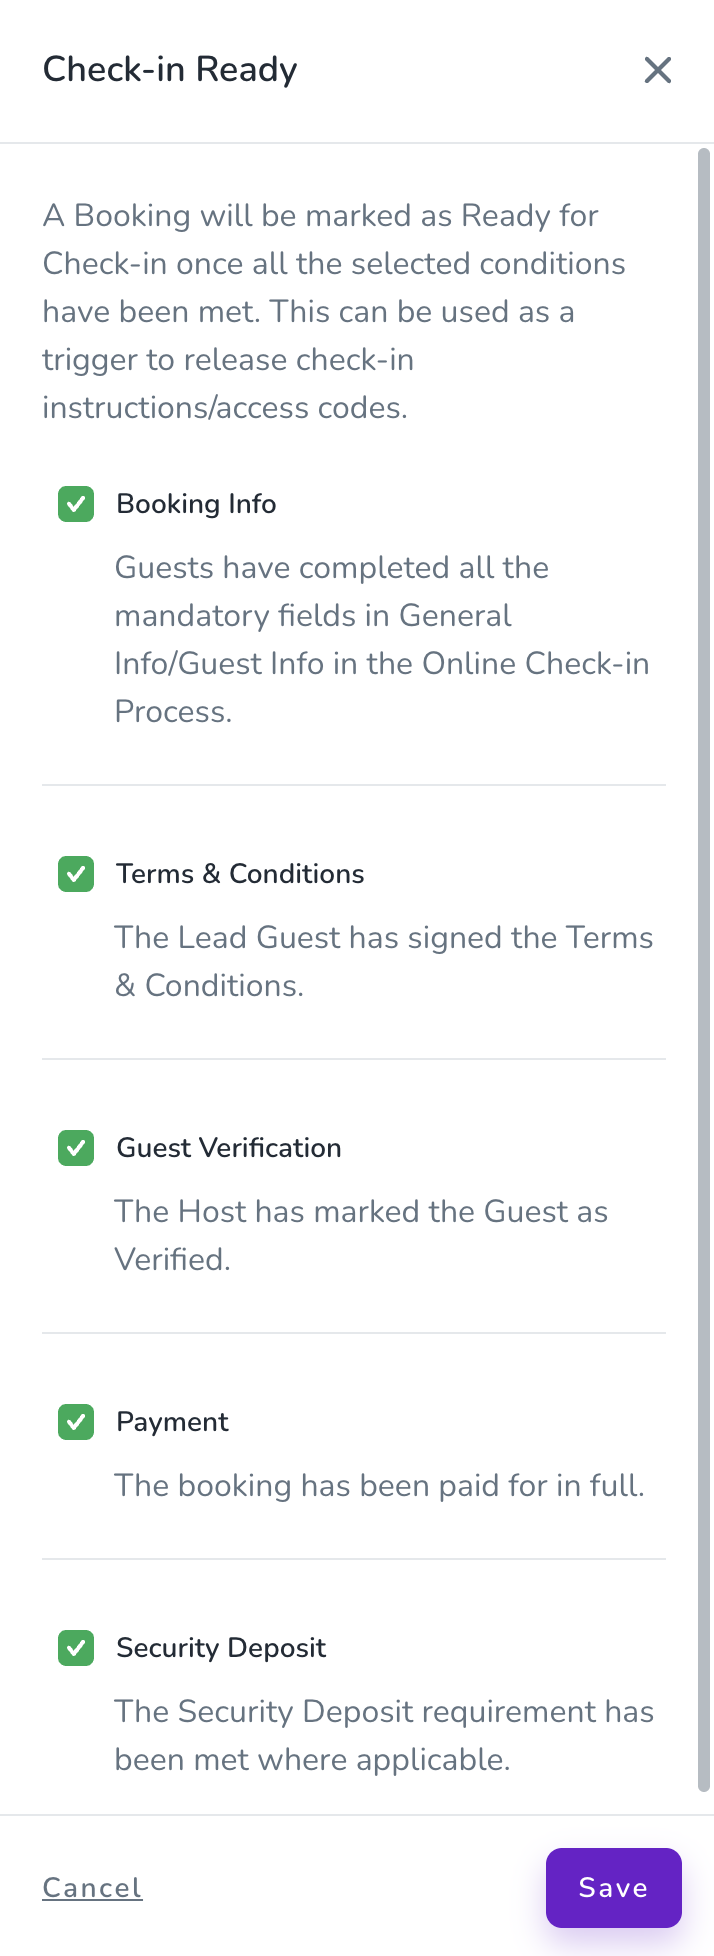
In the drawer, select the conditions that must be completed before a booking is considered Check-in Ready (e.g., Guest Info, Terms & Conditions, Guest Verification, Security Deposit, and Payment).
Click Save.
Your selected conditions will now determine when a booking reaches Check-in Ready status.
You can check the status of a booking in several places.
Booking Overview
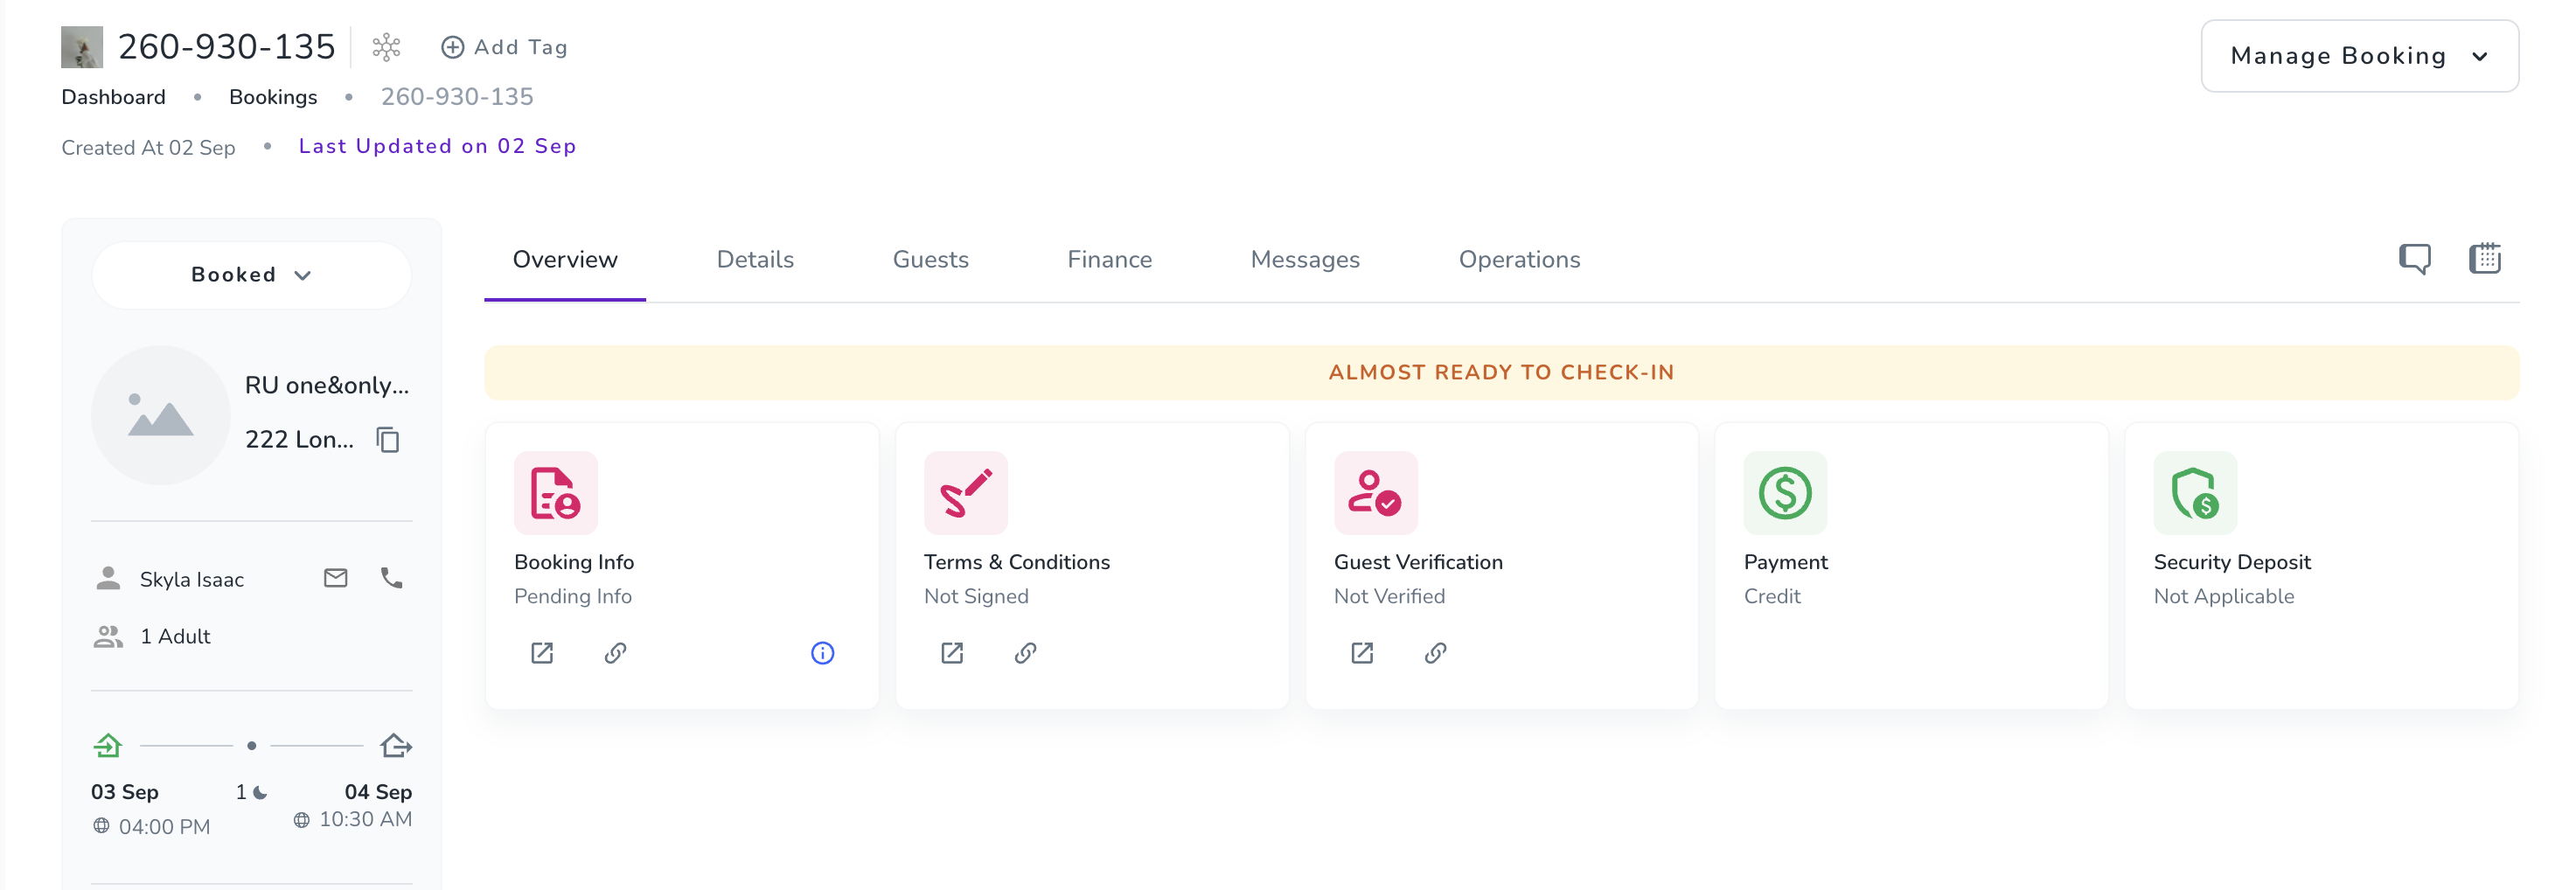
Open a booking and go to the Overview tab. The Check-in Ready conditions and their status are displayed here.
When all selected conditions have been completed, the status turns green.
Arrivals List
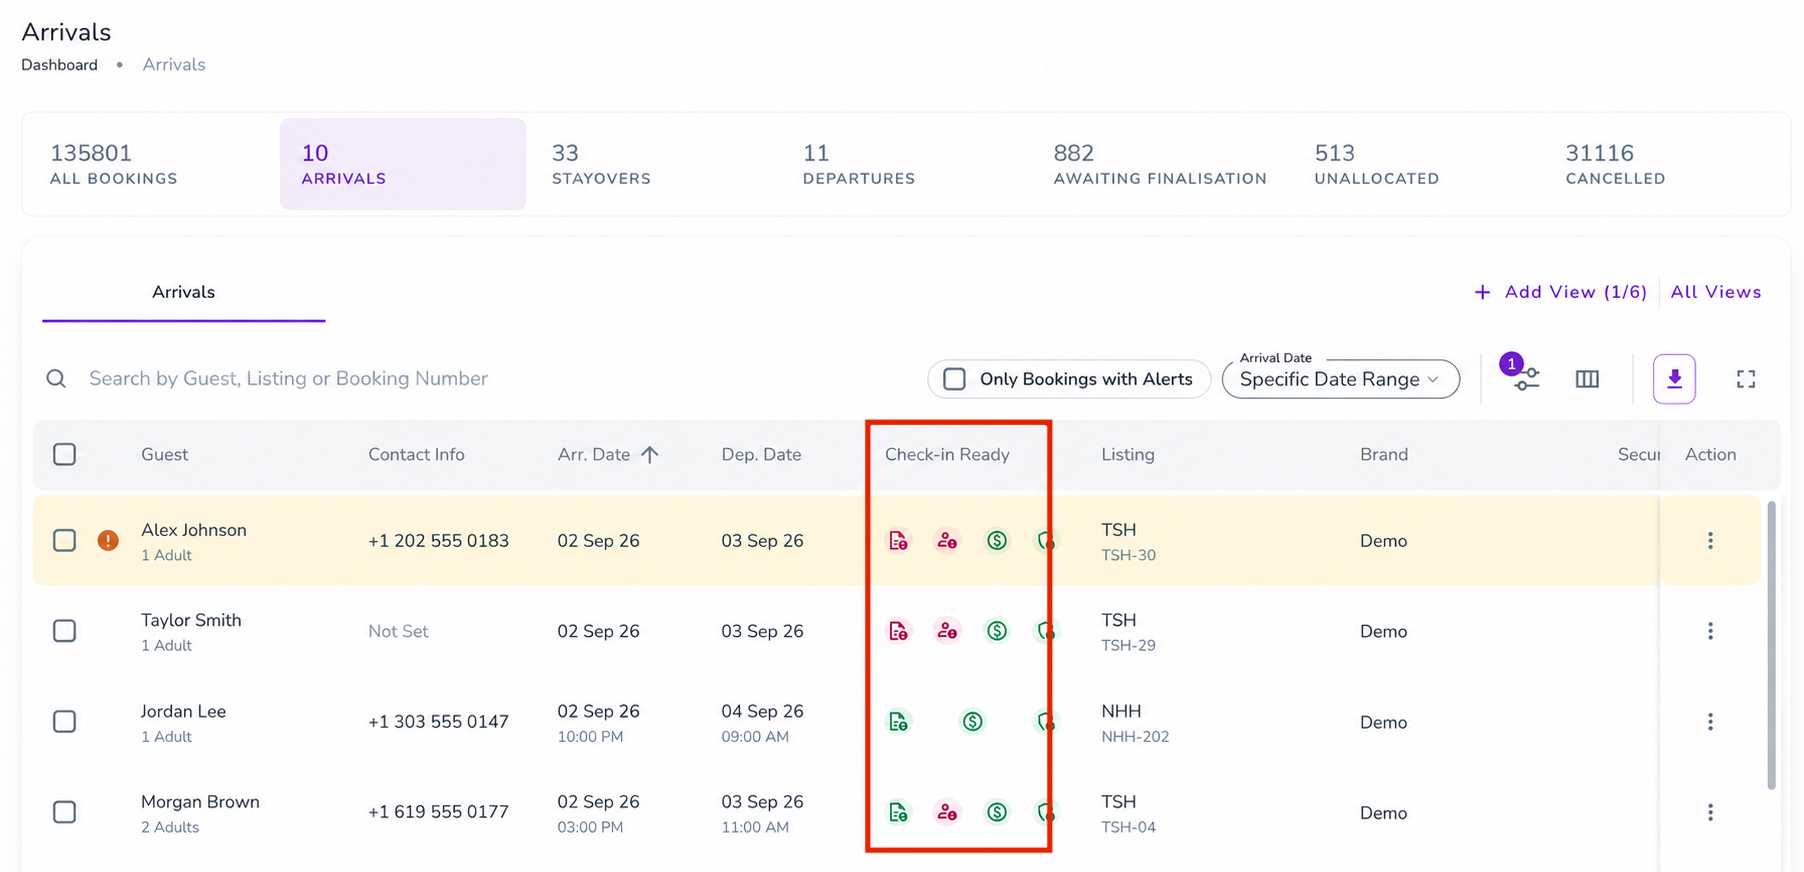
Go to the Bookings Dashboard and select Arrivals. The Check-in Ready status is displayed for each relevant booking.
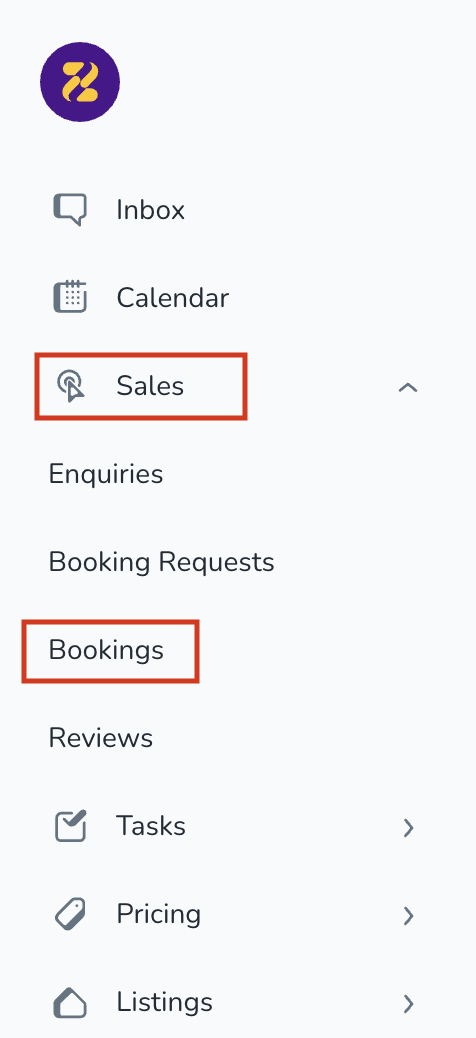
Booking Calendar
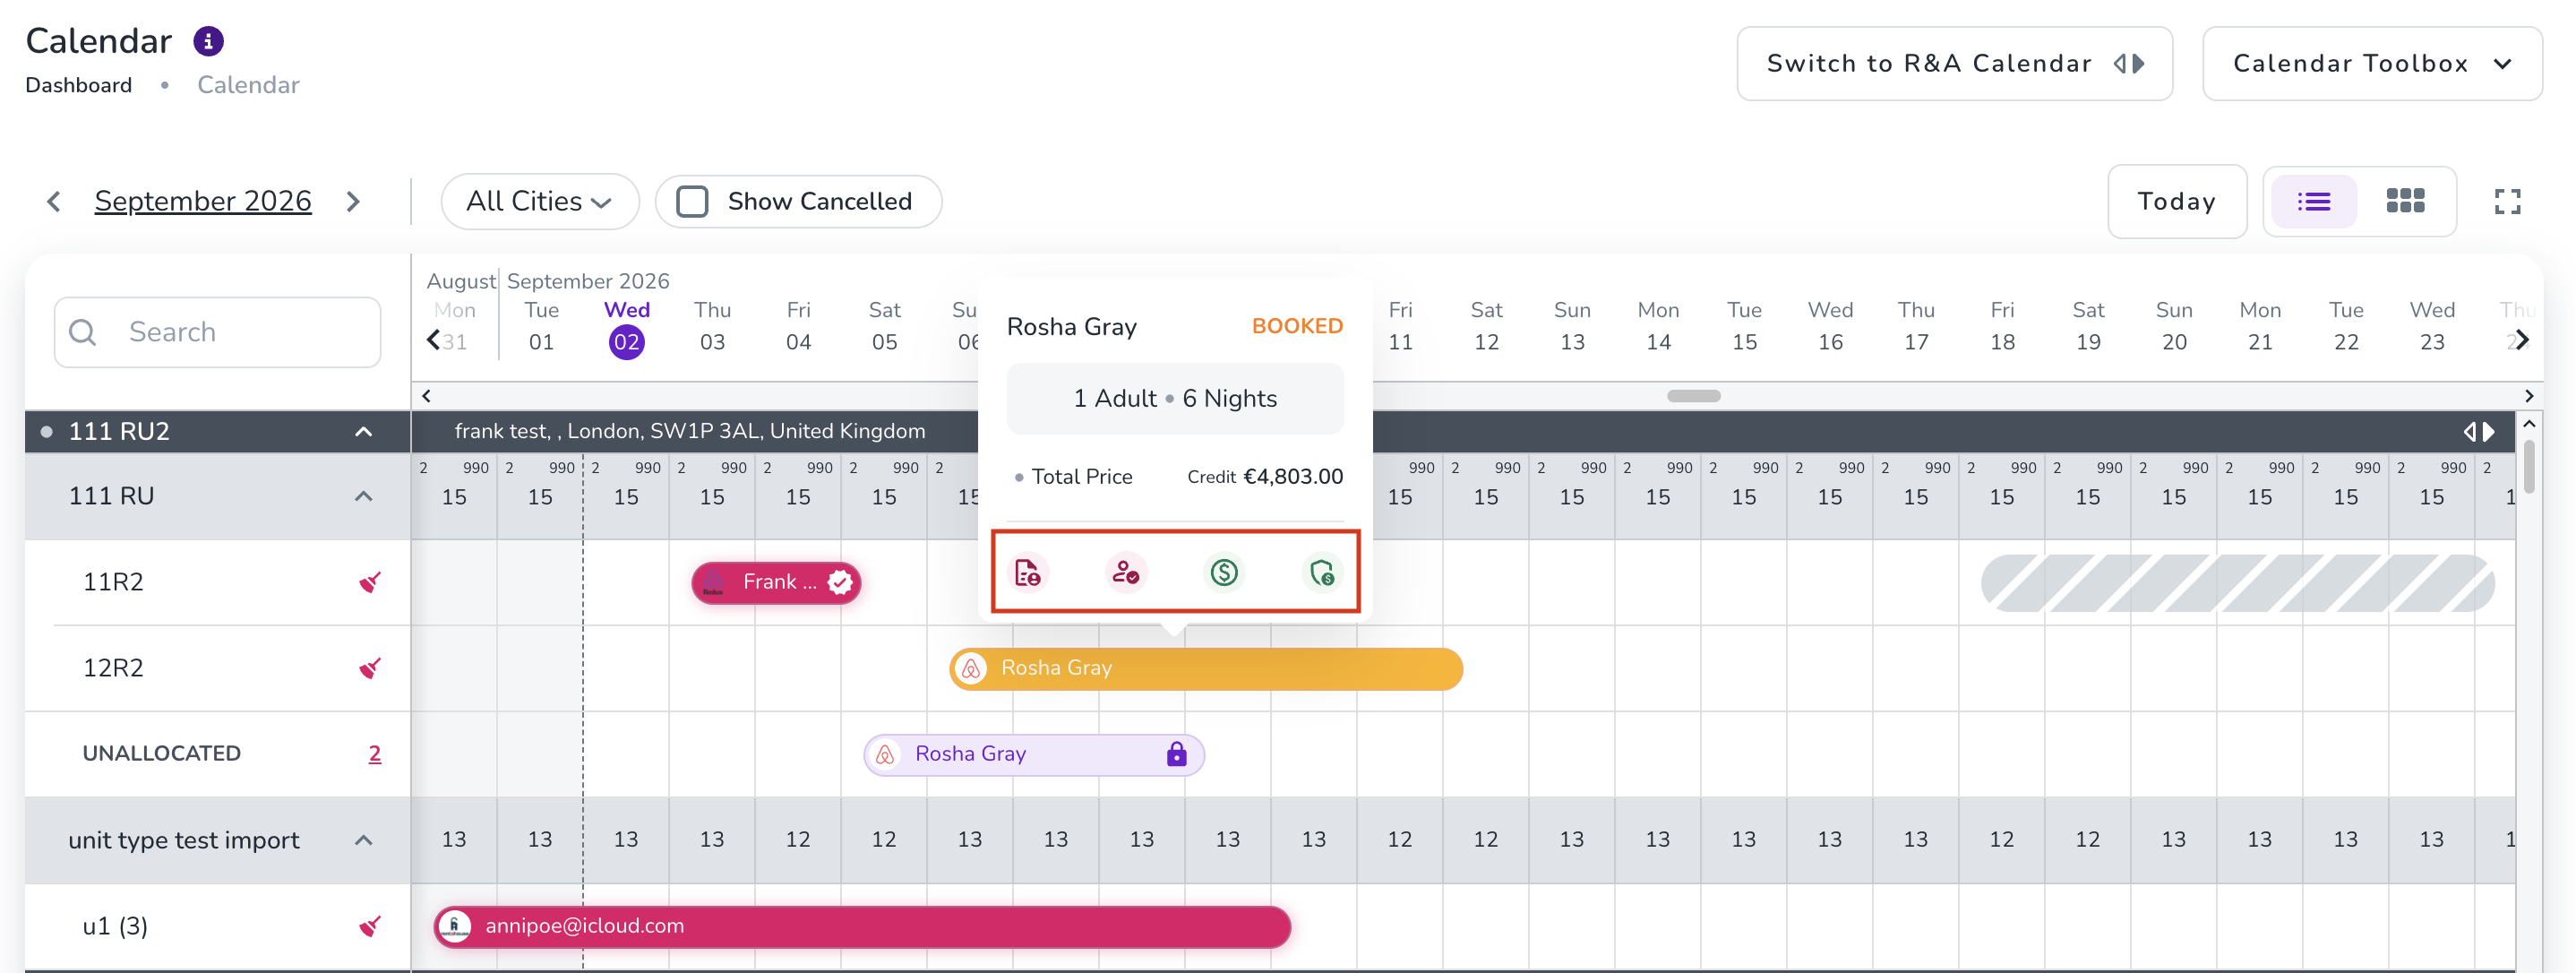
The Booking Calendar uses colours to indicate the Check-in Ready status:
Green: The booking is Check-in Ready.
Yellow: Some required conditions are still incomplete.
Red: The booking is not Check-in Ready.
Hover over a booking to see which conditions are still incomplete.
You can use Check-in Ready as a condition for your Automated Messages. This allows you to send messages based on whether a booking has met all your required check-in conditions.
To add Check-in Ready as a condition:
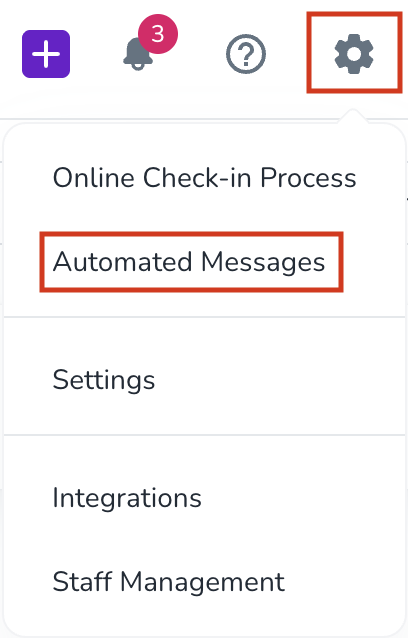
Click the gear icon.
Go to Automated Messages.
Click New Automated Message, or open an existing message.
Go to the Condition card and click Add a Condition.
Select Check-in Ready.
Click Add.
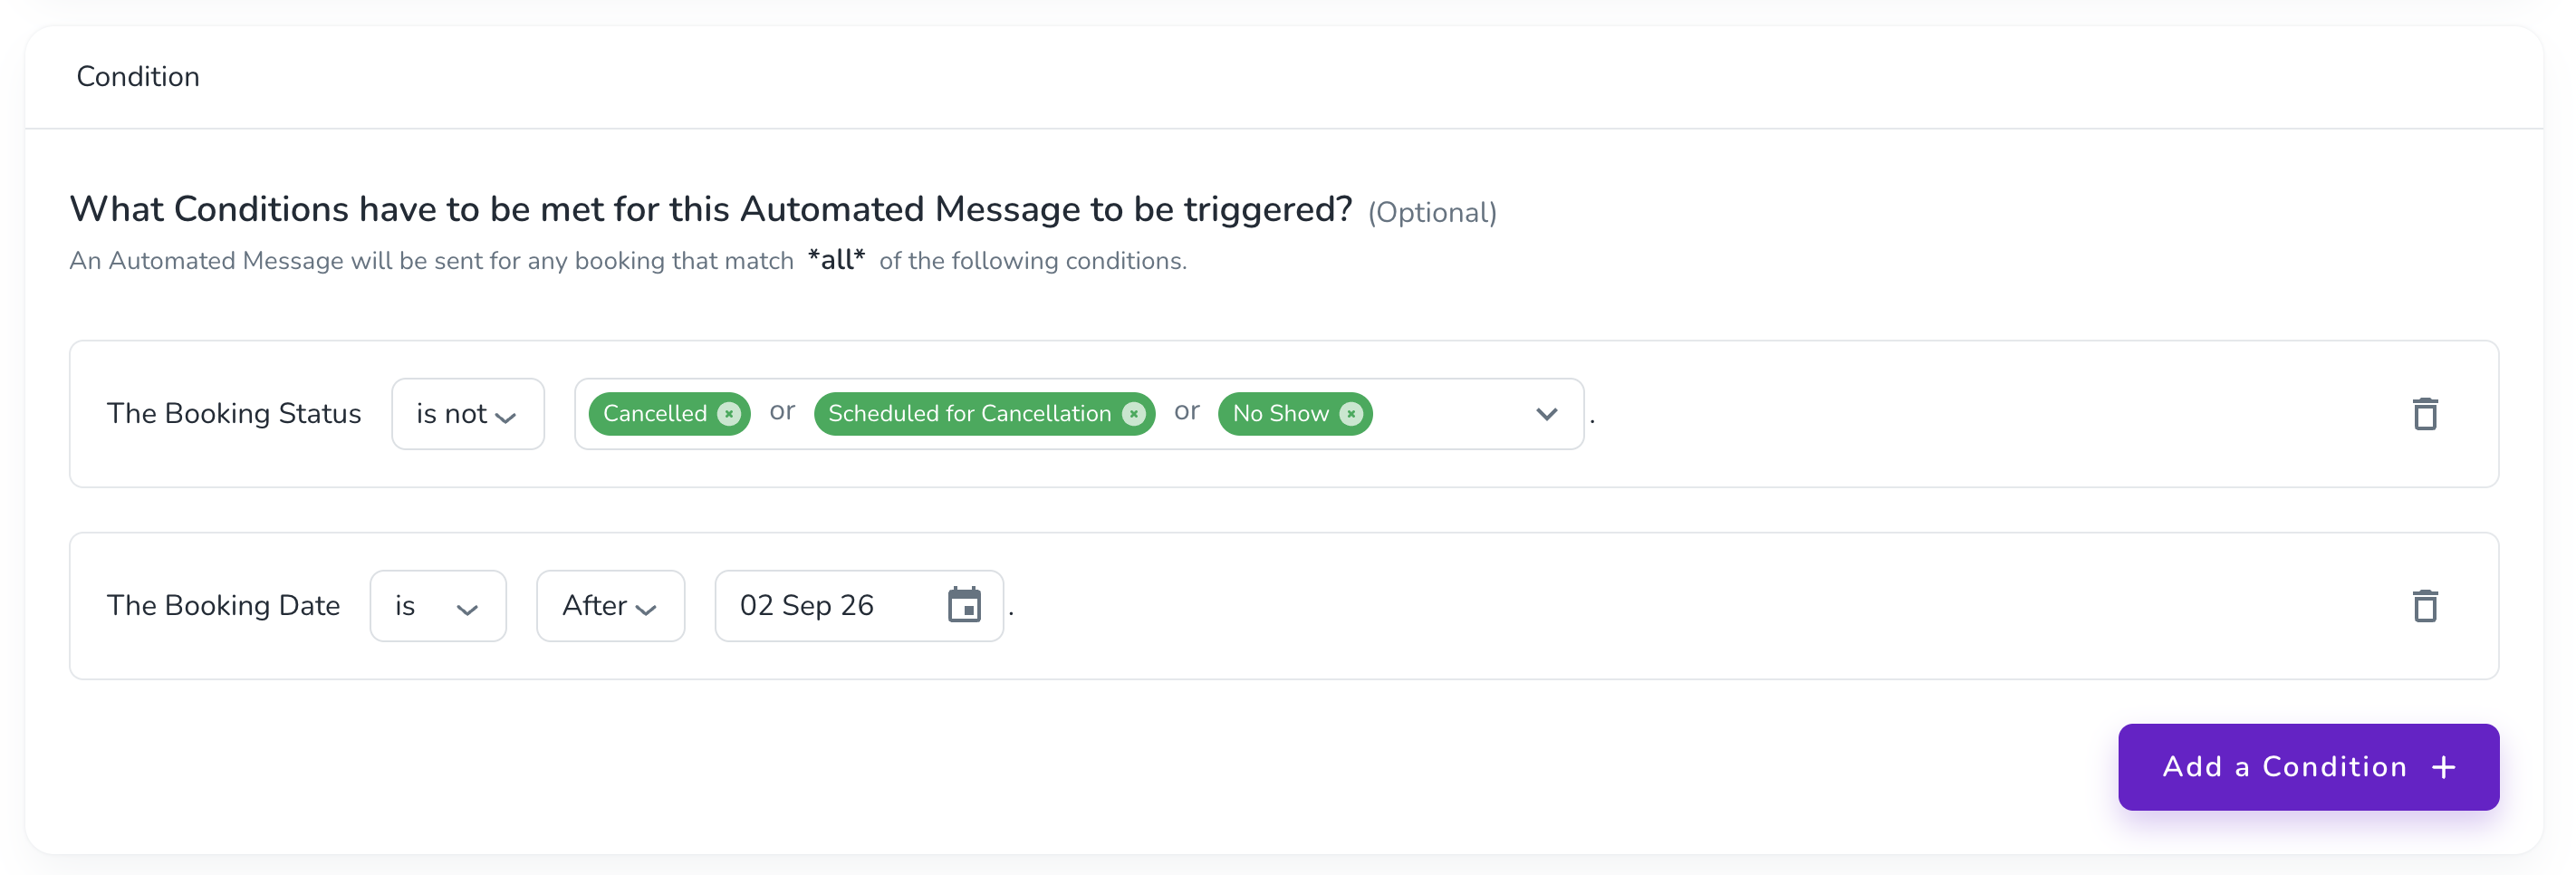
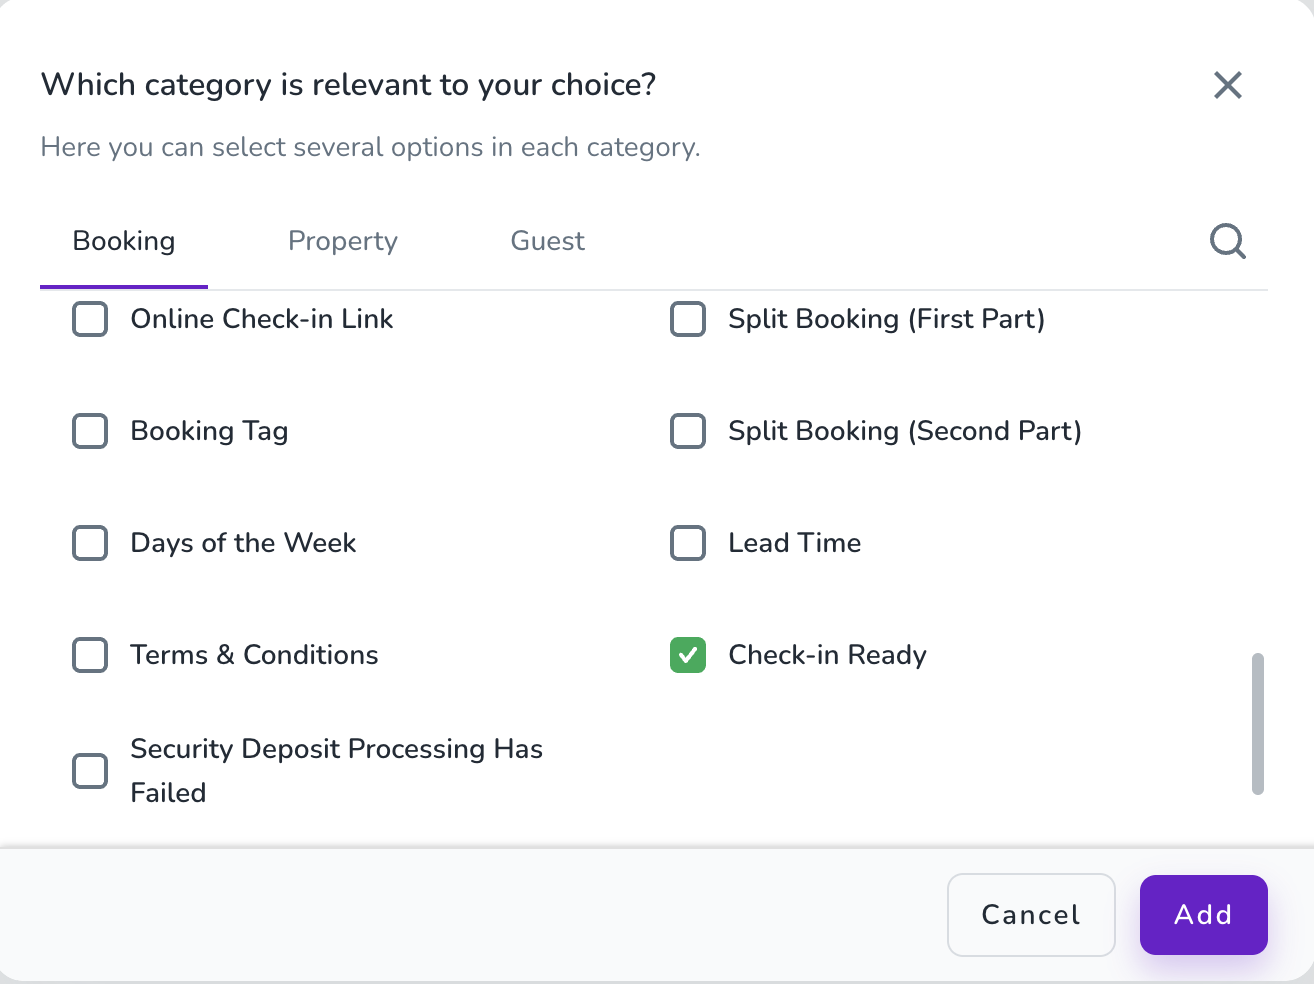
The automated message will then use the booking's Check-in Ready status as the selected condition.
Once you have specified your Check-in Ready requirements, continue your pre-check-in setup by providing the details your guests will see and use during their stay.
