Watch this tutorial video on how to create a single Automated Message to send out to guests through Email, SMS, or API:
Automate your hospitality business today! Welcome to the future of communication! Our Automated Messages feature allows you to easily set up messages to be sent out to guests through Email, SMS, or API. Save time, increase customer satisfaction, and improve your business processes with just a few clicks. Reach out to your guests quickly, efficiently, and personalize your messages. Try it now! 🔥
If you have to email out the same information every time a guest books, a lot of your time will be wasted. Moreover, most of the time you have to follow up a guest by an SMS to make sure they've seen the information. And that's not all. You need to send the guest a number of information such as access codes, which are sensitive information and should not be released before all the necessary boxes are ticked. That is why if you sign up with Zeevou, you'll be provided with a set of default templates for various points of the booking process and after it. You can customise these templates based on your brand's logo and contact information, and have a beautiful HTML design. Also, these templates are editable. Besides, since Zeevou has integration with CliskSend, hosts can automate SMS to their guests and staff.
If you are on Host Core, you are limited to one active automated message at a time. To activate additional automated messages, select Unlock Growth Plan inside the message toggle banner to upgrade to a higher plan or purchase the Message Automation module in your account.
If you have the Message Automation module: You can create and activate multiple automated messages without limit.
Using Certain variables in your message templates requires specific add-on modules to function.
Direct Booking Pro Module: Required if your template includes any of the following variables:
Booking Review link
Google Listing URL
Tripadvisor URL
Online Check-in Module: Required if your template includes any of the following variables:
Booking Arrival Time Link
Booking Online Check-in Link
Booking Payment Link
Terms and Conditions Link
When you activate a template containing a restricted variable, the Unlock banner displays the required module. To unlock it, select Unlock Module in the pop-up to open the Upgrade Flow and purchase the related module. (Depending on the selected variable, you will be redirected to upgarde to Direct Booking Pro or purchase Online Check-in.)
Once the required module is enabled, the banner will no longer be displayed, and you can activate your automated message
You can efficiently create and manage automated messages in Zeevou, ensuring effective communication with your guests. This automation ensures that guests receive timely and relevant information without the need for manual intervention. This system not only saves time and reduces errors but also enhances the overall guest experience by providing timely, accurate, and consistent information. Automated Messages can be Booking-Based (purple) or Event-Based (green).
Booking-Based (Purple) Messages are triggered by specific actions or stages within the booking process. For example, when a booking is confirmed, modified, or cancelled.
Event-Based (Green) Messages are triggered by specific events that occur, either related to the booking such as check-in/check-out, instructions or any other custom event that you define within the system.
Note that there are two messages that are set by default in Zeevou: Online Check-in Steps and Check-in Instructions. You can edit and activate them.
Step 1: Access Automated Messages
Click the gear icon in the top right corner.
Select Automated Messages.
Click New Automated Message +.
Step 2: Name Your Message
Enter a name for your message.
Click Add.
Step 3: Set Time Criteria for the Message
When
Choose Based on Booking’s Timeline for Booking-Based messages.
Choose Right after all conditions have been met for Event-Based messages.
Set a specific time frame by clicking Set a Time Frame and define Start Time and End Time (Optional).
Conditions
Click Add a Condition + to choose relevant categories (Booking, Property, Guest).
Configure each condition and add multiple conditions as needed.
Click Add.
Messages
Choose how the message will be sent (Email, SMS, API).
Specify the receiver of the message. For example, you can set the unit’s Owner as a recipient in the To, CC, or BCC fields
Use Variables for specific details (Booking, Guest, Listings, Brand).
Note that when communicating with guests:
Use @Arrival Date and @Departure Date for overall stay information spanning multiple related bookings
Use @Segment Start Date and @Segment End Date when you need to reference specific dates for individual bookings within a guest's stay.
Add message templates in other languages if needed by clicking the plus icon near the English language.
Write your message and preview it.
Optionally, Switch to HTML format for Header and Footer.
Send a test email by clicking the tick sign to see the result
To add an attachment or more messages, click Add Attachments or Add another Message.
Step 4: Save and Activate
Click Save & Close in the top right corner.
Apply the message to pre-existing bookings by ticking the box in the pop-up (Optional).
Choose to Activate the message or Save as Inactive.
Note that messages are properly filtered based on Property, Unit Type, Unit, and Channel status. Only relevant messages will appear when creating a booking and in the booking’s Messages tab under Conditional Automated Messages.
Managing Messages
Favourites: Add messages to Favourites by clicking on the star icon.
Cloning: Clone messages using the icon next to the star icon.
Deleting: Delete unused messages. Archived messages will not appear in the Automated Messages list.
Customising Settings
Search: Use the Search icon in the top right corner to find messages by Subject or Automated name.
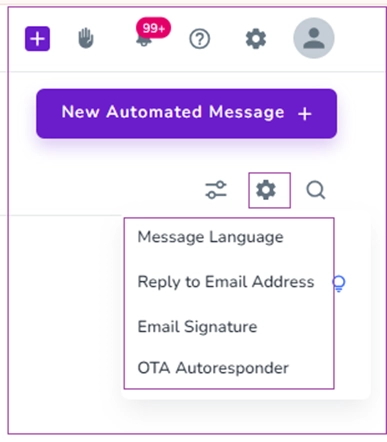
Settings: You can adjust the following message settings by clicking the gear icon inthe top right corner.
Message Language: Set your guest’s country and language.
Reply to Email Address: Set the sender name and reply-to email address for different brands.
Email Signature: Create an email signature for your brand.
OTA Autoresponder: Set Autoresponder details per brand, for Pre-booking Enquiries or Guest Messages.
Filtering Messages
Use the filtering icon in the top right corner to select variables and filter messages.
Click Show Results to view filtered messages.
Use Clear Filters to reset and start a new filter.
You can schedule your message by selecting the "Based on Booking's Timeline" option. Then, choose how many days before or after a specific event (e.g. Booking Creation Date) the message should be sent.
For example, selecting "1 Day After Booking Creation Date" means the message will be sent one day after the booking is created.
Alternatively, you can choose "Right after all conditions have been met" if you want the message to be triggered as soon as the criteria you set are fulfilled.
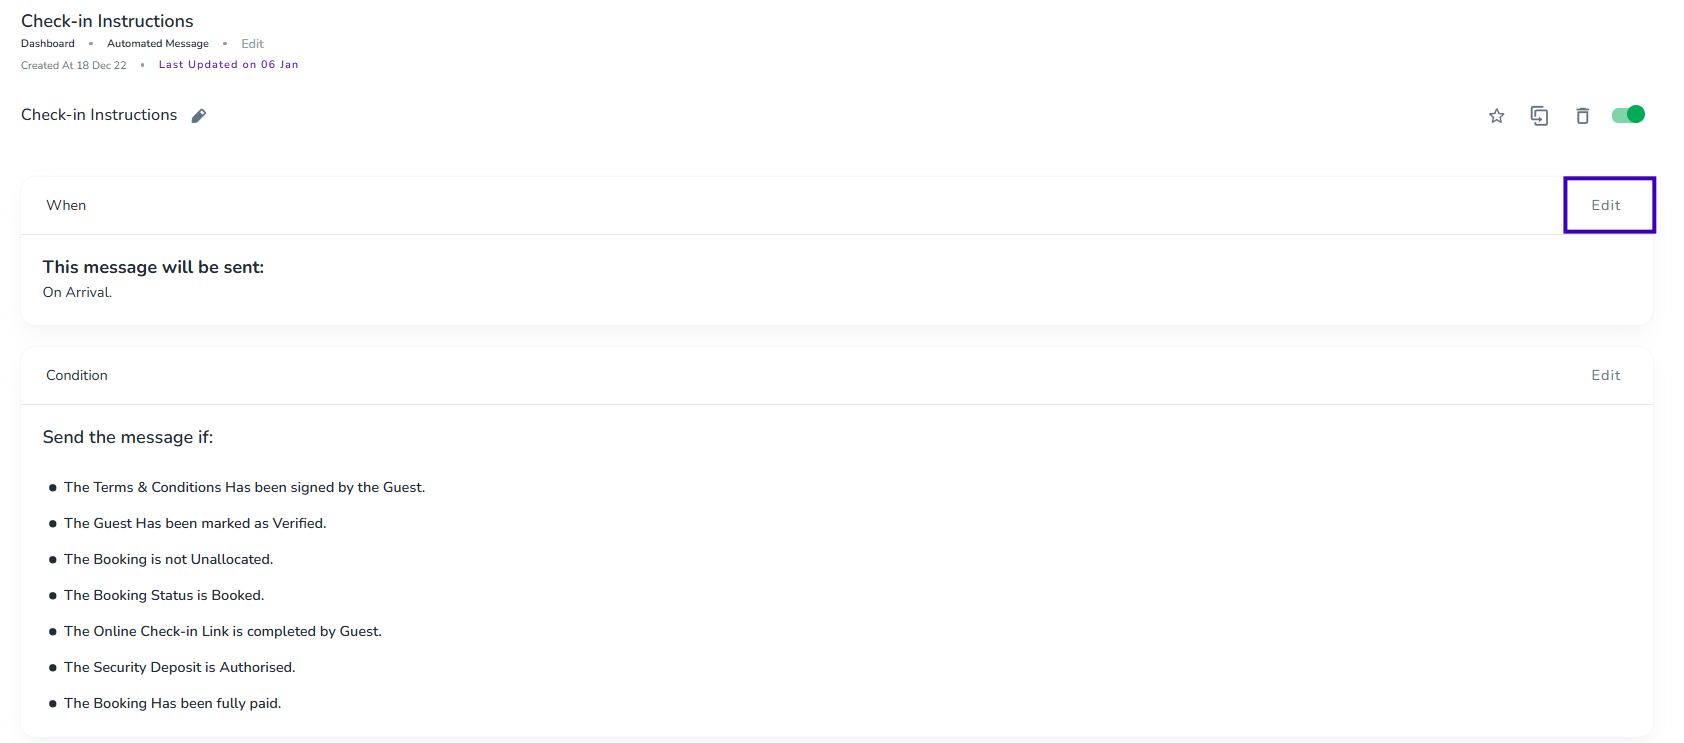
If you’d like to restrict the conditions to only sending out after a specific time (or within a certain time frame each day), follow these steps:
1. Click Edit on the right of the “When” section.
Click Set a Time Frame
Specify the desired time frame.
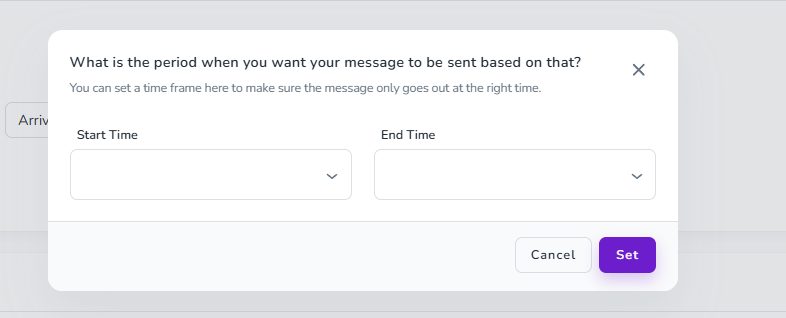
Click Set
Click Save Changes
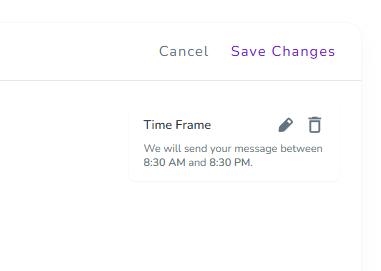
There are three major categories in Automated Messages Conditions:
Under the Booking tab, you’ll see a list of available filters. These include:
Arrival Date
Arrival Date
Payment Collection Type
Departure Date
Channel
Booking Date
Booking Status
Payment
Purpose
Security Deposit
No. of Nights
Security Deposit Charged
Unallocated
Risk-Free
No. of Adult Guests
Booking Includes Children
Creation Source
Has Been Extended
Booking Warning
Is an Extension
Online Check-in Link
Split Booking (First Part)
Booking Tag
Split Booking (Second Part)
Days of the Week
Lead Time
Terms & Conditions
Check-in Ready
Booking Finalisation Status
Security Deposit Collection Has Failed
Under the Property tab, you’ll see a list of filters, including:
Area
City
Property
Unit Type
Unit
Check-in Type
Property Country
Listing Type
Unit Type Category
Under the Guest tab, you’ll find options such as:
Signable
Guest Level
Guest Tag
Opted-in
Date of Birth
Corporation Level
Corporation Tag
Corporation Country
Guest Country
Select Filters:
Click the checkboxes next to the options relevant to your analysis. Under Booking, for instance, to filter by the guest's Arrival Date or Payment, click the checkbox beside those options. For example, under the Booking tab, you can select Booking Date and set the exact condition from the dropdown menu, which allows you to trigger an automated message based on the booking creation date:
On – Triggers the message if the booking was created on the selected date.
Before – Triggers it for bookings created before the selected date.
After – Triggers it for bookings created after the selected date.
Or Less Before – Triggers it for bookings made a certain number of days or less before a set date.
Under the Property tab, for example, choose City to filter by specific city locations or select Unit Type to refine data by the type of units (e.g., apartments, houses).
Multi-Selection:
You can select multiple options across the categories to create a more refined filter. For example, select both Booking Status and Channel to analyze confirmed bookings based on their source.
Under the Property tab, you can combine Property Country and Listing Type to view specific property listings within a particular.
Use the Search Bar:
If the list of options is long, use the search bar in the top right corner to find specific filters quickly. Type in a keyword like "Channel" or "Payment" to locate the desired option.
Confirm Your Selections:
After selecting the relevant filters, click the Add button at the bottom-right corner of the interface to apply your selections.
Cancel if Needed:
If you need to reset or change your selections, click the Cancel button to exit without applying any changes.
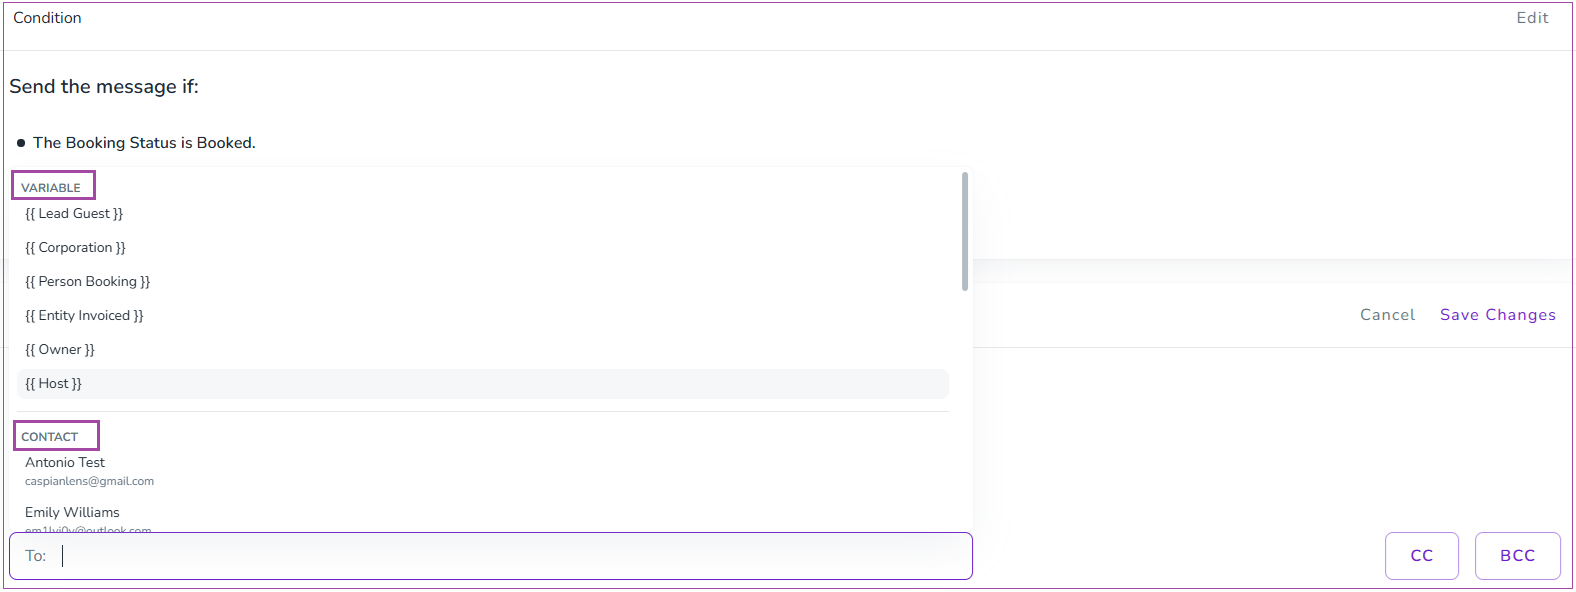
When composing a message, use the To field to select the primary recipient(s).As you type in the To field, a dropdown displays matching Contacts and Variables, allowing you to quickly select the appropriate recipient for your message.
Use dynamic variables to automatically send the message to the relevant recipient associated with the booking.
{{ Lead Guest }} – Send the message to the booking's lead guest.
{{ Corporation }} – Send the message to the corporation linked to the booking.
{{ Person Booking }} – Send the message to the person who made the booking.
{{ Entity Invoiced }} – Send the message to the Owner linked to the booking's MPR .
{{ Owner }} – Send the message to the property owner.
{{ Host }} – Send the primary contact email configured for the booking's Brand. .
Select a saved contact to send the message to a specific email address.
Search for a contact by typing their name or email address.
Select the desired contact from the list to add them as a recipient.
Selected recipients appear as tags in the To field. You can add multiple recipients, remove any recipient by clicking the × icon, or use the CC and BCC buttons to include additional recipients.
Variables in automated messages are dynamic placeholders (like @CompanyName, @ArrivalDate, or @SegmentStartDate) that automatically pull specific details—such as guest names, booking dates, property information, or your brand name—from your Zeevou setup into outgoing emails, SMS, or API messages. For example, using @CompanyName in a message will insert your actual brand name. This helps personalise and automate your guest communications without manual editing for each booking or listing. You can find each variable for its related group in the following table:
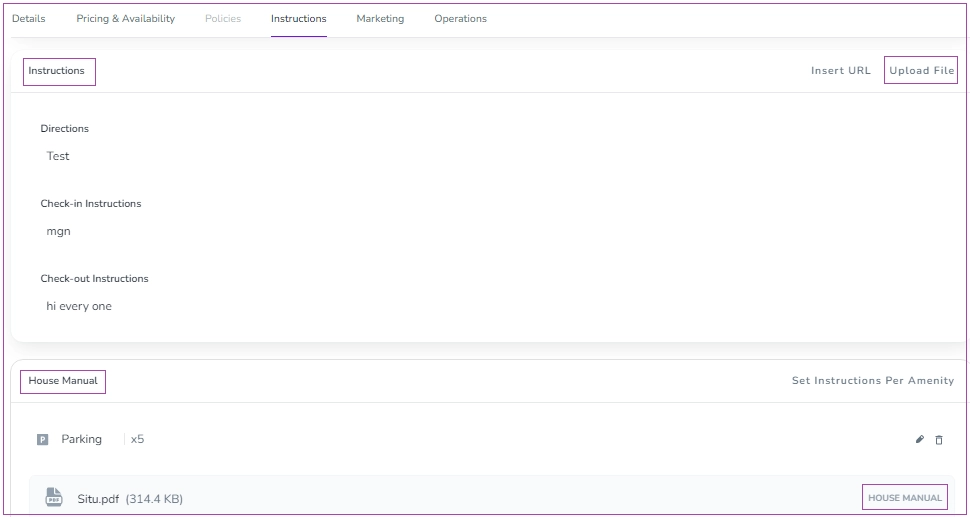
You can attach manuals, check-in guides, or invoices to the automatic emails. To do so, open your desired Automated Message and go to Messages card. Click the pencil and then on Add Attachment. Then, select your desired file from the dropdown menu or click the plus sign for Custom File.

Note that you should upload the House Manual or the Instructions in the listing under the Instructions Tab (for multi-units, under each unit).
Sometimes the devices of the recipients do not support HTML versions. In such cases, if you have activated the Plain Text Version of the template, the plain text will replace the HTML version automatically. In Inbox->Templates, there is an option called Customise Plain Text Version. By ticking this option, system automatically provides a plain text version for the HTML content. This option lets you fire a plain text version of the HTML template to the recipient. You can customise the provided plain text or totally replace it with your preferred content. Please note that this option is available only for HTML Types.
The bilingual templates feature enables hosts to send automated messages tailored to the guest’s nationality, enhancing communication and guest experience. Hosts can configure default messages, originally in English, to include multiple languages.
Log into your Zeevou account.
Click the gear icon in the top right corner and select Confirmation Process.
Click Guest Info and find Lead Guest Info in the tab.
Turn on the toggle for Nationality and set it as Mandatory.
Click the gear icon in the top right corner and select Automated Messages.
On the Automated Messages dashboard, click on the gear icon and select Message Language.
In the open drawer, select your desired Country and Language.Note that you can click Add to have more countries and languages.
Note: For plans other than Free, you can define the country and language for each brand separately.
Finally, click Save.
Click the gear icon in the top right corner and select Automated Messages.
Choose one Message to add content in different languages.
Scroll down to the Message card and click the pencil icon.
Click the plus icon near the English language.
In the open window, select your desired language.
Click Add.
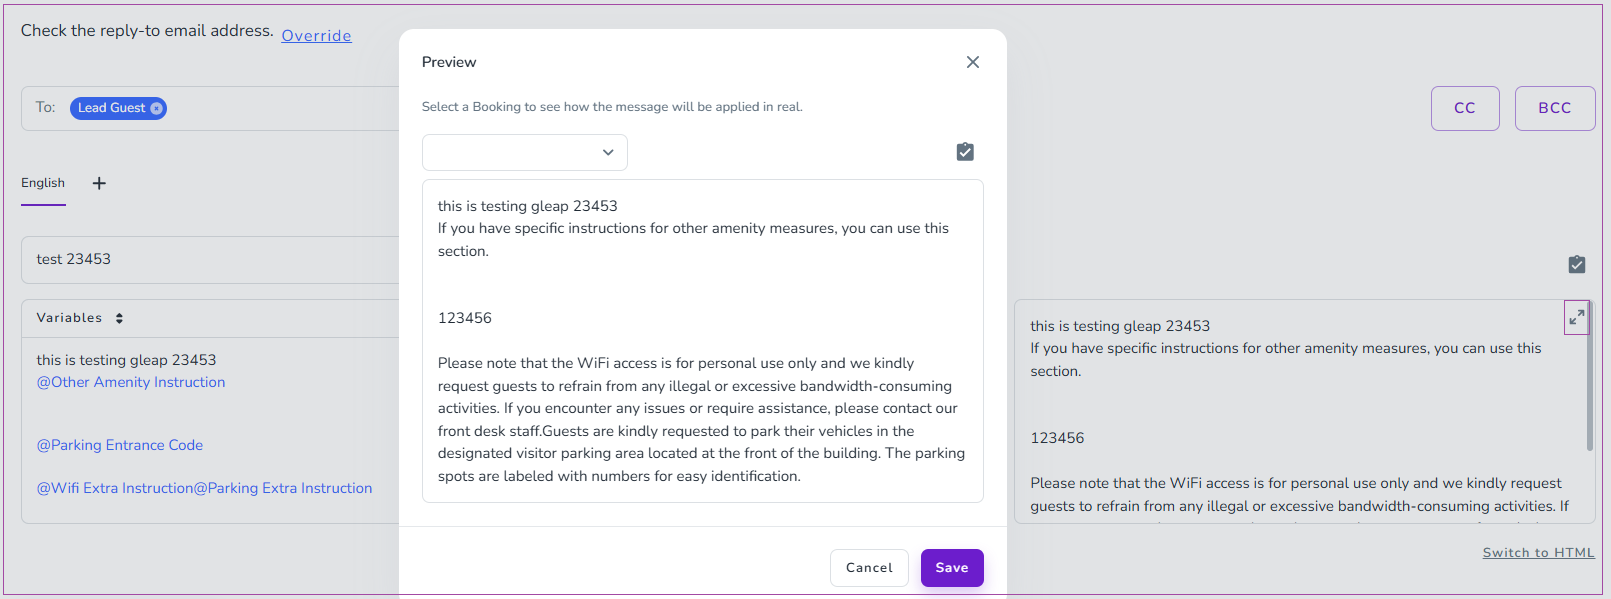
In the Automated Message editor, select a test booking from the dropdown in the Preview panel to see how the message will appear with real booking data. To do so, follow these steps:
To open a larger preview in a pop-up window, click the double arrow icon in the upper-right corner of the preview box.
To send a test message with actual variables, click the checkmark icon inside the preview panel. Insert your email address and click Send.
For live bookings, go to the booking’s Messages tab, find the message under Scheduled Automated Messages, and click Preview to view it with actual guest and booking details.