Do NOT connect Booking.com to Zeevou. Do not connect to QuickConnect either until you are prompted to do so in this guide.
Connecting too early may prevent you from continuing the setup and can cause the process to get stuck.
Please read through this before connecting to Booking.com.
Generally, all BDC taxes are shown in the price breakdown as Channel Tax. Please note that all of these Channel Taxes will be reflected in the related MPRs (Monthly Profit Reports) for the Investor/Host, in accordance with the deal template details.
You can go to Booking.com- > Property -> VAT/Tax Charges to view your VAT status and City Tax.
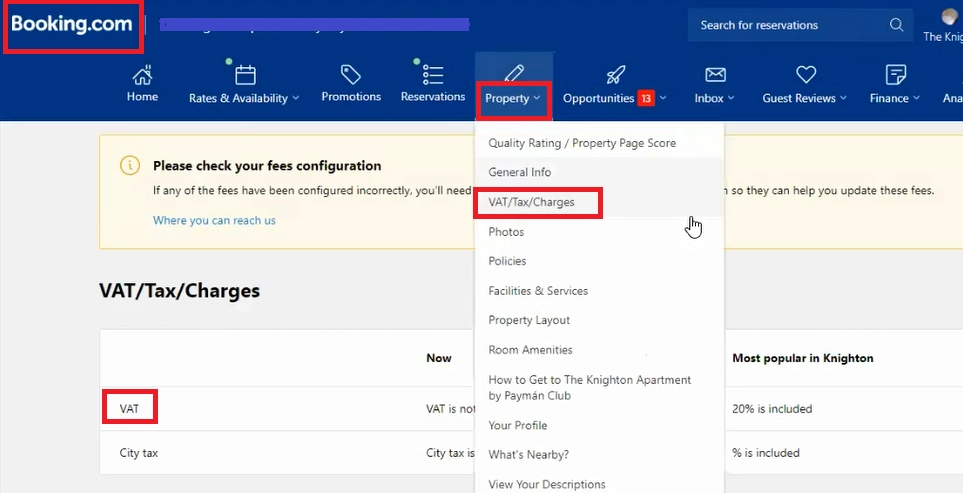
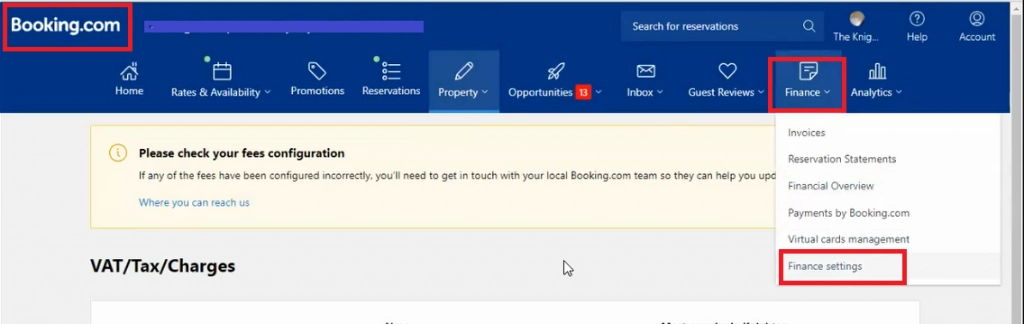
To update your VAT Number, go to Booking.com -> Finance -> Finance Settings.
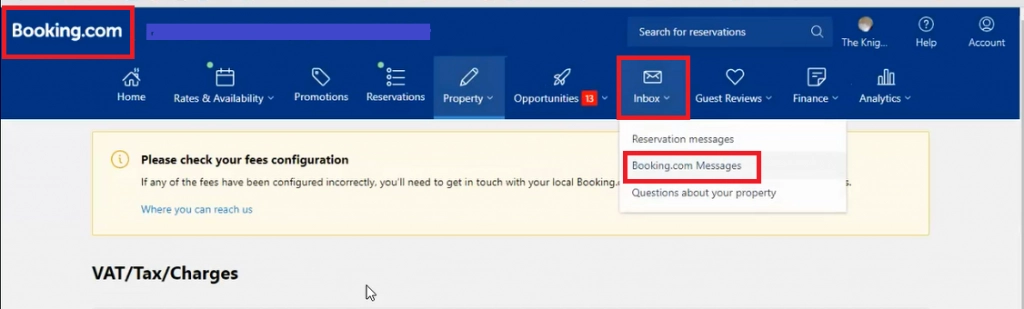
You need to contact the support team for any changes related to VAT rate via Inbox -> Booking.com Messages and write a message to ask for changes.
Note: Please check local laws for any mandatory fees for your property.
Complete your KYP form
If you're a new customer, register your property on BDC first or export your listing from Zeevou to BDC.
Ensure properties in BDC are Open and Bookable
Before mapping your Zeevou listing, ensure there are no non-XML (manual) rate plans active in Booking.com.
Non-XML rate plans can cause syncing and mapping issues. All rate plans must sync via XML for accurate rate and availability updates.
Some Booking.com promotions can override restrictions sent from Zeevou (including minimum nights). Review and disable any conflicting promotions before connecting.

If you have already got a channel manager connected to Booking.com, disconnect your old channel manager first by following these steps:
Log in to your account on admin.booking.com.
Click Account.
Go to Connectivity Provider.
Click Deactivate.
To avoid incorrect bookings during setup, switch all listings to Request to Book. Once you've confirmed that rates and availability are pushing accurately, you can turn Instant Book back on.
Steps to deactivate Instant Book on Booking.com
Booking.com Extranet → Property → Policies → Other Policies
Find How You Receive Bookings → Edit
Select Request to Book
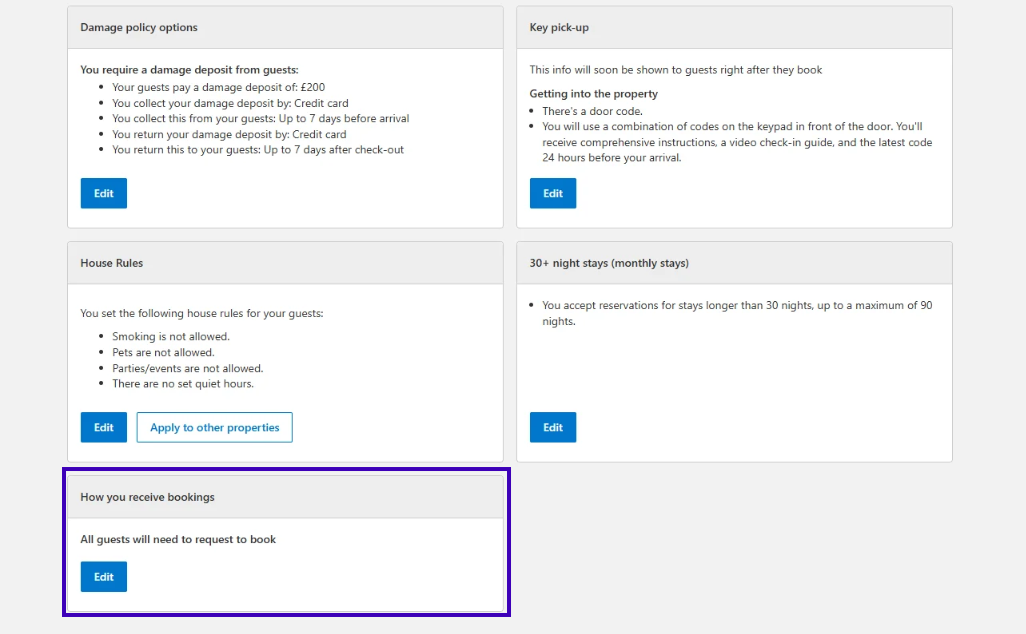
Click Save
Next, determine your Connection Type. If you have just signed up, you will be on Connection Type A.
Log into app.zeevou.com, go to Listings, and click Manage Channels in the top right.
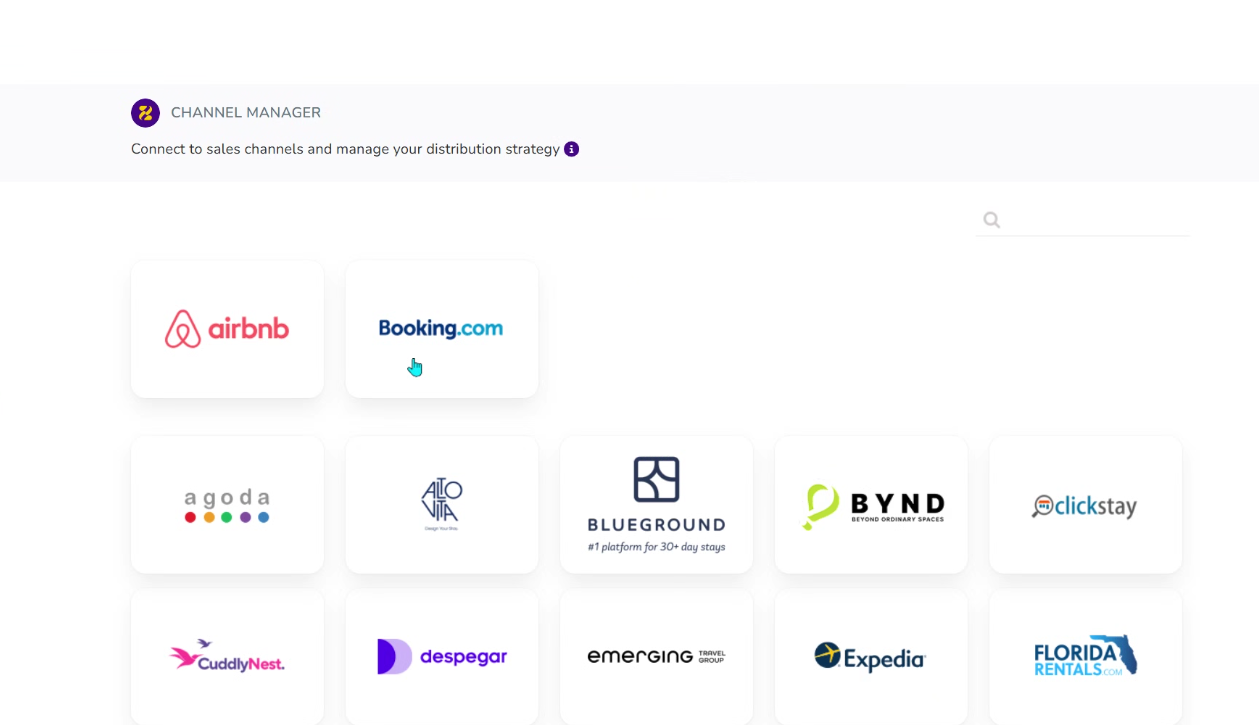
Select Booking.com.
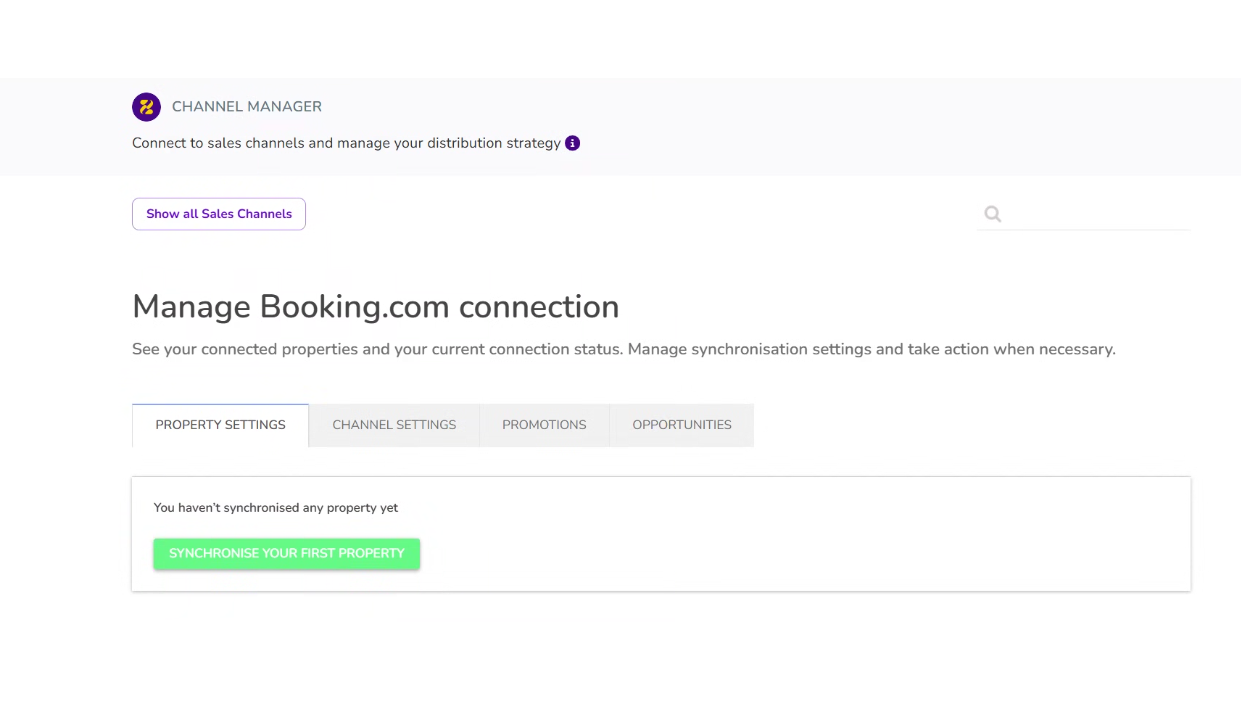
If it is your first Property, click Synchronise Your First Property and confirm by clicking Yes.
Note: If it is an additional property, click on Add more Properties.
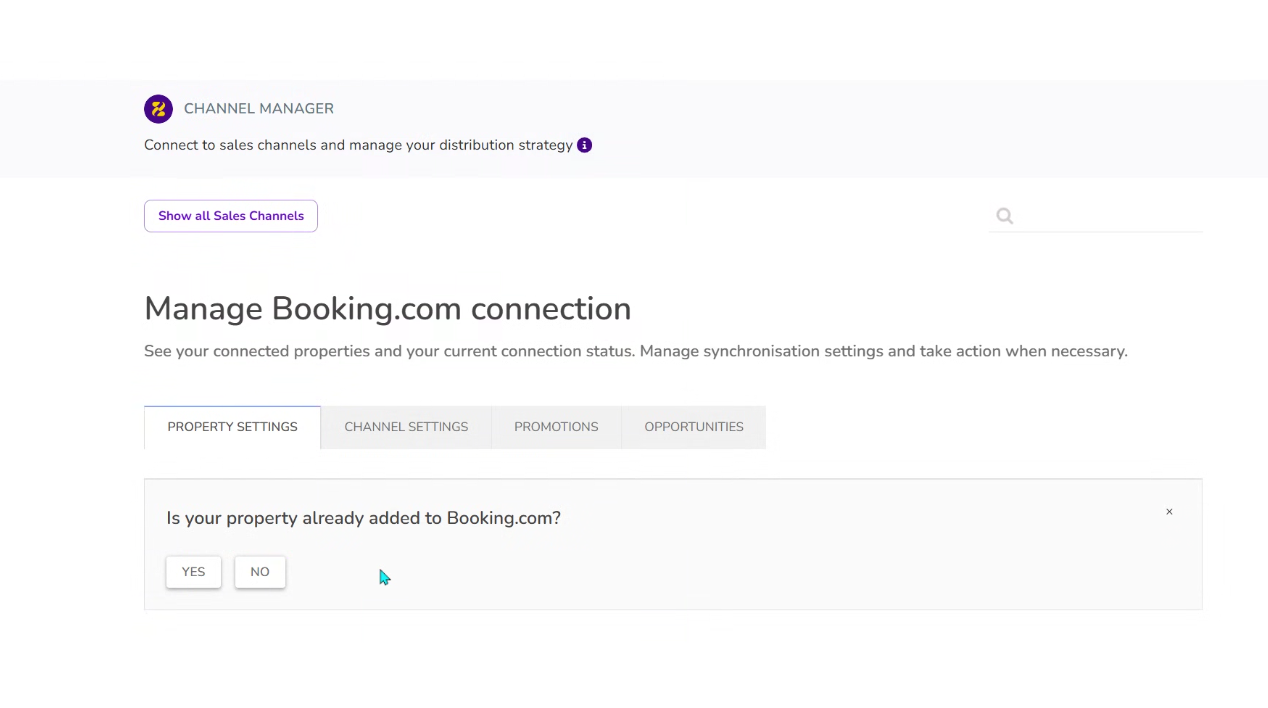
Select Yes if the property already exists on Booking.com
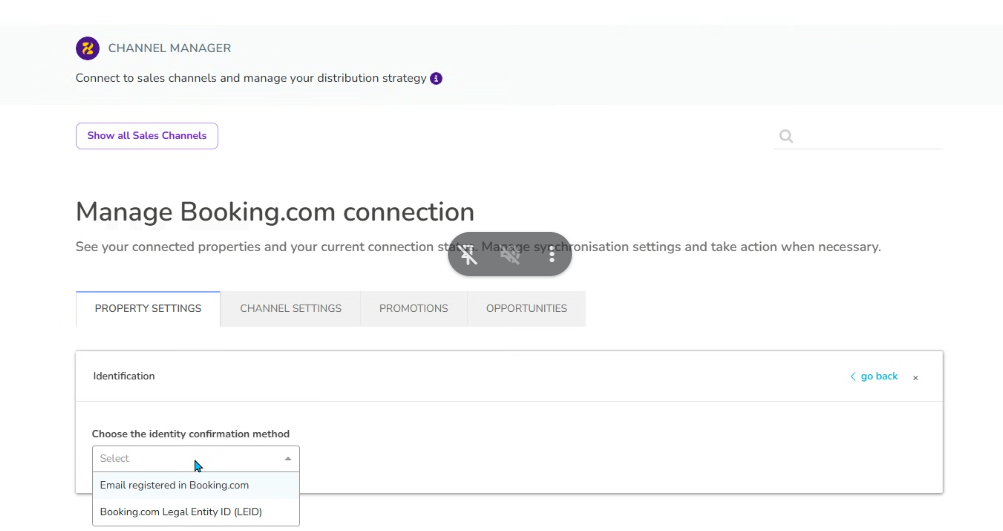
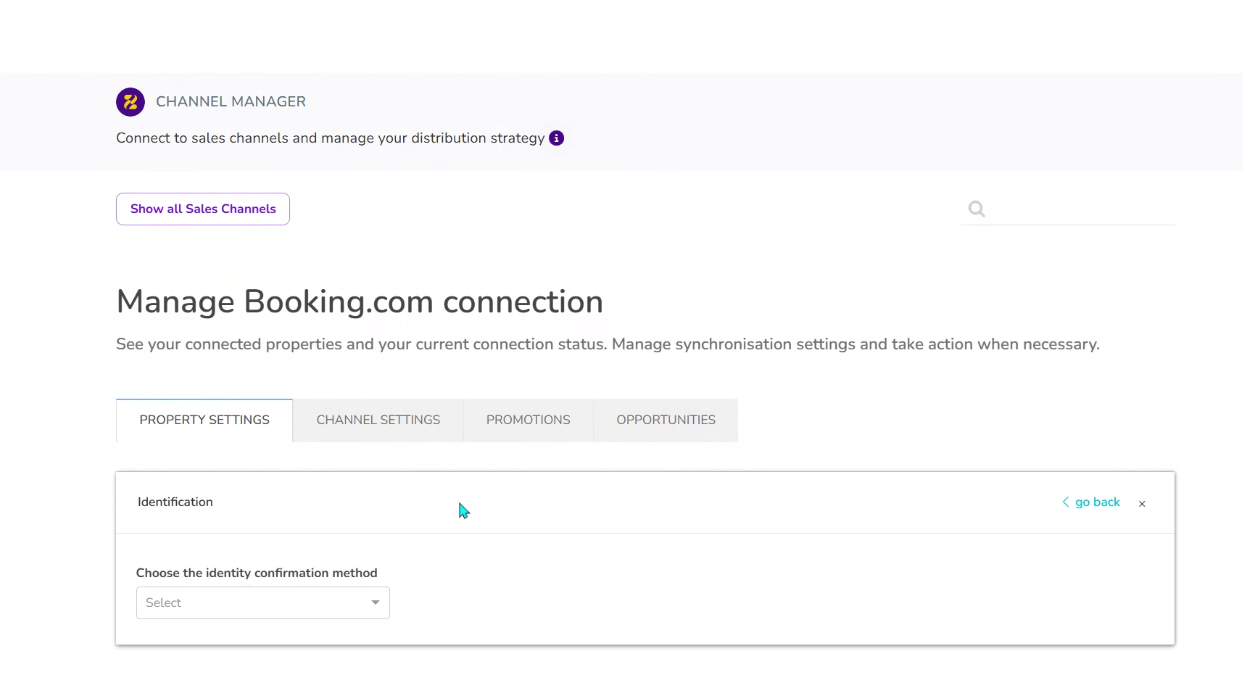
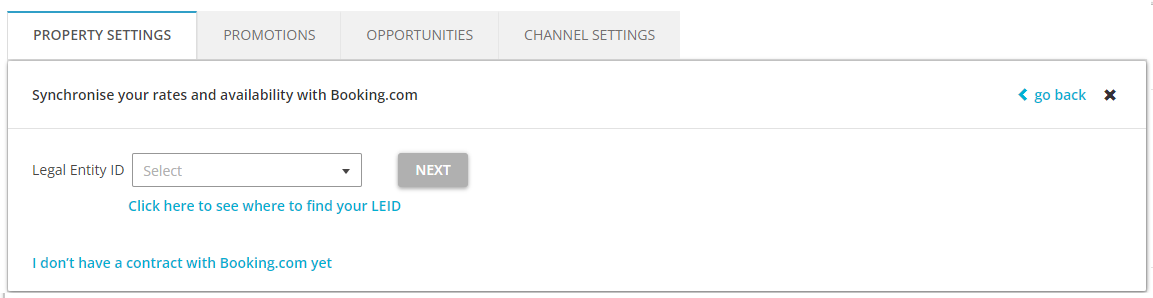
Choose identity verification:
Registered Booking.com email, or
Legal Entity ID (LEID)
Note: To find your LEID, follow these steps:
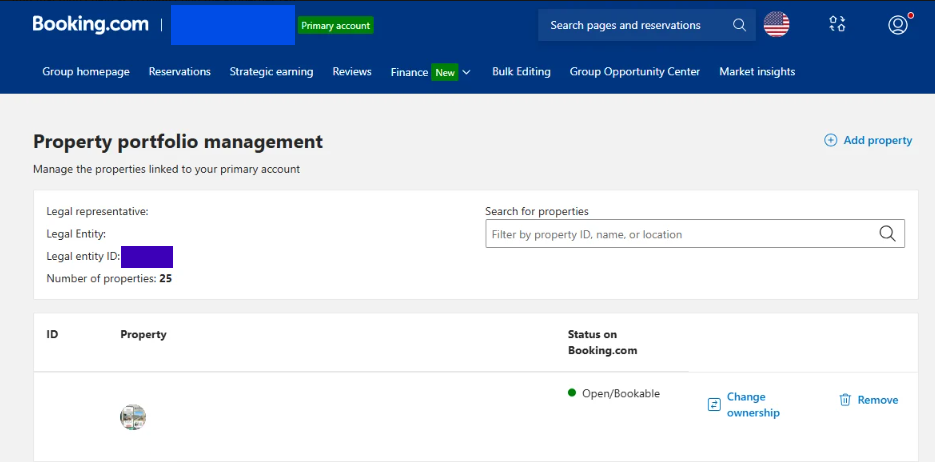
Click your Profile on the top right.
Select Property Portfolio Management from the dropdown that appears.
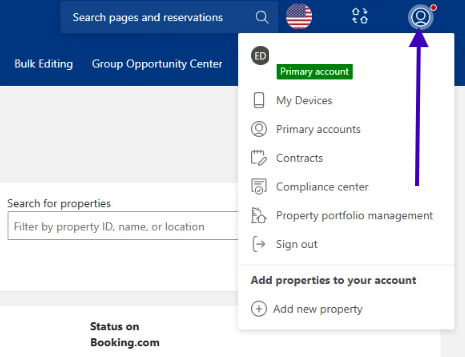
On the left you will see the Legal Entity ID (marked in purple on the screenshot below).
Note: If this is not your first property, it will show you the registered Email address or LEID that was used before for your first mapping. Select one of these if you're mapping to the same group BDC account.
Click Next.
Enter Booking.com Hotel ID.
Paste your Hotel ID and click Next.
Enter the requested Email Address/ID and continue.
Click Go To Booking.com
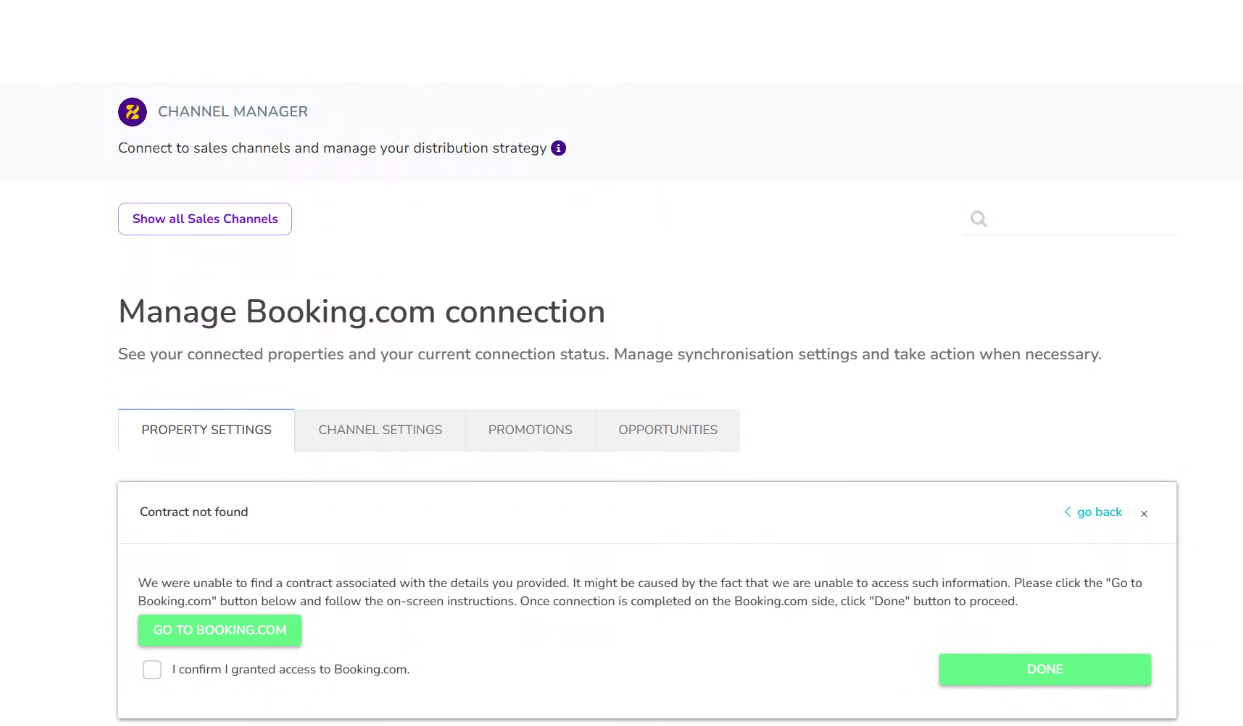
Log in to your account on Booking.com.
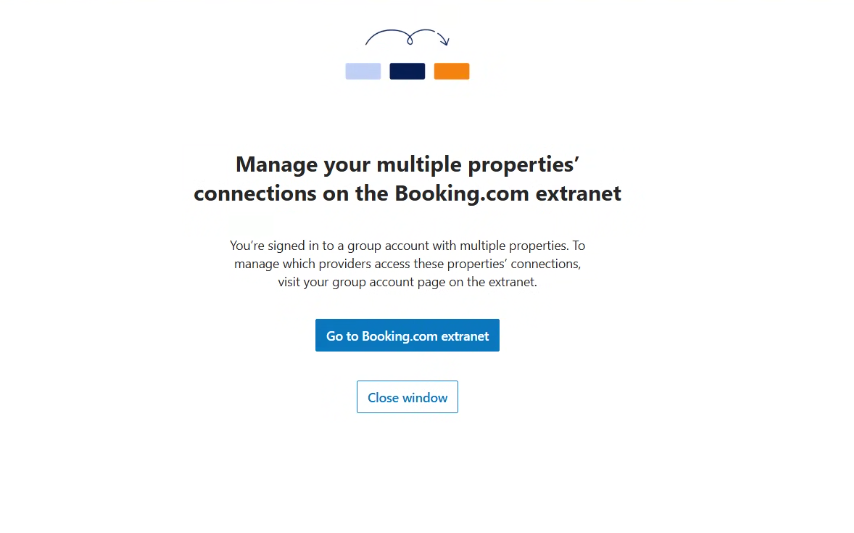
If you have multiple properties on that account, you will see the following screen. Click Go to Booking.com extranet. If you only have one property on this account, skip this step.
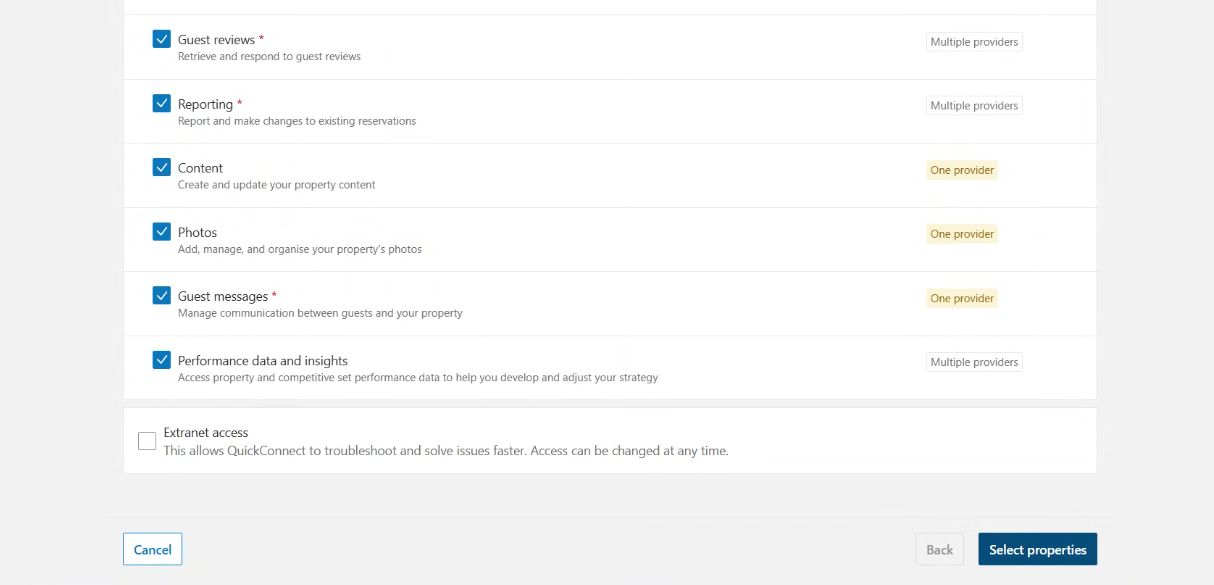
Scroll to the bottom and click on Extranet Access, then click on Select Properties to continue.
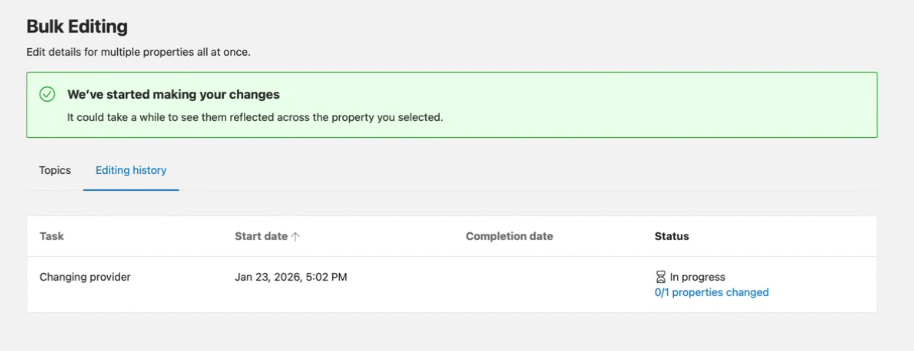
You’ll see the success message - refresh and wait until Status no longer shows as In Progress.
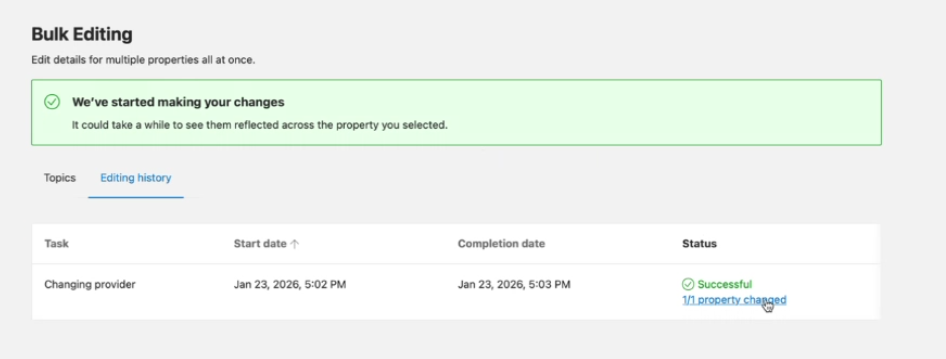
Go back to Zeevou and click on I Confirm. If you get an error, wait around 15-30 minutes before retrying.

From the list of your Properties that appears, select the desired Property to map to Zeevou from the ones that show. If none show, your properties may have outstanding KYP requirements or may not be set to Open and Bookable. Reach out to Booking.com’s support if you require assistance in getting the properties to show.
Click Connect This Room.
Select Manage 1 Rate → Activate
Adjust the number of people in pricing under Advanced, set the markup percentage if needed, and click Save.
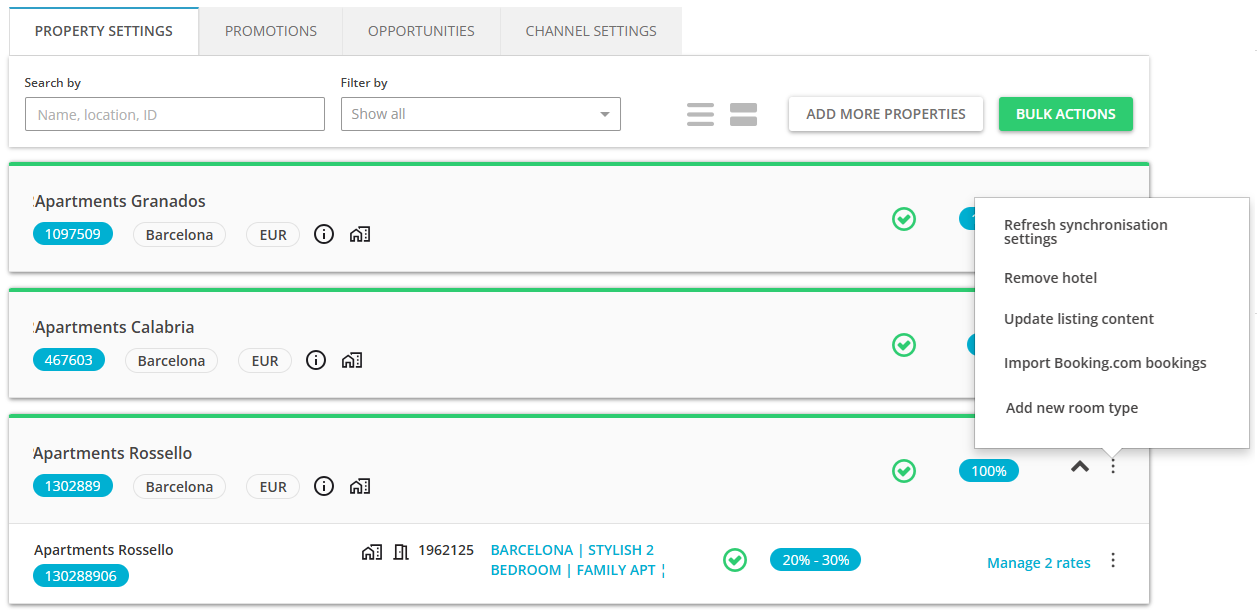
To import existing bookings,
Go to Manage Channels
Select Booking.com
Click the three dots
Choose Sync.
Only future bookings (from tomorrow onward) will be imported.
Test Your Connection
Block a date in Zeevou → confirm it blocks on Booking.com
Increase the price in Zeevou → confirm it updates on Booking.com
Reset pricing once confirmed
Re-activate Instant Booking on Booking.com
If you would like to re-activate Instant Booking, go to your Booking.com Extranet > Property > Policies > Other Policies
Scroll down until you find the box "How you Receive Bookings" > Edit
Select "All guests can book instantly"
Click Save
Note that if If you have not completed all the steps above to connect to BDC, you will see the errors when you open the Booking.com card in the Channel Manager.
Markup percentage setting
Go to Listings → Manage Channels
Select Booking.com
Click Manage Rate
Edit markup percentage and save
Note: For Connection Type A, markup must be set per room.
To set extra guest pricing on BDC:
Booking.com → Rates & Availability → Calendar
Expand the main rate → Edit Occupancy Pricing
Enable Extra Guest Fee toggle
Enter price per additional guest
Save changes
For advanced changes, contact Booking.com support.
To update:
Hover over the three-dot menu and choose Update listing content.
Select one from the update options. If you want to perform a full update, select Update the entire content. If you select this option and have additional content for this property in sales channel extranet, then it may be overwritten.
If you want to update only selected areas, select Update only selected areas. Then, select the areas that you wish to update. For example, if you changed the photos of your property, you should select Images. It is the safest option to use on a daily basis, as it overrides the selected area only.
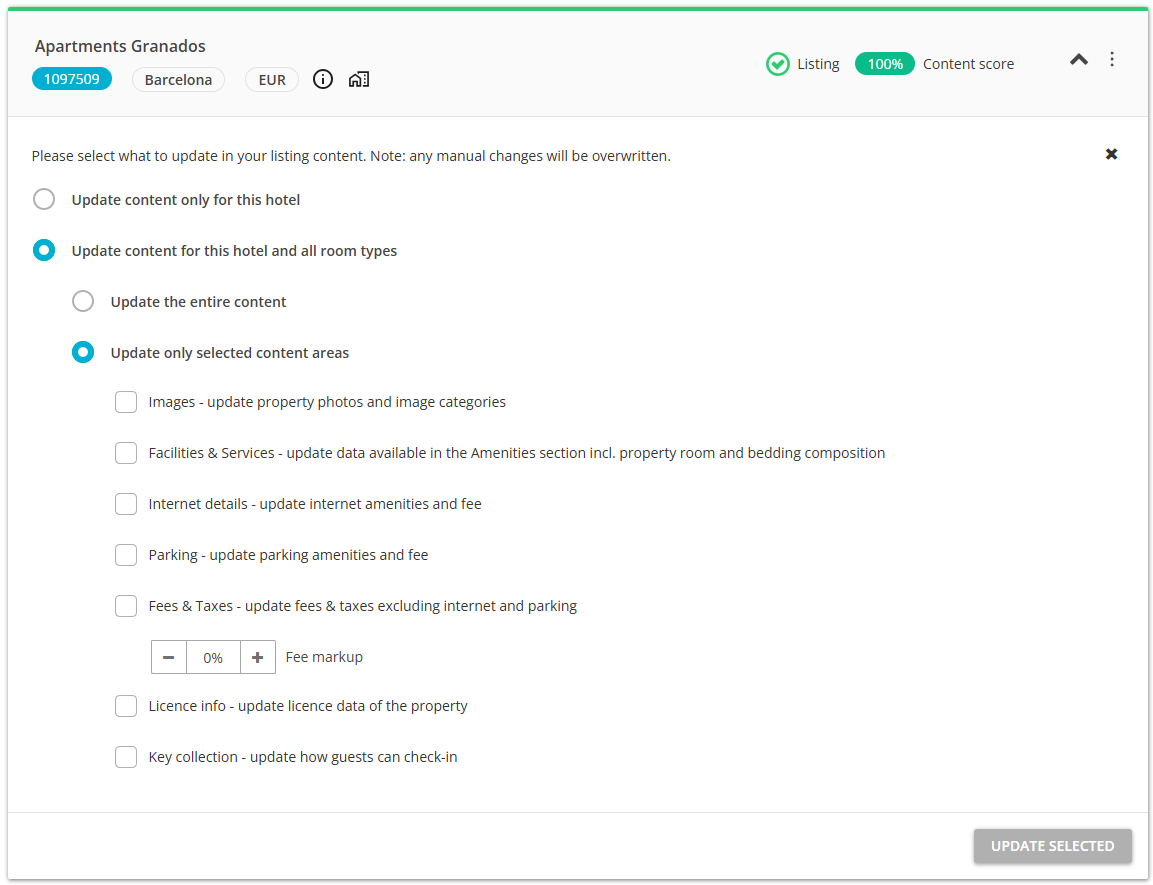
Click Update selected. The update is scheduled, and the listing should be updated within approximately 30 minutes.
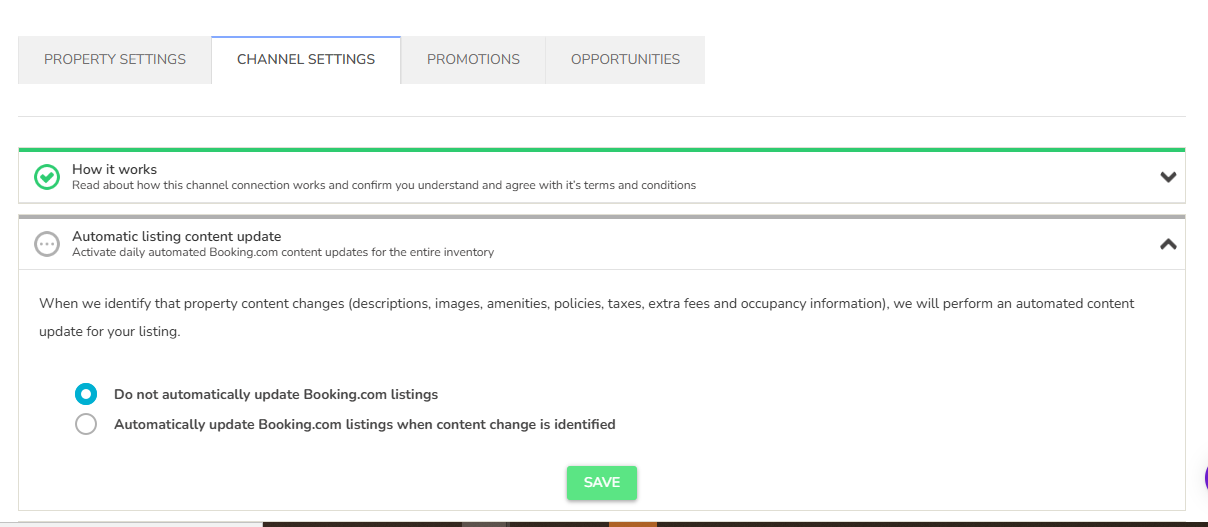
If you have enabled the Full Sync option with Booking.com and would like to stop it, follow the steps below:
Go to the Listings dashboard.
Click Manage Channels and select Booking.com.
Open the Channel Settings tab.
Navigate to the Automatic Listing Content Update section.
Click the dropdown arrow and select Do not automatically update Booking.com listing.
Click Save.
Once saved, your Booking.com listing content will no longer be automatically overridden by Zeevou.
If, after connecting to Booking.com, you intend to edit the photos of your listing through Zeevou or add new photos and push this content from Zeevou to Booking.com, please pay attention to the following points. If Booking.com’s photo upload guidelines are not followed, your listing may be closed by Booking.com for photo review, even after a successful connection.
Photos must have a high resolution: at least 2048×1080 pixels, but preferably 4000×3000 pixels (the maximum uploadable file size for a single photo is 19MB)
Shoot mainly landscape (horizontal) images – these look best on Booking.com
Take a minimum of 24 photos in total.
Take pictures from a height of 100-160 cm (3-5 ft). This maintains consistency across images and feels neutral from the viewer’s perspective.
Keep the focal length between 34-35mm
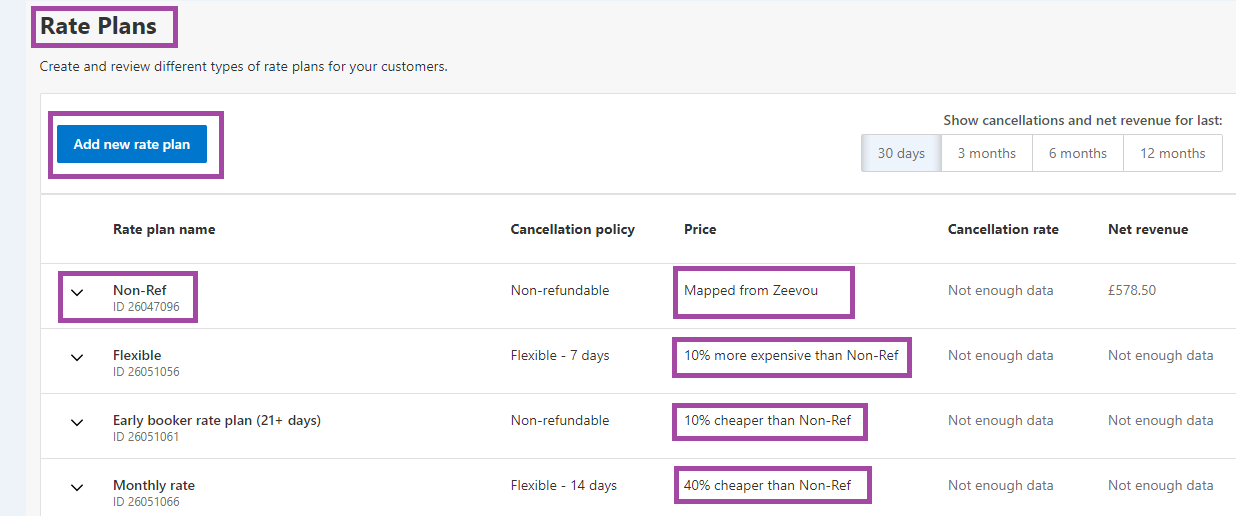
You are free to create additional rate plans to suit your property's pricing strategy.
For rate plans such as Non-Refundable or Flexible, we recommend linking them to your Standard Rate (synchronised from QuickConnect/Zeevou) so they inherit their pricing, minimum stay requirements, restrictions, and availability.
To set this up, please contact Booking.com through your Booking.com Extranet by following these steps:
Click Inbox, then select Booking.com messages.
Click See contact options and choose the relevant topic and subtopic if required.
Select See all contact options, then click Message.
Compose your message and click Send message.
We suggest using the following template:
“Dear Booking.com team,
I need the following setting from you and the individual steps have been agreed with the connectivity team:
The rate "[Rate_plan_name]" has to be set as XML res rate. This setting is done via edit rate category settings.
Once this is done, the rate relation must be set. Please make sure to click on follow restrictions and follow open/closed. Please reply as soon as this has been done.
Kind regards,
[HostName]”
Use this option if Booking.com initiates the channel manager connection.
This step-by-step tutorial walks you through connecting your Booking.com account with your Channel Manager, ensuring smooth rate and availability sync and booking delivery.
To initiate the connection:
If you're a new customer, register your property on BDC first.
If you're an existing customer, log in to your Booking.com extranet.
Open the desired listing in BDC.
Then:
Open your listing in the Booking.com extranet
Click the Profile icon in the top right
Select the connectivity provider
If another channel manager is active, click Switch to a new channel manager
Confirm the code sent by email or SMS
You must choose the pricing model before connecting.
Stay on the Connectivity provider page
Check the pricing model
Room-based: Same price for all guests
Occupancy-based: Price changes by guest count
Select the model that matches your setup
Save your choice
⚠ This step cannot be skipped.
To select Zeevou as the Channel Manager:
Under the Channel Manager name, click Search for providers
Type Zeevou
Click Connect
Booking.com will now send the connection request.
Once you receive the connection activation notice, then copy your Listing ID for mapping:
Go to app.zeevou.com and click on Listings.
Open your desired Listing.
Click Manage Channels in the top right.
Select the Booking.com Logo from the pool list.
In the new page, you need to fill in these items:
Channel Hotel ID: Booking.com Property ID / Hotel ID.
Connection Name: Use to give a name to your connection to make it easier for searching the connected channel account.
Default Multiplier: Use to set the rate multiplication factor applicable for all room types.
Default Surcharge: Use to have a surcharge applied to all the room types.
Rate Pricing: Select the rate pricing model as set up on Booking.com.(Default connection type is Room-based. If you want to push extra guest fees, please ask Zeevou support to confirm your connection as occupancy-based.)
Currency: Property currency should be the same as set up in Booking.com.
6. Click Next to proceed to mapping
You will now see two lists:
Booking.com Room-Rate (BDC rate plan ) list.
Zeevou Room Name (Unit Type) & Zeevou Rate Name (Rate Plan) list.
For each room/unit type:
Select the corresponding Zeevou Room Name and Rate Name.
Click Map to open the configuration pop-up
Configure mapping: You should continue mapping the flow based on the Rate Pricing model selected on Step 1, Section 4:
Room Based:
When configuring Room-Based pricing, the following settings help to set rates:
Single Occupancy: For single-use rate, select the checkbox. When selected, an option will appear to allow you to set up multiple rates.
Applicable No of Guests: Select the applicable number of guests. The rate will be based on what is received from Zeevou for the applicable number of guests.
Rate Multiplier(X) / Surcharge(+/-): To increase/decrease the rate by a percentage and/or fixed value. You can use either option or both simultaneously based on the requirement.
Example: To increase the rate by 10%, enter 1.1 in the first multiplier box or enter 0.90 to decrease the rate by 10%. Similarly, to increase the rate by a fixed value of 5, enter 5 in the surcharge box or -5 to decrease the rate by 5.
Occupancy Based:
When configuring Occupancy-Based pricing, the following settings help to set rates:
Number of Guests: Click + to add additional rows as per occupancy. We will push out the rate for that occupancy to match the maximum number of guests.
Rate Multiplier(X) / Surcharge(+/-): To increase/decrease the rate by a percentage and/or fixed value. You can use either option or both simultaneously based on the requirement.
Example: To increase the rate by 10%, need to enter 1.1 in the first multiplier box or enter 0.90 to decrease the rate by 10%. Similarly, to increase the rate by a fixed value of 5, enter 5 in the surcharge box or -5 to decrease the rate by 5.
Then click SAVE.
Where to find the multiplier
Log into app.zeevou.com and open the Listings menu.
Select the specific Listing you want to update.
Click Manage Channels in the top right.
Select the Booking.com logo from the pool list.
You can now choose one of the following:
A. Update the default surcharge for all mapped listings
Click Edit under the Hotel ID.
Adjust the default multiplier or default surcharge.
Click Next to apply the change.
B. Update surcharge for a specific rate plan
Click Edit next to the mapped rate plan.
Adjust the multiplier or surcharge.
Click Save.
Note
These steps apply similarly to other OTAs that support multiplier/markup configuration.
After mapping:
Navigate to Channel Connection Details.
Change the status from INACTIVE to ACTIVE by clicking on the info alert icon under the Hotel ID.
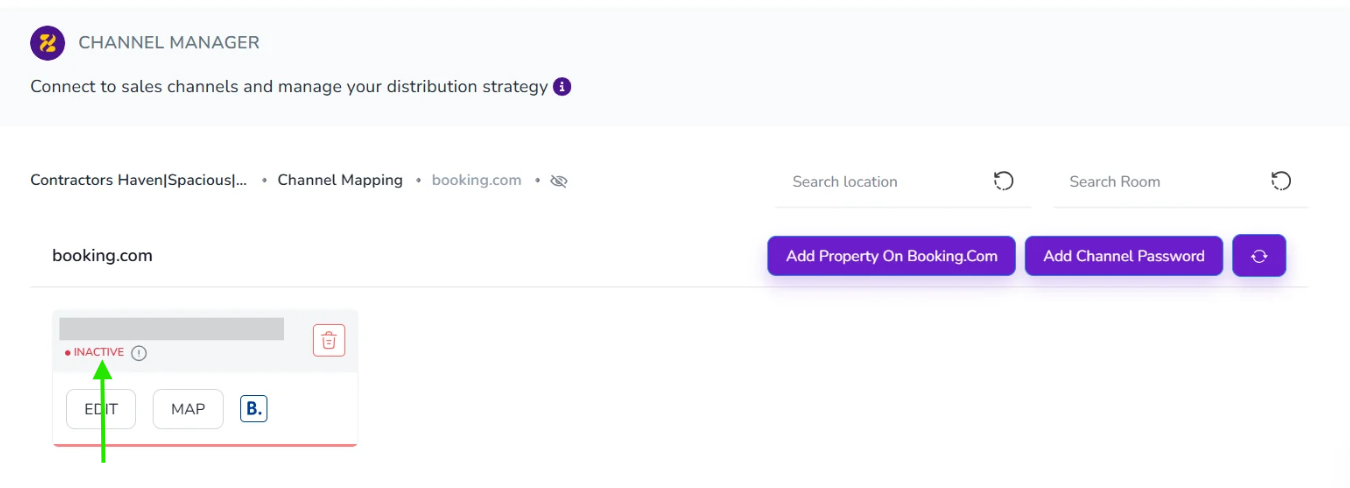
Click Yes to confirm activation.
Status will update LIVE in green.
Step 5. Testing & Re-Activating Instant Book
Test Your Connection
Block a Date on Zeevou and make sure it reflects on Booking.com. If pushing correctly, remove the block.
Increase the price slightly for one night on Zeevou and make sure it reflects on Booking.com. If pushing correctly, reset the price to what you would like it to be.
Step 5. Re-Activating Instant Booking on Booking.com
If you would like to re-activate Instant Booking, go to your Booking.com Extranet > Property > Policies > Other Policies
Scroll down until you find the box "How you Receive Bookings" > Edit
Select "All guests can book instantly"
Click Save
When the first rate plan is added on Booking.com, and it is mapped in Zeevou, the other one(s) can be connected in two ways:
Mapping in Zeevou
When the rate plan is added on Booking.com, it can be mapped in Zeevou correspondingly:
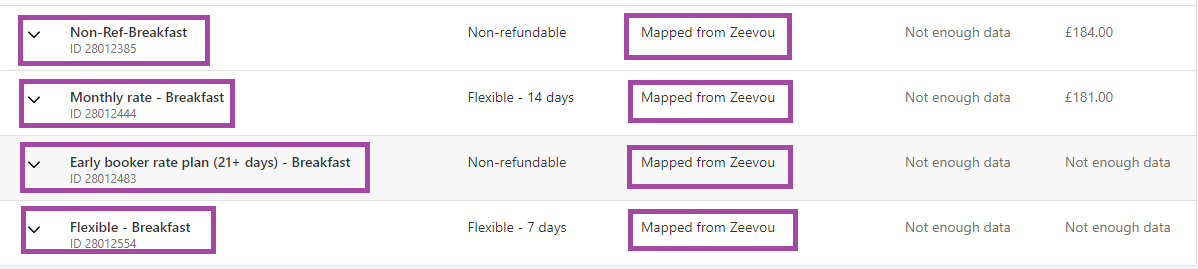
2. Deriving on BDC
The additional rate plans can be derived from the first one as shown below. So, no mapping is required as they get the information they need from the parent rate plan.
Note: If you want to set up a derived rate plan, you need to contact the BDC support team to enable this feature for you to work smoothly: "Enable to follow ALL the RESTRICTIONS from the parent rate plan.”
You need to contact the BDC support team to activate the 'Enable to follow ALL the RESTRICTIONS from the parent rate plan' option for all derived rate plans.
Alternatively, you can create the same rate plan setup on both Zeevou and BDC, and map each of them one-to-one.
Important Note:
According to Booking.com Extranet records, a service fee may only apply from the point it is configured for a property onward. If a reservation is created before the fee is set up, the fee will not be applied retrospectively. Since fees are not applied retroactively, any new or updated fees will only be reflected on Booking.com after a static content update is pushed following the change.
You can manage and sync your Booking.com promotions directly from the mapping page. This allows you to set discounts and special rates without having to leave the platform.
To set a promotion:
Navigate to Booking.com Mapping page:
Open your preferred listing.
Click the Manage Channels button.
Select Booking.com
Click on the Promotion tab.
2. View and Manage Existing Promotions Under the Promotions page, you will see a list of your current offers, including Promotion ID, Type, Discount, and Status. From here, you can:
View all active and inactive promotions.
Edit existing promotions to update discounts or dates.
Enable/Disable promotions instantly using the toggle switch.
3. Add a New Promotion
Click on the + Add Promotion button.
4. Select Promotion Type: Choose the type of discount you wish to offer:
Geo Rate: Targeted at specific countries.
Mobile Rate: Exclusive for app users.
Early Booker: For guests who plan ahead.
Last Minute: To fill the remaining occupancy.
Basic / Campaign Promotion: Standard or seasonal discounts.
5. Fill Promotion Details. Enter the required parameters for your selected promotion:
Targeting: Select Country, Device, or Campaign (depending on the type).
Mapping: Select the specific Room and Rate Plans the discount applies to.
Discount: Enter the percentage (%) off.
Dates: Set the Stay and Booking date ranges.
Conditions: Define rules for Early Booker or Last Minute deals.
Blackout Dates: Add any specific dates you wish to exclude from the promotion (optional).
6. Save and Activate
Click Save.
The promotion will be automatically activated and pushed to the channel.
7. Verify on Booking.com
Log in to your Booking.com extranet.
Verify that the discount is applied correctly to the intended rooms and dates.
⚠ Important Notes:
Promotions apply only to the specific rate plans you select during setup.
Promotions are live as soon as you click save.
Please allow a few minutes for changes to reflect on the Booking.com listing.
Follow the procedure below if you already have some properties created in Zeevou and you want to create new Booking.com listings.
Log into app.zeevou.com, go to Listings, and click Manage Channels in the top right.
Select Booking.com.
If it is your first Property, click Synchronise Your First Property and confirm by clicking Yes.
Note: If it is an additional property, click on Add more Properties.
A dialogue window appears with the question if the property is already published on Booking.com.
If the property is listed in Booking.com, terminate the process and map your properties to the Booking.com listings.
If the property is not listed in Booking.com, click No.
Provide the required information and click Next.
Click, I don't have a contract with Booking.com yet.
Fill in the form. Some data may be pre-populated based on what you have already provided in Zeevou.
The countries where you already have properties are selected by default and cannot be removed. Add more countries if you wish to. Additionally, selected countries appear with a little x button. Additional countries can be removed.
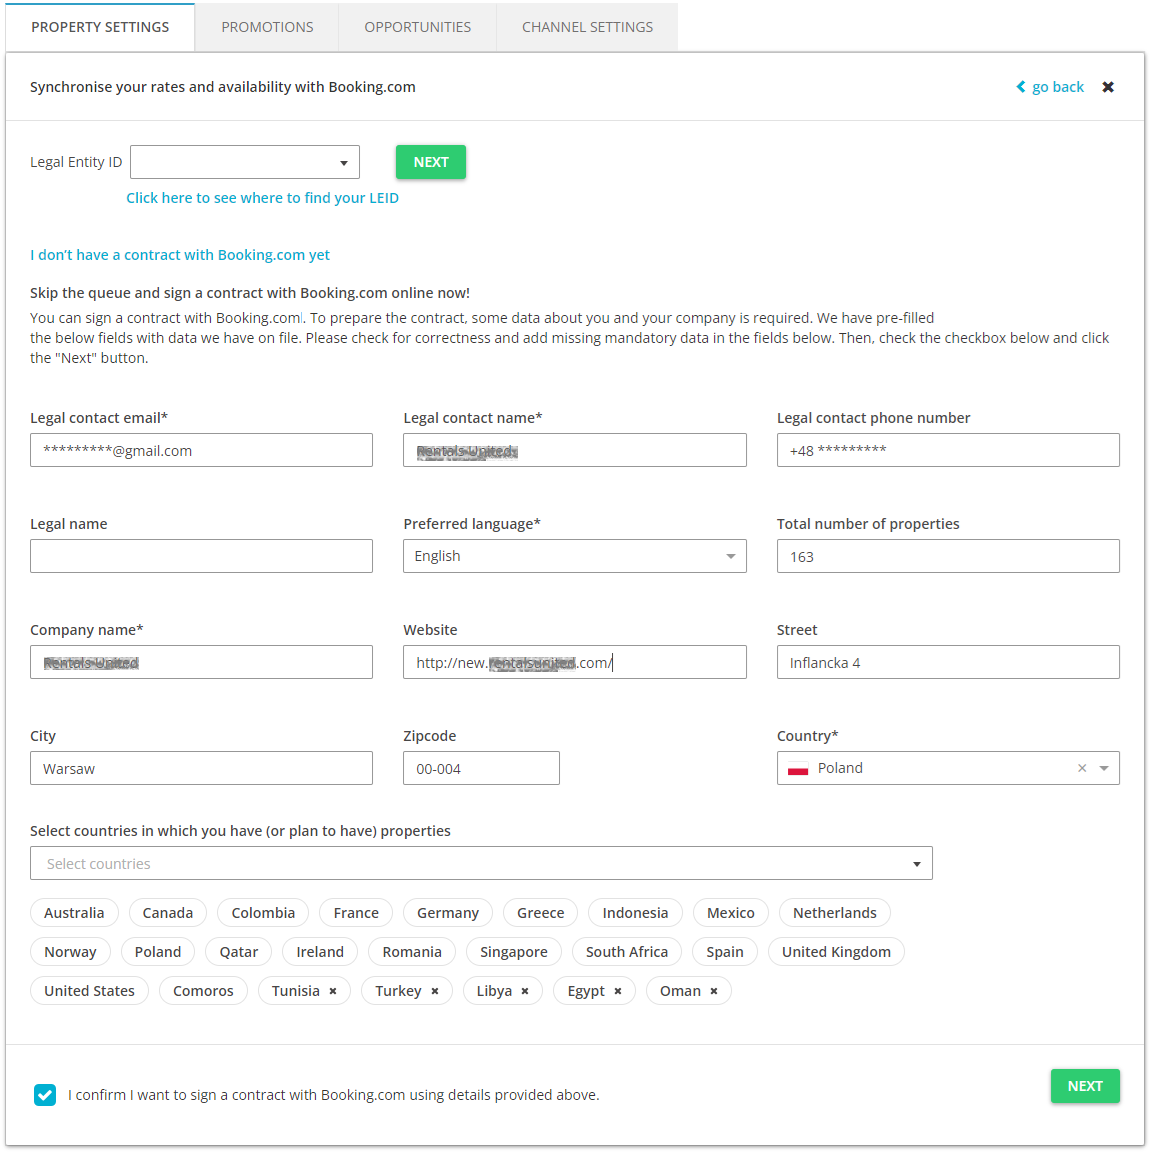
Booking.com requires each country you rent in to be included in your contract. If this is your first contract with Booking.com and you are already planning on extending your rental business into countries where you do not have properties yet, you can select additional countries from the dropdown and add them to your contract in advance.
If you already have a contract with Booking.com and want to add a property in a country which is not a part of your current contract, Booking.com will send you an email with instructions on how to extend your contract with the new location. Follow these instructions. Once you are done, come back to the Listing Page and retry the error to complete the procedure. Then, you will be able to list properties in the new location.
Tick the checkbox to confirm you want to sign a contract with Booking.com and click Next.
Booking.com will generate a Legal Entity ID (LEID) for you.
Check your emails for a message from Booking.com. If you cannot find it in your inbox, check the SPAM folder. Follow the instructions and sign the contract online. Note that your listings will not go live until you sign the contract.
If you have not received the contract and your LEID number is not available in Rentals United within the next 24 hours, please retry the whole procedure. If this does not help, contact the Zeevou Support team.
Once the contract is signed, your properties will go live on Booking.com within 24 hours.
Now that you have the LEID, you can proceed with the connection using the BDC Type A instructions at the top of this page.
