Note that before any step, if you log in to app.zeevou.com and see the below figure in your Listings Dashboard page, please follow Connection Type A Instructions. Otherwise, go ahead with Connection Type B Instructions.
Log in to app.zeevou.com, go to Listings, and click Manage Channels in the top-right.
Select Airbnb and click on Connect.
Get Connected to Airbnb
If it is your first property to map, follow these steps to get connected:
How it works: Tick Attestation, then click Save & Next.
Airbnb Minimum stay: It is recommended to select Keep my regular minimum stay not to override current Zeevou settings and to be able to manage min stay from Zeevou directly
Automatic listing content update.
Airbnb cancellation policy : Select your desired one.
Default channel markup: Keep it as zero, it is better to increase it via listing's mapping page.
Further Instructions: Click on Yes and then Connect.
Click Synchronise Your First Property and confirm by clicking Yes.
In the pop-up that opens, click on the Let’s Go button.
Click on the blue hyperlink text “click here” in the same pop-up.
Log in to Airbnb.com Extranet and click the Access button to confirm the connection request.
Close the Airbnb window.
Then, return to the Zeevou Channel manager page to view the list of your Airbnb Listings.
Click on the Add Property button.
Is the property already published on Airbnb?
Click on Yes.
Select your desired listing by clicking on Connect this Listing to assign your desired Zeevou property.
Select the property from the dropdown menu and click on Continue.
Then, under Additional Settings, you can add Markup and Sync Options click on Link & Connect.
Note that Under Sync Options, you should select either of these options:
Limited Sync : push only rates and availability not the content.
Sync everything: push picture, description, etc from Zeevou to Airbnb plus rate.
Click on connect another account button.
Go to step 5.
You should import existing bookings by clicking the three dots on the right next to the arrow, and choose Import Airbnb Bookings.
Click Proceed and Import. It may take some time to import all future existing bookings.
Now, your property is connected. To review and manage your property connection settings, click on Manage.
Under Advanced Settings, you can adjust the Number of people in price, then click Save Changes.
Note:
To set a preparation time, please contact us directly. Before connecting your Airbnb account, make sure to remove the Preparation Time field on Airbnb. Once the connection is established, you won’t be able to modify this setting on your own. If you would like us to add a preparation time for you after connecting, let us know, and we’ll apply it on your behalf.
Once you connect your Airbnb listing to Zeevou, the Airbnb Smart Pricing feature will no longer be available. However, you can still add promotions (rule-sets) directly under Calender tab in Airbnb.
Connecting your Airbnb listings to Zeevou is done entirely from the Channel Mapping section in your Channel Manager. This guide walks you through how to integrate Airbnb using the Type B connection process, how to map rooms and rate plans, and how to ensure everything is synced correctly.
Before starting, make sure:
You have an Airbnb Host account.
Your listings are already created on Airbnb.
You are logged in as the main host (not a co-host).
You know which Airbnb listings are associated with which account (if you manage multiple).
You can also create new Airbnb listings from the Channel Manager, but this guide focuses on mapping existing ones.
Locate on your desired Listing in Zeevou.
Click on Manage Channels.
Choose Airbnb from the channel list and click on it.
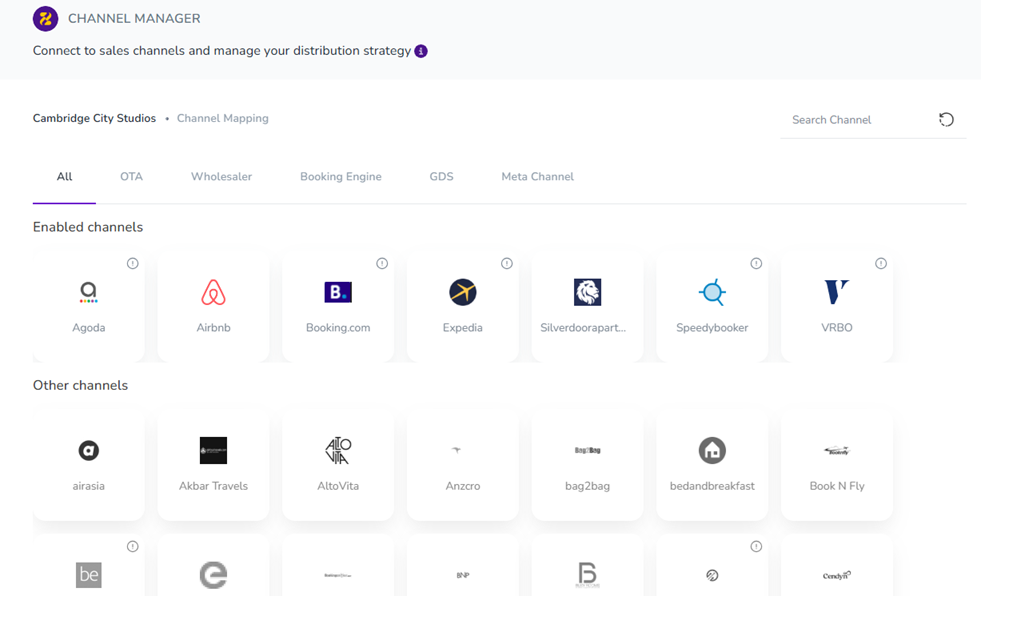
To initiate the connection:
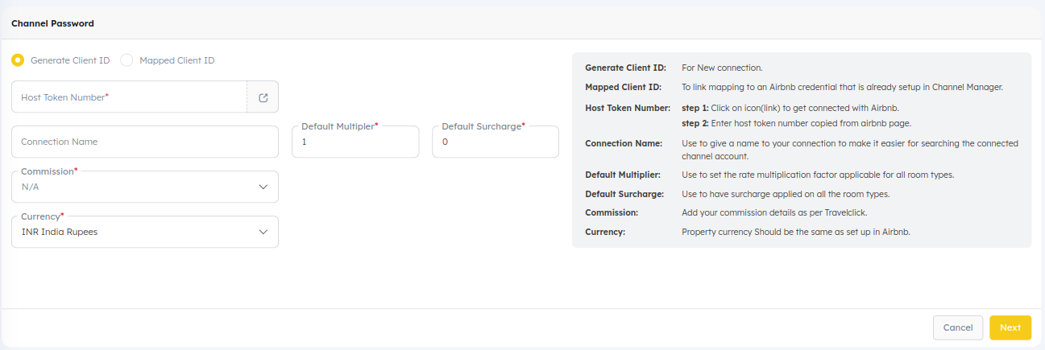
Click Generate Client ID if this is your first time connecting to Airbnb.
Click on the arrow in front of Host Token ID
You will be redirected to the Airbnb login page.
Log in using your main host credentials.
You’ll be taken to an authorization screen.
Scroll down, check “I agree”, and click Allow.
This will generate a Host Token Number.
Copy the token and return to Zeevou’s Airbnb setup page.
Paste the Host Token Number into the field provided and proceed.
Revise Currency settings and click on Next.
If you’ve already connected a listing with live mapping, use the Mapped Client ID and select the corresponding Property ID and Airbnb Account ID."Then, click on Next.
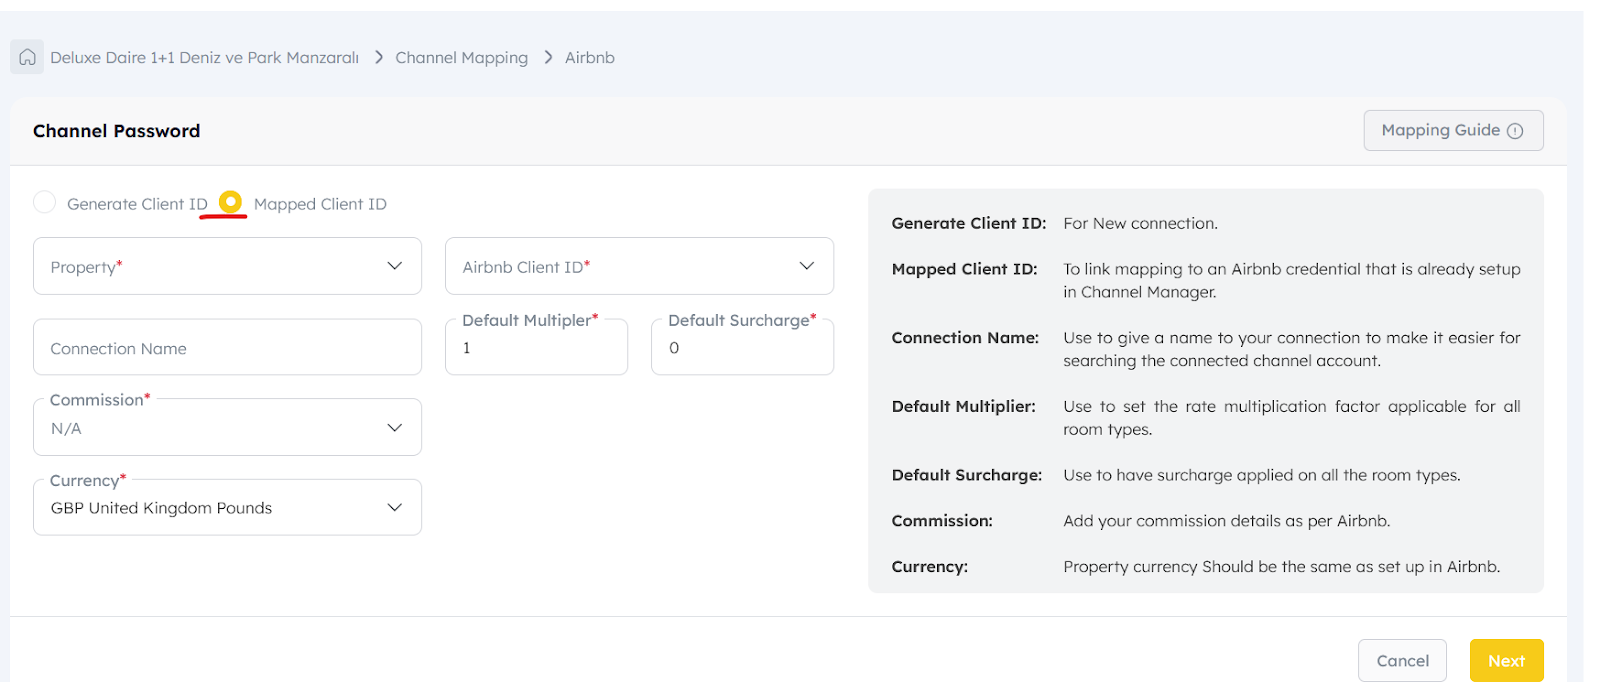
Important: For multiple listings on the same Airbnb account, reuse the same Mapped Client ID to avoid duplication.
Note 1: It only relates to the authorization step and will not map the listing to the shown Airbnb one.
After authentication, Zeevou will retrieve your Airbnb listings for mapping.
The list of Airbnb Room-Rate (Airbnb Listing name and ID).
Zeevou Room Name (Unit Type) & Zeevou Rate Name (Rate Plan) (your Zeevou setup) list.
For each room/unit type:
Select the corresponding Room Name and Rate Name.
Click Map to open the configuration popup.

In the mapping popup, configure:
Multiplier –to adjust markup percentage for rate(e.g., 1.10 adds 10%)
Surcharge – fixed value to be added to the rate (e.g., +5)
Occupancy – Minimum number of guests included in rate.

Then click Next. it will take time while it is fetching your listing’s information.
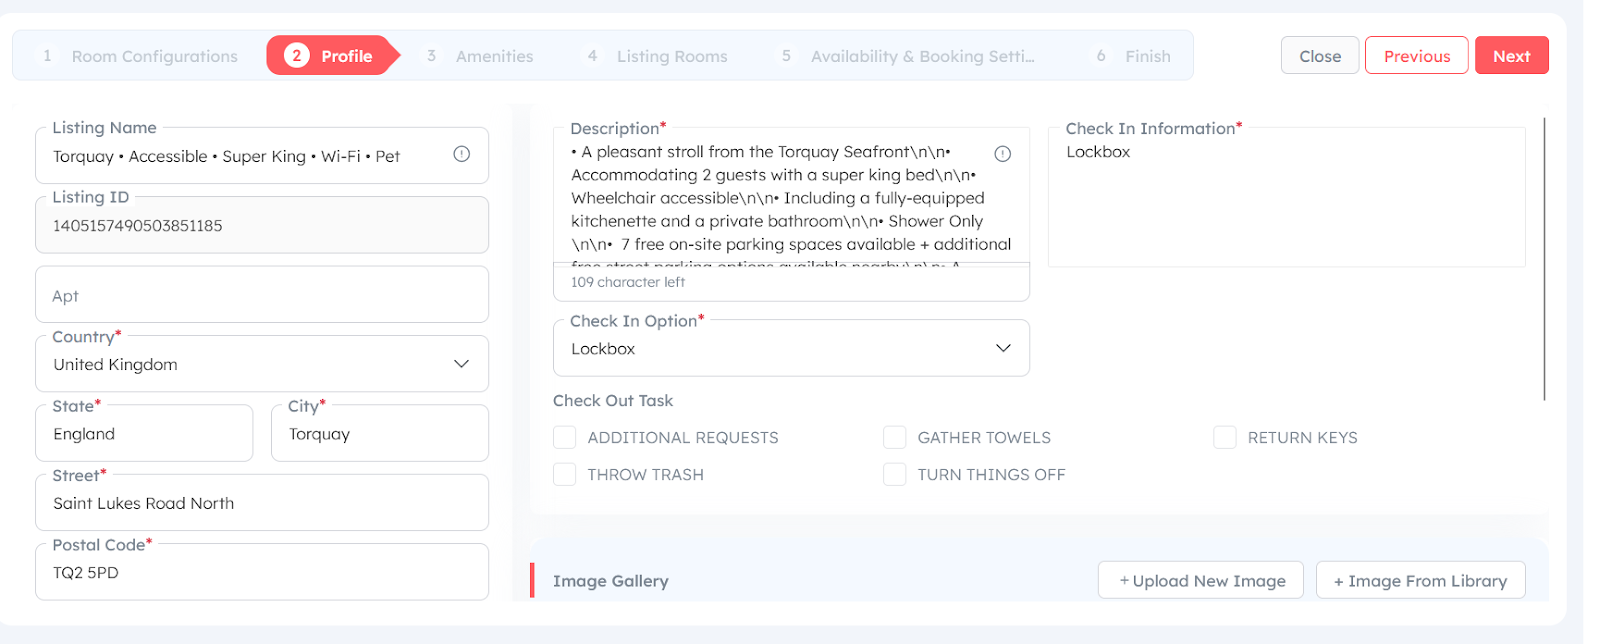
To complete mapping, Airbnb requires certain content standards. Make sure your listing has:
A headline (minimum 8 characters)
A description (minimum 50 characters)
At least 7 high-quality images (JPEG, min 800×500 pixels)
You need to fix all errors for Starred Sections(*).
No watermarks, logos, or text overlays on images are allowed for pictures.
Then click Next.
It should include at least 5 amenities. Then click Next.
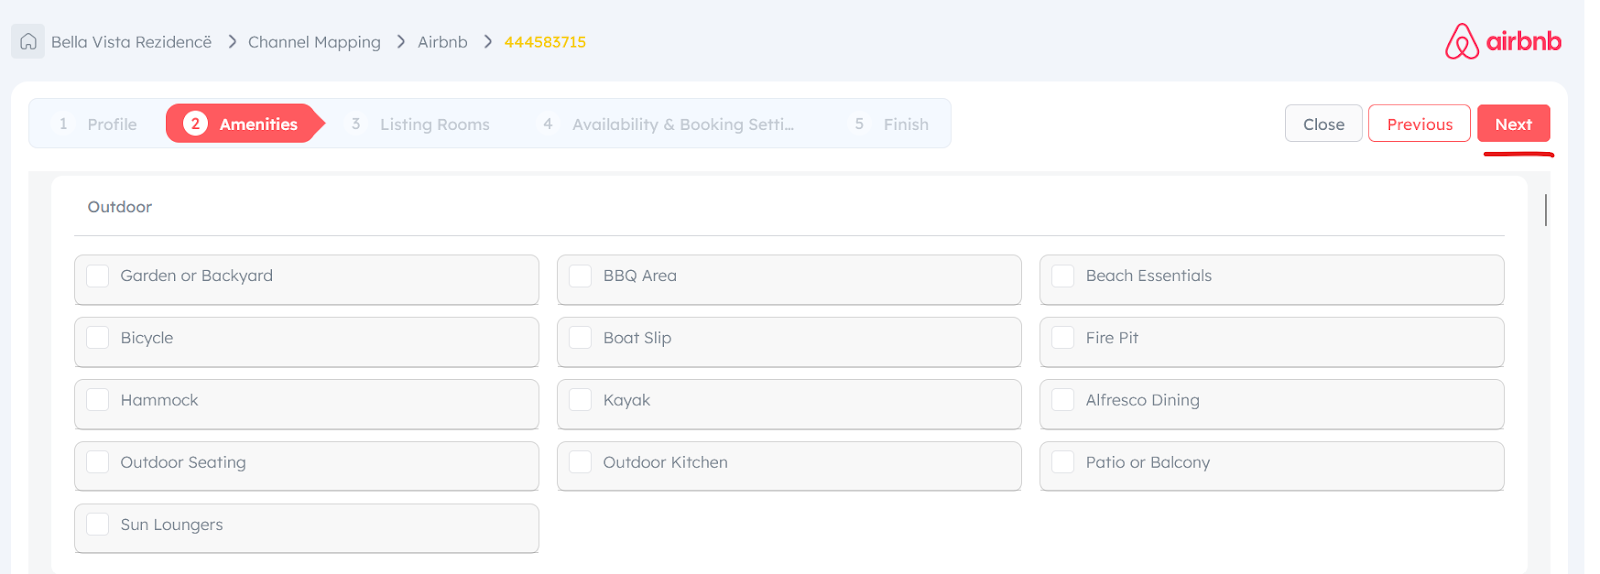
You need to fix all errors for Starred Sections (*).
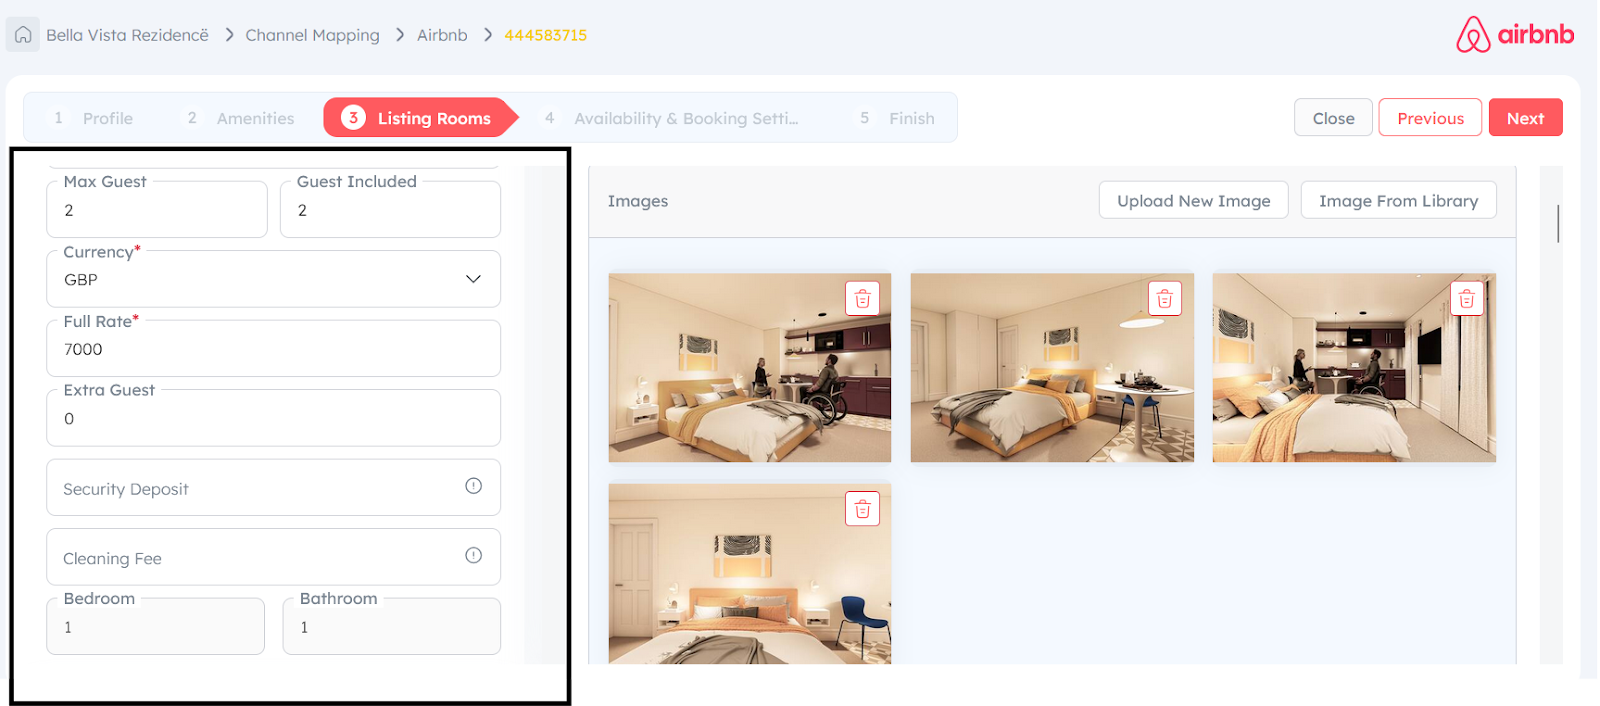
Make sure you have the right value for guests and fees here.
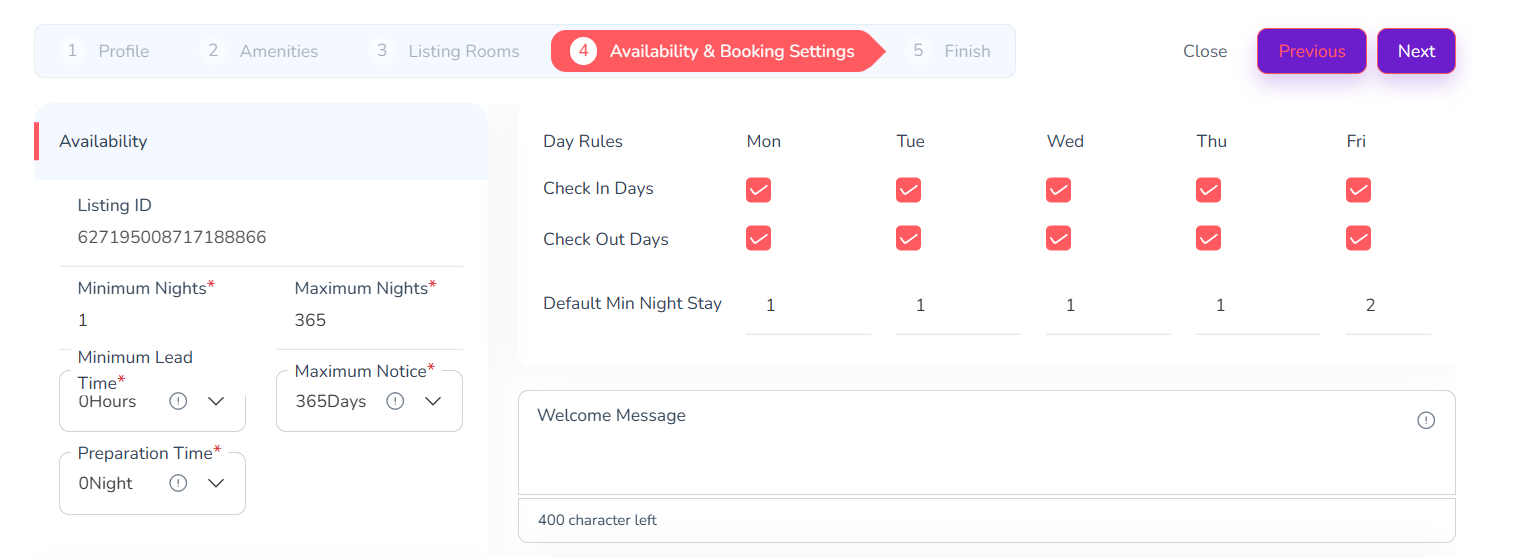
You need to revise values for Availability, Booking Rules, Permitted, Day Rules here.
Note that you must select a valid Maximum Notice period from the restriction settings before saving changes.
Do not close your browser until all setup steps are green.

If you tried to push listing from channel manager, meaning create listing from Zeevou side, then it will need step 5 for confirmation.
After submission, Airbnb will review your listing.
Status will show as “Ready for Review” in Zeevou.
Airbnb may take 1–3 business days to approve.
Until approval, the listing is not visible or bookable on Airbnb.
Once approved, the sync status changes to Active in the Airbnb extranet.

Final Tips
You should map all existing Room types in Zeevou with corresponding Airbnb Listings.
For listings under the same Airbnb account, reuse the existing token (Mapped Client ID).
You can generate a new token ID, if you wish to map a listing under another airbnb host account.
Zeevou lets you manage Rates & availability, images, content, amenties and restrictions across Airbnb through the channel manager.
Airbnb Promotions (Seasons)-Type B Connection