Note that before starting any step, if you log in to app.zeevou.com and see the figure below on your Listings Dashboard page, please follow Connection Type A Instructions. Otherwise, go ahead with Connection Type B Instructions.
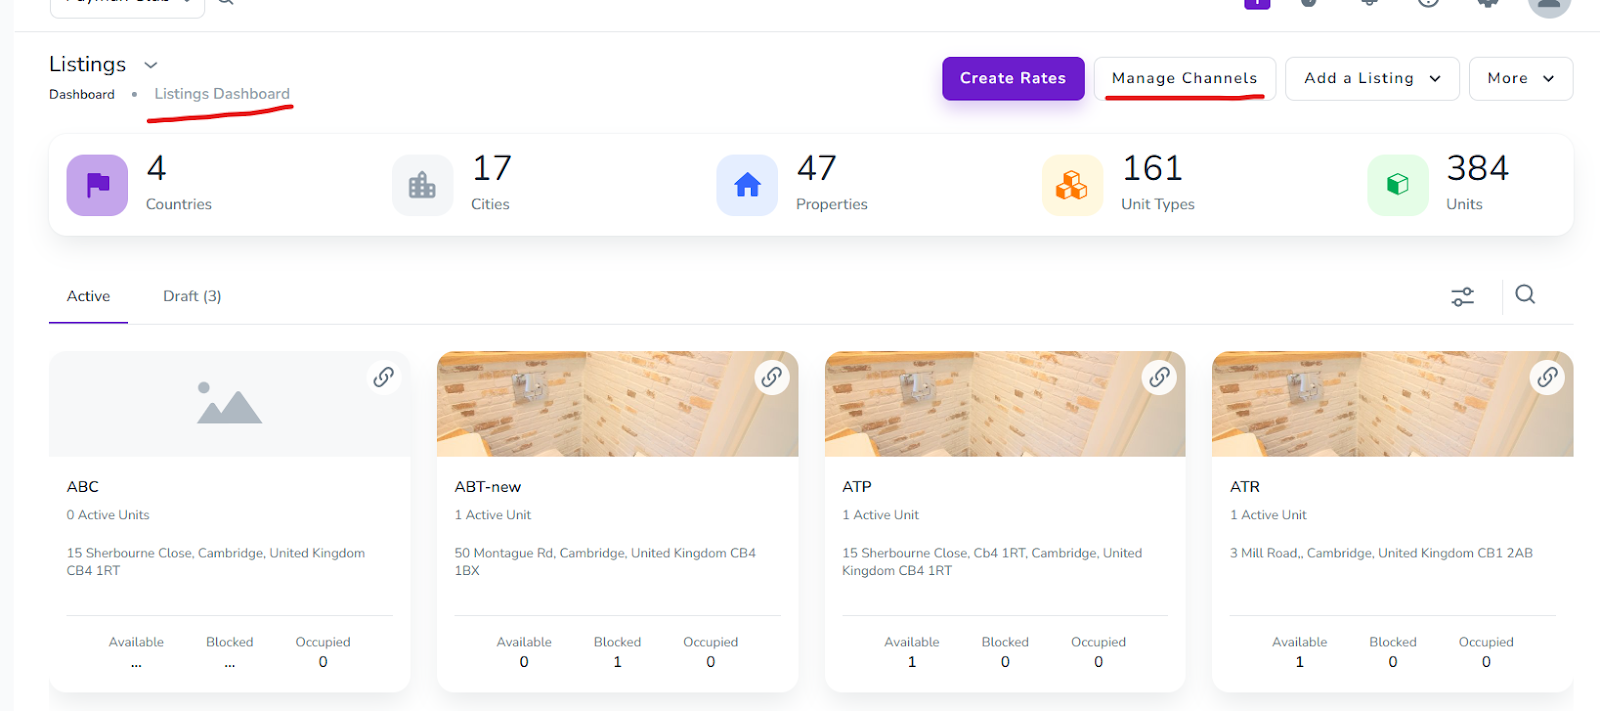
Note that only listings that are newly created and pushed from Zeevou can be mapped. Existing listings cannot be mapped to this channel.
Get Connected to Trip.com – Create a New Listing on Trip.com
Log in to your account at app.zeevou.com.
Go to Listings and click Manage Channels at the top right.
Select Trip.com and click Connect.
Follow these three steps to complete the connection:
Step 1: How It Works
Tick the Attestation box, then click Save & Next.
Step 2: Default Channel Markup
You can adjust the markup percentage for the base rate or add an additional fee. When done, click Save & Next.
Step 3: Further Instructions
If you already have a Trip.com account, select Yes, then click Connect.
Next, click Synchronize Your First Property.
You will be asked for a Trip.com Code Context.
For Trip.com, the Code Context is required. For properties connected through Rentals United, always use the code 1339.
Select Add New, enter the code 1339, and click Next.
Choose the desired listing for mapping from the list, then click Continue twice.
Notes:
If you see an alert icon next to your listing, contact Zeevou Support for assistance.
When your properties reach the Ready to Publish state, click Publish Properties.
A new customer
You need a Trip.com V2 account in order to connect to it. To create one, go to Trip.com V2 and set up your property with them before proceeding.
An existing customer on the channel
In order to activate the connection, you can contact your account manager at Trip.com V2 and request that they enable the connection with the STAAH or Zeevou channel manager.
Log in to app.zeevou.com and go to the Listings Dashboard.
Open your desired listing and click Manage Channels in the top-right corner.
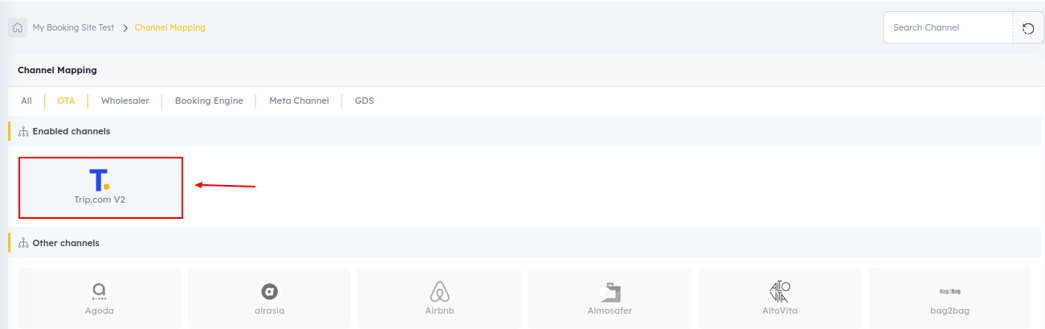
Select the Trip.com V2 logo from the pool list.
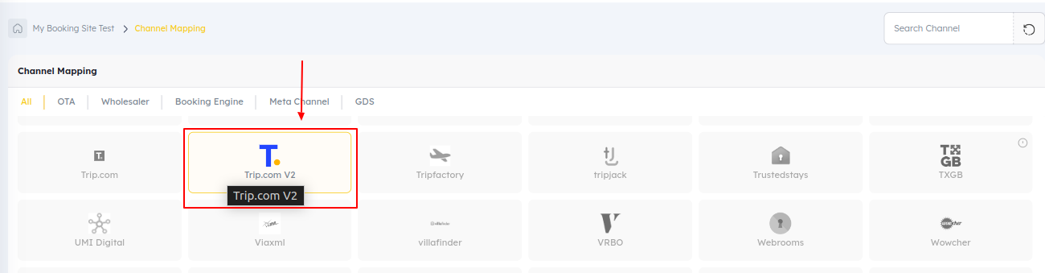
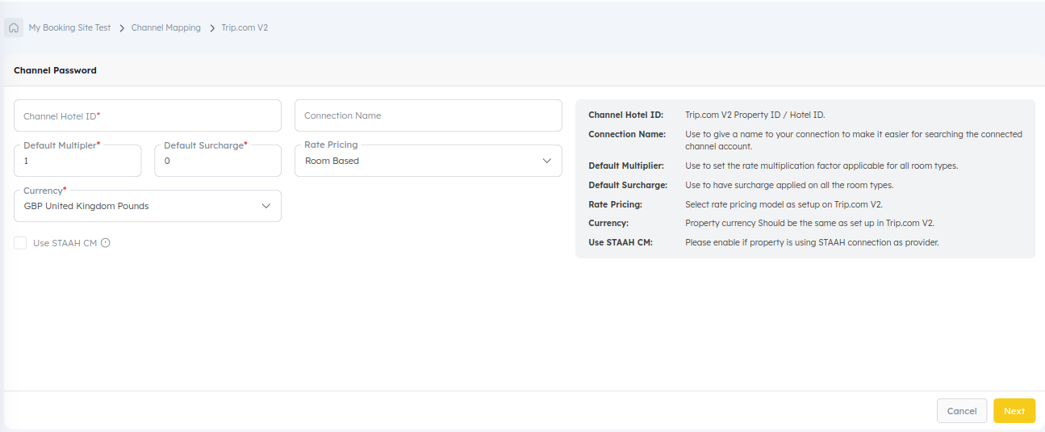
On the new page, fill in the following fields:
Channel Hotel ID: Paste the Trip.com Hotel ID you copied earlier.
Connection Name: Use this to give your connection a name, making it easier to search for the connected channel account.
Default Multiplier: Use this to set the rate multiplication factor applicable to all room types.
Default Surcharge: Use this to apply a surcharge to all room types.
Rate Pricing: Select the rate pricing model set up on Trip.com V2.
Currency: The property currency should be the same as the one set up in Trip.com V2.
Once the details have been updated, click the Save button, which will redirect you to the mapping screen.
On the mapping screen, you can see the list of Trip.com V2 room types and rate plans, along with the channel manager room types and rate plans.
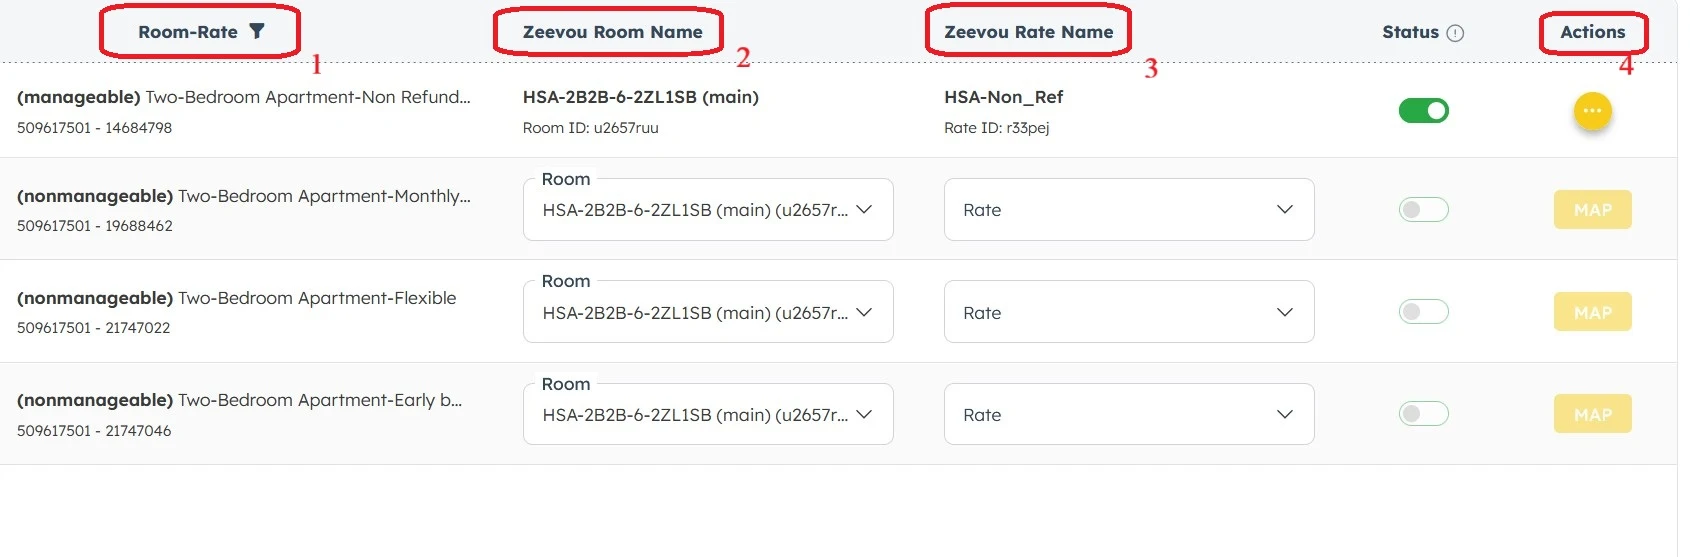
Trip.com Room–Rate Details: Select the room type and rate plan to map.
Zeevou Room Name: Select the room type to be mapped.
Zeevou Rate Name: Select the rate plan to map.
Actions: Click Map, and you will be asked to set up the mapping configuration for a specific rate plan.
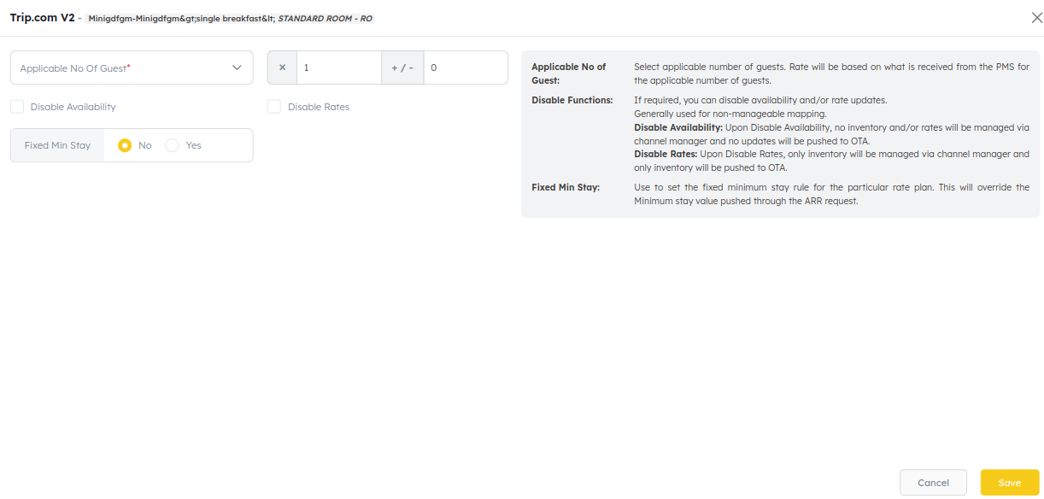
Save: Click Save to complete the rate plan mapping.
Once the mapping is complete, you need to activate the connection. Return to the channel connection details module, change the channel status to ACTIVE, and save. This action will automatically trigger a full update to the channel.
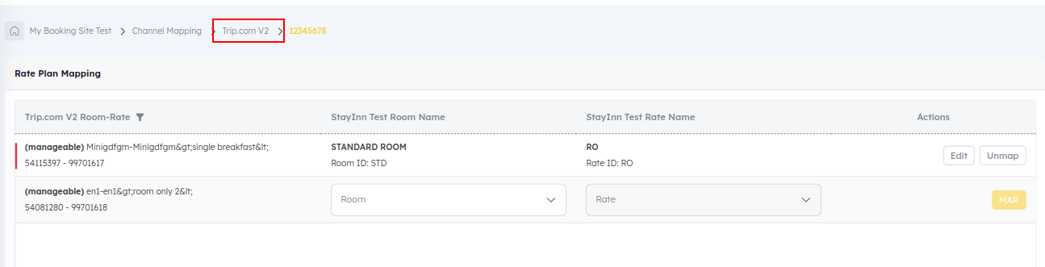
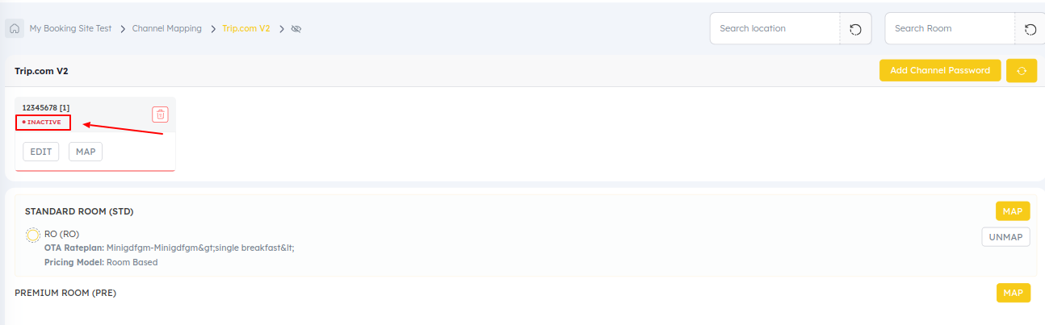
9. Click INACTIVE to activate the channel. Alternatively, go to Channel Mapping > click Trip.com V2.
10. Click Inactive > change the status to Active > Save.
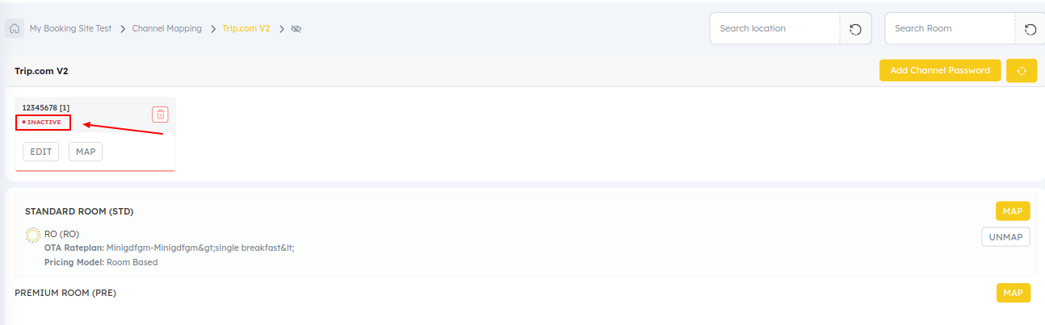
Existing Trip.com V2 listing: If the room is already mapped to Trip.com V2, you can see the mapping details. To map the room to an existing Trip.com V2 property ID already set up in the channel manager, select the Trip.com V2 property ID. It is possible to have multiple property IDs.
New Trip.com V2 listing: If the room is not linked to Trip.com V2, mapping details will not be displayed. If you want to connect multiple Trip.com V2 channel IDs under one property, click Link to New Location ID and proceed as usual. Alternatively, under the channel connection module, click Trip.com V2, click Add Channel Password, add the new Trip.com V2 ID details, and proceed with the mapping.

NOTE: Future bookings for Trip.com are not imported automatically. Please create them manually in Zeevou or use the Booking Import Instructions.
Want to learn how to connect Silverdoor to Zeevou? Read the guide here →
Need to disconnect your property from a connected channel? Read the guide here →
