Do you need this?
✅ Yes, if you'll be creating multiple listings (saves time by setting rules once)
❌ No, if you only have one listing → Skip - you'll configure this when you create your listing
Why do this first? Any listings you create after this will automatically inherit these settings. Set it once, save time later.
Note: This won't affect listings you've already created - only new ones.
1. House Rules
Minimum age of lead guest (if required)
Smoking/pets policies
2. Check-In & Check-Out Time
Standard check-in time (e.g., 3:00 PM)
Standard check-out time (e.g., 11:00 AM)
Early/late fees (optional)
3. Security Deposit Timeline
Deposit amount (if required)
When to pre-authorize and release
4. Cleaning
Set the default number of nights between cleans for long-term stays. The system will automatically create the appropriate number of cleaning tasks and schedule them evenly throughout the guest's stay.
5. Check-in & Check-out Instructions per Method
Default instructions for keypad/lockbox/meet & greet
You can customise per listing for your guests later.
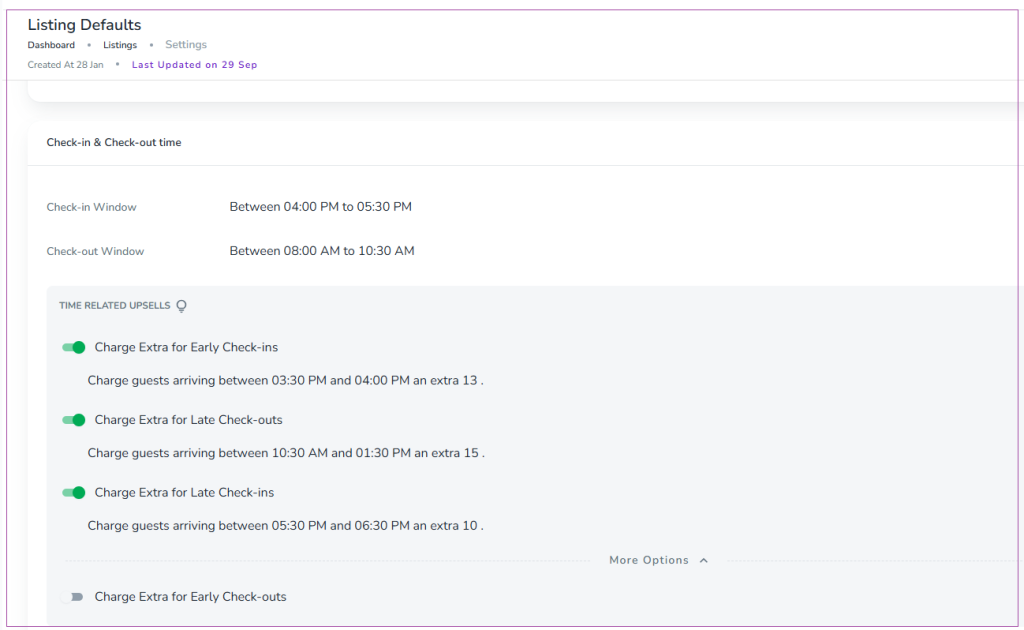
To do so, log into app.zeevou.com and go to Listings. On the Listings Dashboard, click the More arrow and select Set Listings Defaults. Then, you will be redirected to the Settings page. On the Check-in & Check-out time card, you can manage options for check-ins and check-outs by clicking the pencil and setting your desired time. You can also turn on/off the toggles of Charge Extra for Early or Late Check-in or Check-outs. So, when the guests select their desired Check-in and Check-out times in the Booking Confirmation Process, they will be able to see the fees for paid time slots and select them.
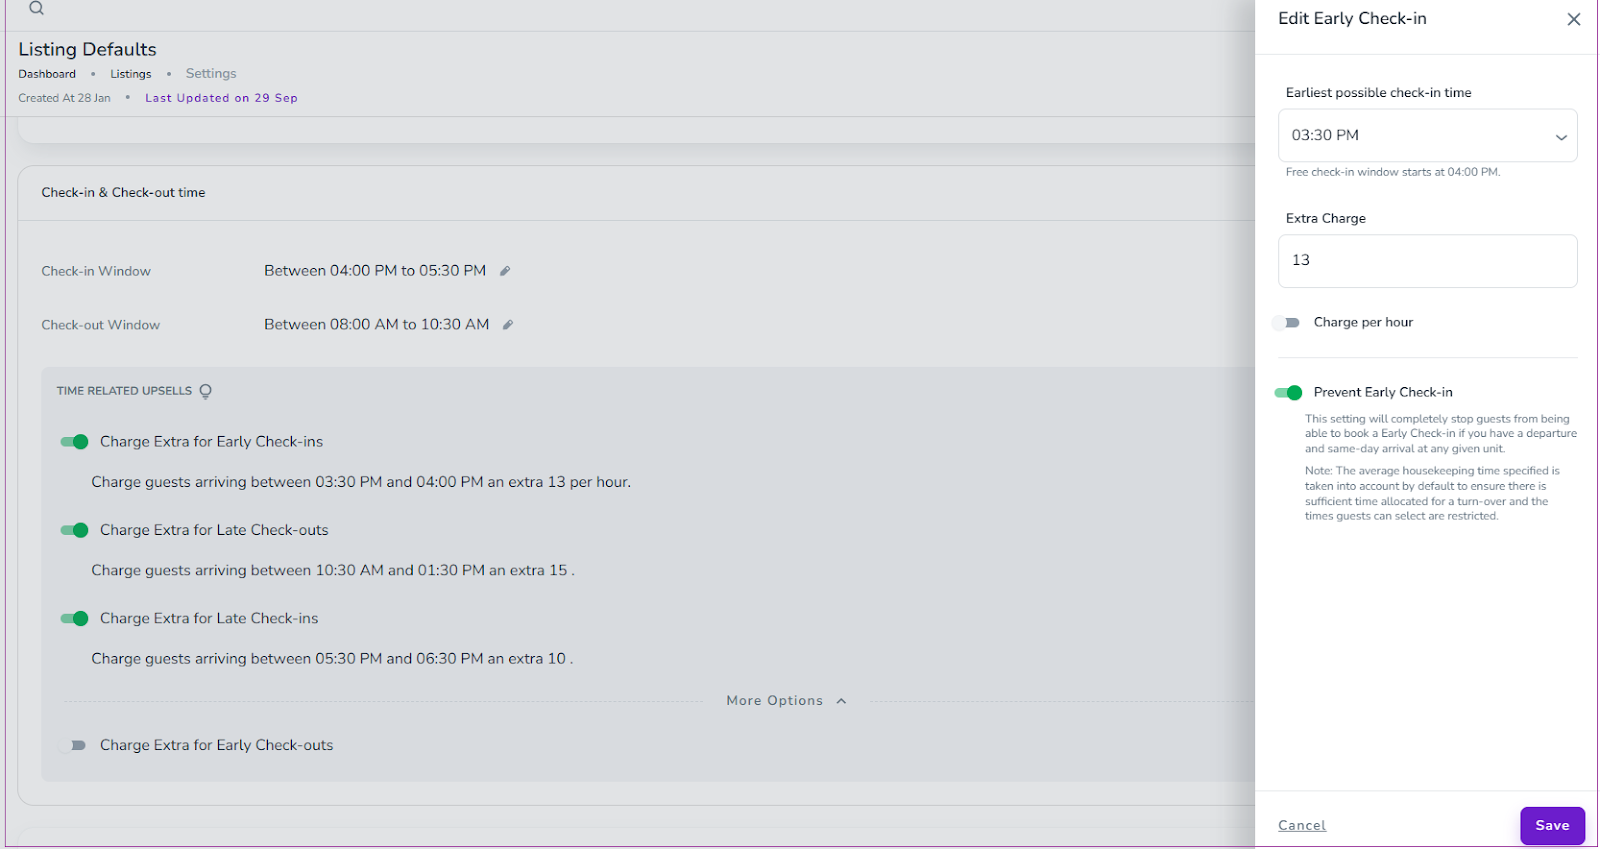
To prevent Early Check-in or Late Check-out, you can click on the pencil in front of the toggle of Charge Extra for Early Check-in or Late Check-outs. Then, a drawer opens in which you can turn on the Prevent Early Check-in toggle and click Save. This setting will completely stop guests from being able to book an Early Check-in or a Late Check-out if you have a departure and same-day arrival at any given unit.
Note: The average housekeeping time specified is taken into account by default to ensure there is sufficient time allocated for a turn-over, and the times guests can select are restricted.
However, you can override the default at the Property level. To do so, navigate to Listings, Property level, under Policies tab, on the Check-in & Check-out time card, and click on the pencil to edit.
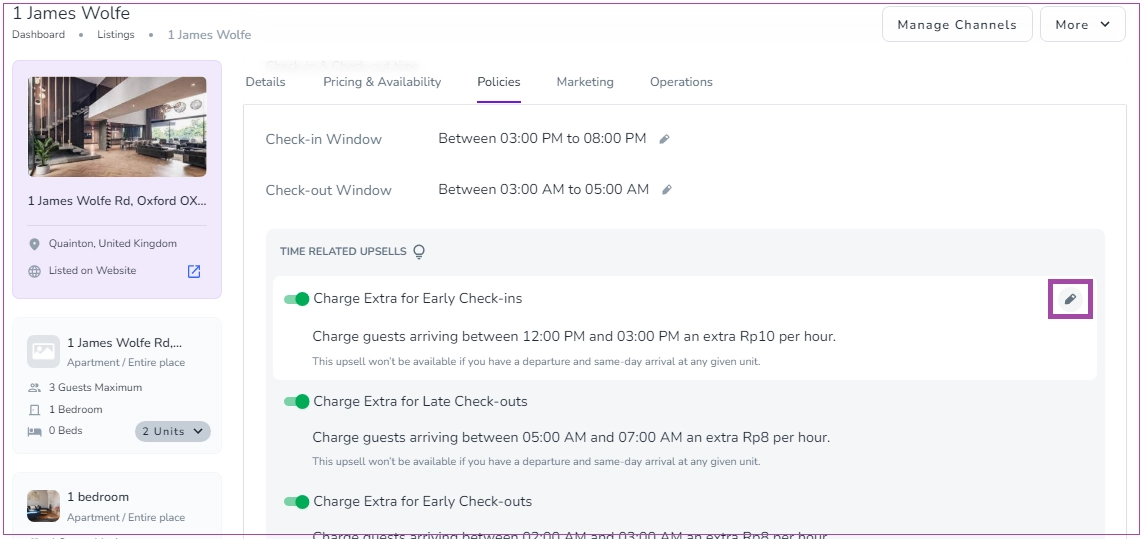
Note that when Prevent Early Check-ins is enabled, and a booking’s departure date coincides with the arrival date of the next booking, the system does not go back to the standard earliest possible check-in time; instead, it calculates the earliest free check-in time, ensuring that this time does not conflict with the previous booking’s departure plus the configured housekeeping duration.
Go to Listings → More → Set Listing Defaults

Configure your preferred settings
Click Save
When you update a listing default, a pop-up will appear asking where you want the changes to be applied. You can choose one of the following options:
New listings only – Applies the updated default only to listings created in the future.
Existing listings – Applies the updated default to selected existing listings.
Both new and existing listings – Applies the updated default to both future listings and the selected existing listings.
If you choose Existing listings, a multi-select tree will be displayed, allowing you to:
Select specific existing listings.
Select entire groups of listings.
Use Select All to apply the changes to all existing listings at once.
