Before adding properties to Zeevou, make sure you read through the following, if any of them apply to your portfolio:
List Your Properties using one of the 3 methods outlined below
Open each Unit Type and add the bedroom and bathroom configuration for each.
Make sure to add enough beds so that the total number of sleepers matches the maximum guest capacity you have specified, or you will face issues when connecting to channels.
There are 3 ways in which you can list your properties on Zeevou. Feel free to select the one you prefer, or mix and match for different properties in your portfolio.
If your property is already listed on Airbnb, you can quickly add it to Zeevou through our Airbnb Import Option, which scrapes the listing that a guest sees and pulls through all the photos, descriptions, and amenities. Please note that this step does NOT map the calendar. You will be talked through how to do so in future steps.
To get started with importing your listing from Airbnb, click here.
If you haven’t listed your property on Airbnb, choose one of the following methods.
Use our Listing Creation Wizard to easily list your properties on Zeevou.
To get started with manually creating your listings one by one, click here.
If you have a large portfolio, you may wish to use the option below.
3. Bulk Import Listings via Spreadsheet
You can import your entire portfolio in one go by using a spreadsheet. You will be able to upload images and select amenities and other details for each listing once imported.
To get started with uploading your Listings into Zeevou via a spreadsheet, click here.
This process only scrapes data from your Airbnb listings. You don’t need to be logged in to your account to proceed with this. It will not affect any data on your account, and it will not create an integration to Zeevou. Once the listing has been imported to Airbnb, you will have the option to map the listing fully to Airbnb and any other channels you wish to integrate through Zeevou.
On the Listings dashboard, click Add a Listing on the top right corner.
Select Import Airbnb Listings.
Log in to Airbnb.
Open the desired Airbnb listing.
Click the View mode of your listing.
Click the Share button to display the public listing URL.
Copy your public Airbnb URL and paste it in the open window. For example, (https://www.airbnb.co.uk/rooms/1318754333696514746)
Select “As a new Listing.”
Click Import.
You will be taken to the Listing Import Wizard to add a few additional details that we can’t pull from Airbnb.
Step 1: Location
Enter your listing’s Address, City, and Postcode.
Confirm the pin location by ticking the checkbox.
Click Next.
Step 2: Listing Info
Fill in your listing’s basic information:
Listing Type (Optional)
Unit Type Category
Internal Name (with character limit)
Check-in & Check-out Method
Number of Units
Unit Names
Click Next.
Step 3: Marketing Info
Edit or add the Marketing Headline and Description (Optional).
Click Next.
Step 4: Listing Images
Click Upload Images to insert new images.
Edit or remove existing images and captions by hovering over each image and clicking the gear or bin icon.
Click Next.
Step 5: Listing Amenities
Click Add Amenities and then the search icon to add the amenities that are available in all Units of the Listing.
Remove amenities by hovering on them and clicking on the bin icon.
Click Next.
Step 6: Pricing
Fill out pricing details for your base price. You will be able to override these manually later on or integrate a dynamic pricing tool.
Currency
Weekday Price
Weekend Price
Max Capacity per Unit
No of Guests included in price
Additional fee for extra guests (this shows up if the number of guests included in the price is lower than the max capacity)
Optional toggles: Security Deposit, Cleaning Fee.
Click Next.
Step 7: Manage Brands
Pick one or more Brands to publish the Listing on their websites.
Select a Default Brand to be used for Bookings that come from Channels.
Click on Finalise Activation, and the listing appears under the Active section on the landing page.
If you want to save the listing in drafts, click Save draft and activate later. To edit the drafted listings, scroll to the right to Draft tab while on a desktop.
Click Drafts on the Listings.
Select your listing and click Complete.
IMPORTANT NOTE: Go to Listings, choose the property, open the Details Card (under each unit type if there are multiple), click Add Rooms and Spaces at the bottom of the page, enter the bedroom and bed count, and Save.
Bedrooms must be added to match your guest capacity before mapping the property to channels.
Managing Multiple Unit Types at a Property
If you run multiple Unit Types at this Property, follow the steps below to import a second Airbnb Listing as an additional Unit Type within the same Zeevou Listing.
On the Listings dashboard, click Add a Listing in the top right corner.
Select Import Airbnb Listings.
Copy your Airbnb URL/ID and paste it in the open window.
Choose As a New Unit Type under an existing Listing.
Select your desired property from the drop-down menu (active properties only).
Click Import.
Once you are done with listing all your properties, proceed with Setting Your Rates.
This guide provides a straightforward process to create a listing in Zeevou. By following the steps outlined, you can efficiently set up and activate your property, ensuring all essential details are recorded accurately.
Log into app.zeevou.com.
Navigate to Listings on the main menu.
Click the dropdown menu next to Add a Listing at the top right.
Select Create a Listing.
Note: If your listing is a complex (includes more than one type of unit), create the first unit type now. You can add other unit types later on the listing page.
Step 1: Enter Location Details
Fill in your listing address: َAddress, City, Postcode, and Country.
Confirm the pin location on the map.
Click Next.
Step 2: Add Listing Information
Insert the basic information:
Listing Type (Optional)
Unit Type
Internal Name
Check-in & Check-out Method
Number of Units
Unit Names
Click Next.
Step 3: Listing Information
Insert the Listing Headline and Description (Optional) for your direct booking website.
Click Next.
Step 4: Upload Listing Images
Upload images for your listing.
Adjust the settings for each image as needed.
Click Next.
Step 5: List Amenities
Add the amenities available in all units of this listing.
Click Next.
Step 6: Set Pricing
Fill out the pricing details:
Currency
Weekday Price
Weekend Price
Maximum Capacity per Unit
No of Guests included in price
Optional toggles:
Minimum Stay
Maximum Stay
Security Deposit
Cleaning Fee
Click Next.
Step 7: Manage Brands
Pick one or more Brands to publish the Listing on their websites.
Select a Default Brand to be used for Bookings that come from Channels.
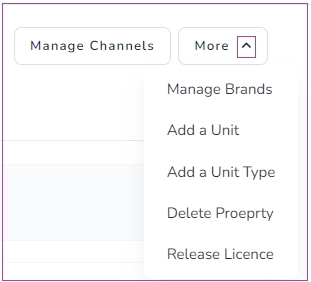
To create a Unit Type, open the Listing and click More and select Add a Unit Type.

Then, you are directed to a two-step wizard.
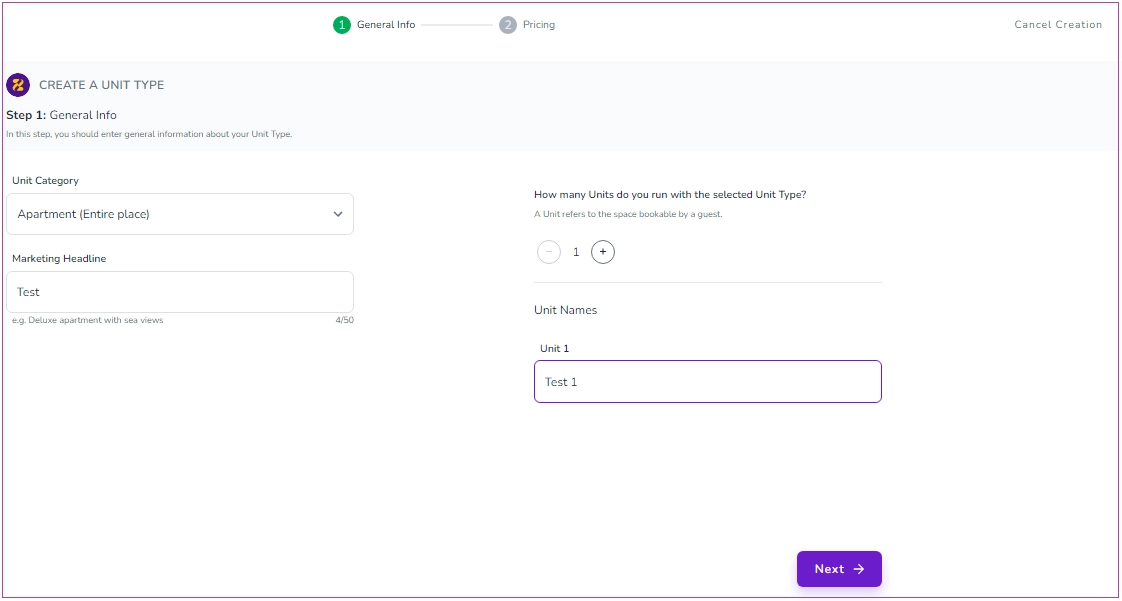
Step 1: General Info
You should insert General Info, including Unit Category, Marketing Headline, and Unit Name. Then, click Next.
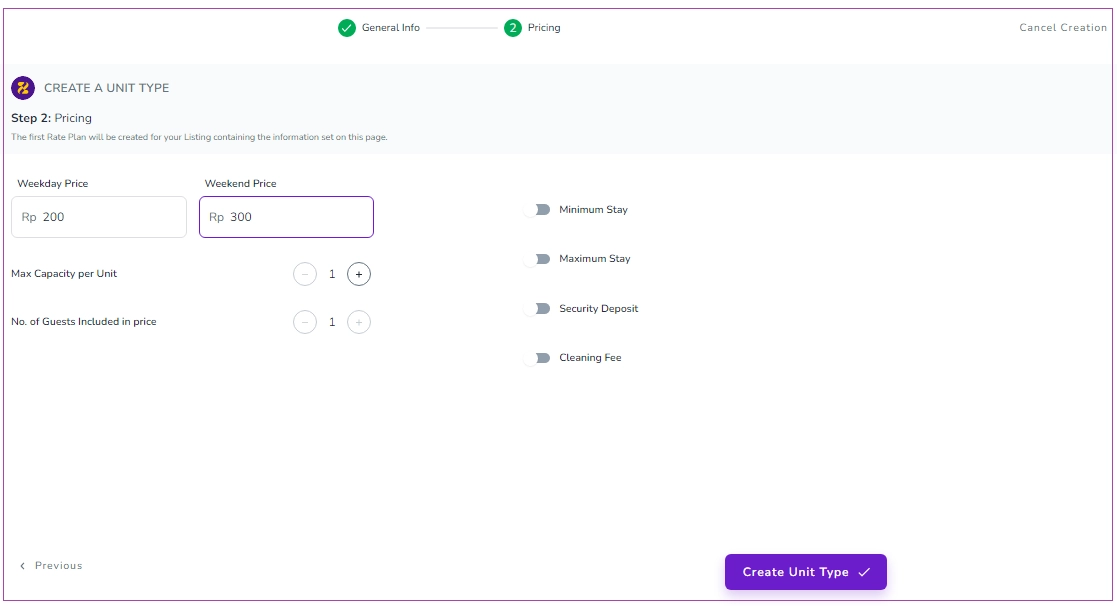
Step 2: Pricing
You should insert Prices for Weekday and Weekend. You can also enable other toggles if you wish. Finally, click Create a Unit Type.
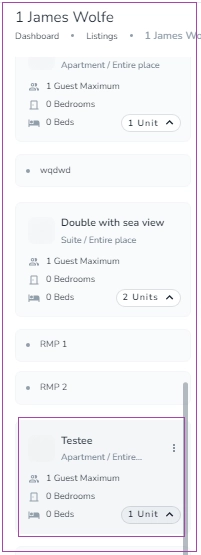
Your created Unit Type will be added to the Listings page.
Adding Another Unit
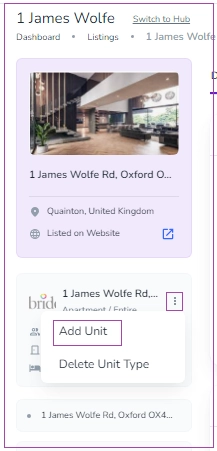
In order to create a Unit, go to Listings, and if your listing is a Single Unit (A Property with one Unit Type and one Unit), click More and select Add a Unit.
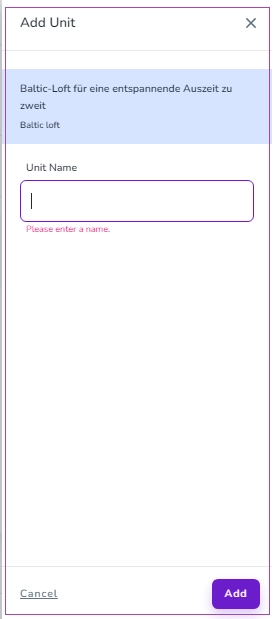
Then, a drawer opens in which you can enter the Unit name and click Add.
If your listing is a complex, click the three dots of Unit Type and select Add a Unit, and continue as explained above.
Finalising Your Listing
Click Finalise Activation, and the listing appears under the Active section on the landing page.
If you want to save the listing in drafts, click Save draft and activate later. To edit the drafted listings:
Click Drafts on the Listings.
Select your listing and click Complete.
By following these simple steps, you will have your listing created and ready to attract bookings on Zeevou.
IMPORTANT NOTE: Go to Listings, choose the property, open the Details Card (under each unit type if there are multiple), click Add Rooms and Spaces at the bottom of the page, enter the bedroom and bed count, and Save.
Bedrooms must be added to match your guest capacity before mapping the property to channels.
Once you have listed all your properties, proceed with Setting Your Rates.
Bulk Listing Import options let you upload an Excel file to your account, and the system will create single-unit properties based on the details you enter in the file.
Step 1: Download a copy of the Bulk Listing Import Template from here.
Step 2: Use the dropdown option of the template to fill all the fields for each property.
NOTE: Only the WIFI Name and WIFI Password can be left empty.
Step 3: After inserting all details in the template file, click on the File -> Save As option and select CSV format.
Note: Please make sure you have not set any signs or symbols other than alphabetic characters and numbers for the name fields.
Step 4: In Listings-> Properties -> Bulk Import Listings, click the Import File button.
Step 5: In the opened pop-up, click the Choose button, find the prepared file, and click the Submit button.
Step 6: After you import the file, the system will validate data and send an email to the email address you have logged in with.
NOTE: If the system faces any errors, you will be informed via email. Then, you can fix the error and try to import the file.
NOTE: The rate plan of a Unit Type, created through List Import, will be Nightly and applied only to the Website Booking Engine and Manual bookings by default. You can, later on, change it to apply to the channels too.
NOTE: The Unit of the Property, created through Bulk Listing Import, will be inactive by default. You need to manually activate it.
Below is a full list of all the rules that need to be met by the listings in the spreadsheet upload:
'Name can not be empty.'
'Name should be unique.'
'Name should not contain any special characters.'
'Internal name can not be empty.'
'Internal name should not contain any special characters.'
'Internal name should be unique.'
'City can not be empty.'
'City should not contain any special charachters.'
'Country can not be empty.'
'Country should exist in system.'
'Default currency can not be empty.'
'Currency should exist in system.'
'Door number can not be empty.'
'Door number should not contain any special characters.'
'Unit category can not be empty.'
'Unit category should exist in system.'
'Unit type marketing name can not be empty.'
'Unit type marketing name should not contain any special charachters.'
'Unit type marketing name should be unique.'
'Maximum capacity can not be empty.'
'Inputted for maximum capacity value should be numeric'
'Maximum capacity can't be lower than 1.'
'At least one check-in type is necessary'
'Check-in type should exist in system.'
'Brand name can not be empty'
'Brand name should exist in system.'
'Security deposit can not be empty'
'Inputted value should be numeric.'
'Security deposit can't be lower than 0.'
'Bedrooms can not be empty'
'Bedrooms value should be numeric.'
'Number of bedrooms can't be lower than 0'
'Bathrooms can not be empty'
'Bath rooms value should be numeric.'
'Number of bathrooms can't be lower than 0'
'Min stay can not be empty'
'Min stay value should be numeric.'
'Number of min stay can't be lower than 1'
'Max stay can not be empty.'
'Max stay value should be numeric.'
'Number of max stay can't be lower than 1'
'Min guest can not be empty.'
'Min guest value should be numeric.'
'Number of min guests can't be lower than 1'
'Default rate can not be empty.'
'Default rate value should be numeric.'
'The amount of the default rate can't be lower than 1.'
'Number of minimum guests can not be greater than maximum capacity.'
'Number of min stay can not be greater than max stay.'
IMPORTANT NOTE: Go to Listings, choose the property, open the Details Card (under each unit type if there are multiple), click Add Rooms and Spaces at the bottom of the page, enter the bedroom and bed count, and Save.
Bedrooms must be added to match your guest capacity before mapping the property to channels.
Once you have listed all your properties, proceed with Setting Your Rates.
