You can customise your website from the Websites section in Zeevou.
You can edit design, pages, blog posts, SEO, and layout.
This guide shows you how to update your website step by step.
Go to Websites in the main menu
Click Website Settings
You will see three tabs:
General Settings
Pages
Blogs
Go to General Settings to start designing your website.
There are six tabs to work with:
Theme and Design
Header
Footer
Site Management
Chat Via WhatsApp
Settings
Theme and Design
Fonts & Colours:
Edit Font, Theme Colour and Main CTA Colour.
Choose colours that match your website’s mood and ensure readability.
Brand Identity:
Add a Slogan, Logo, and Favicon. Don’t have a logo? Contact us at [email protected] for a quote on logo design.
Upload your Google Logo (Representing your brand identity in the Google Hotel/Vacation Rentals.)
Website Visual Style: Select the style that best matches your brand. The structure will remain consistent across styles. There are three styles of Edgy, Balanced and Rounded.
Global CSS: Override your website’s default design with custom CSS code for a personalised look and feel.
Header
Header Menu:
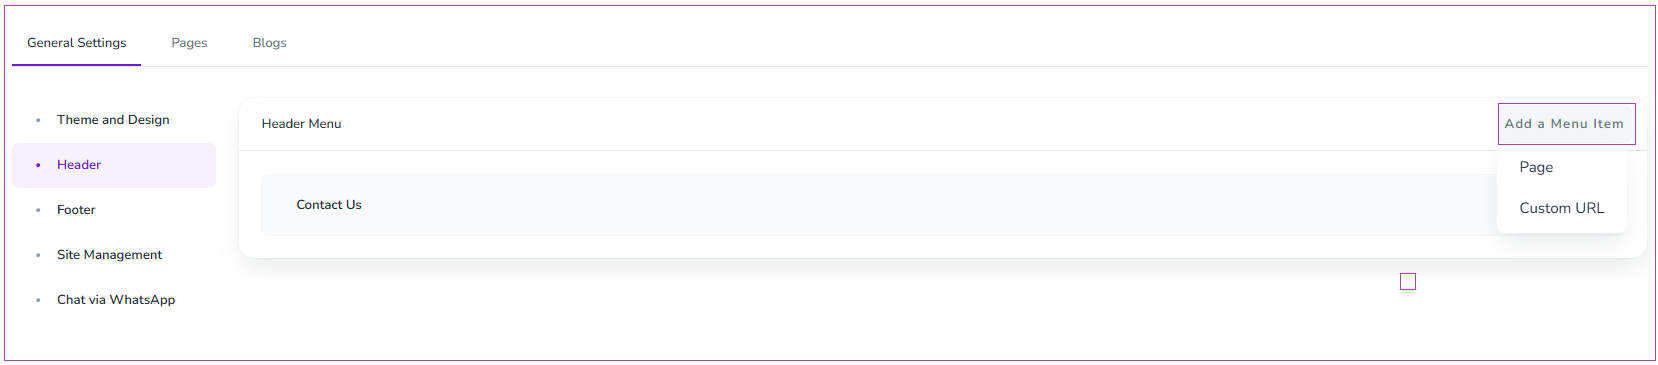
Click Add a Menu Item to add a Page or Custom URL.
Edit existing items by clicking the pencil icon.
There are two ways to Add a Menu Item. By clicking Add a Menu Item, you can select Add Page or Add Custom URL. Via Add Page, you can add the pages that are already created in the system easily. By Add Custom URL, you can add either Zeevou Pages (that can be added via Add Page easier), or other pages.
Footer
Copyright Statement : Add a Copyright Statement (to be displayed in the website footer, indicating that others need your permission to use or reproduce your website’s content).
Footer Menu: Click Add a Menu Item to add a footer menu the same way as in the Header.
Newsletter Subscription: Allow visitors to input their name and email address to stay informed about your marketing news.
Images in the Footer: Upload images like awards and certificates to build trust among your audience
Custom URL Footer: Enhance user experience and navigation by adding a footer menu to your website. To do so, click oAdd a Menu Item and select Custom URL.
Site Management
Domain Settings: Set and edit Website URL and Custom Domain.
Direct Booking Process Settings: These settings apply to the page where guests finalise their reservations on your website.
Specify which page the guest should be redirected to.
Enable Display Mobile Number field on the form.
Enable Email Address Verification.
Google Tracking and Analytics: Insert Tag Management ID, Analytics Tracking Code, and Search Console Verification Code.
Site SEO includes:
Sitemap: A sitemap is a file that details your website’s structure. This helps search engines understand your website better. Simply copy and paste the URL into the Google Search Console to use it.
Same as Links: Enhances your Website’s SEO by adding links similar or relevant to your site. Added links will be hidden from your visitors while helping to improve search engine results.
Search Widget: Configure search functionalities on your website by using iFrame code.
Chat Via WhatsApp
Activate WhatsApp Chat:
Turn Show on Website toggle on, click Go to Brand Settings.
Choose your preferred brand if you run multiple brands.
Under Contact Details tab, on the Contact Info card, click Add Info and select phone number to insert. Finally, click Add. On the Social Media card, click Add Social Media to select your desired media which will be displayed on Automated Messages and Websites.
Come back to the Website section and toggle the feature to display the chat widget on your website.
Settings
General Settings: Select and edit your preferred website language from the available options.
Here is the full list of supported languages:
Name | Native Title
English | English
German | Deutsch
French | Français
Russian | Русский
Spanish | Español
Italian | Italiano
Portuguese | Português
Dutch | Nederlands
Turkish | Türkçe
Greek | Ελληνικά
Arabic | العربية
Polish | Polski
Romanian | Română
Croatian | Hrvatski
Hungarian | Magyar
Czech | Čeština
Indonesian | Bahasa Indonesia
Thai | ไทย
Japanese | 日本語
Hindi | हिन्दी
Albanian | Shqip
Ukrainian | Українська
Featured Amenities: On Featured Amenities card, click Add Featured Amenity. The added amenity will be displayed on the property cards and the property page on the website.
Creating Single Pages
Go to the Single Pages tab and click+ New Page
Insert Heading, Body, and optionally a Featured Image
Note that a featured image is the main visual representing a post, page, or article on a website. It appears in previews, thumbnails, and social media shares to enhance engagement
Click Create & Publish
Click the three dots on each item to Modify Settings
Listings, Cities, and Countries
See your published and unpublished Listings and add new Cities or Countries
Click the three dots on each item to Modify Settings
Customise content and images for each city or country
Modify Settings
Click the three dots on each created page to Modify Settings or Delete
Add content, images, and manage SEO settings
Use Visual or HTML Editor for content
Note that the default is Visual Editor. If you want to add HTML codes to your page content, you can switch to HTML Editor for editing the Description
Click + New Blog Post to create a post.
Use the three dots next to each post to Modify Settings or Delete.
Categories
Add a new category by clicking + New Category.
Use the three dots next to each category to Modify Settings or Delete.
Tags
Add a new tag by clicking + New Tag.
Use the three dots next to each tag to Modify Settings, Rename, or Delete tags.
Note that you won’t see the changes reflected immediately in Google search results, as it can take several hours for updated information to appear.
Homepage Slider
You can have slider for your home page background. In order to add images to be shown as slider for the home page please go to Zeevou website, Websites -> Pages -> Single Pages-> Home page and click on three dots to Modify Settings. Then click on Upload Images. If you add more than one image under home page images you will see an image slider on the home page.
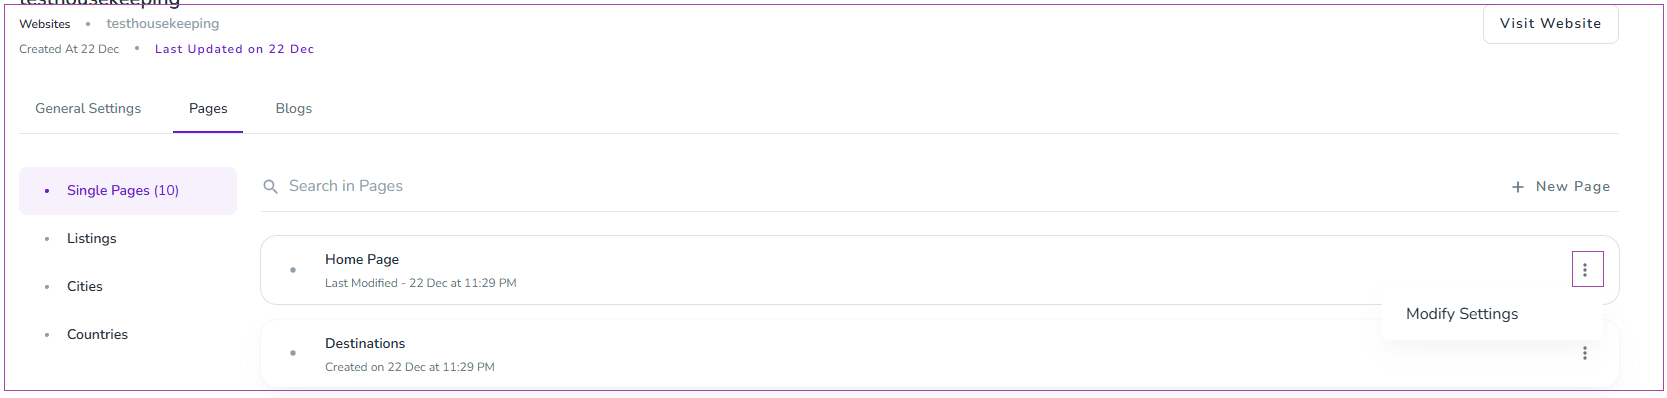
Edit a City Page
You can go to Websites-> Pages-> Cities and click on three dots of your desired city to Modify Settings.
On the open page, you can enter or edit the name and description by clicking the pencil on the City Content card. You can also add more images by clicking Upload Images on the Images card.
Edit a Country Page
You can go to Websites-> Pages-> Countries and click three dots of your desired country to Modify Settings.
On the open page, you can enter or edit the name and description by clicking on the pencil on the Country Content card. You can also add more images by clicking Upload Images on the Images card.
Add a Menu Item
To do so, go to Websites -> General Settings tab-> Header card. There are two ways to Add a Menu Item. By clicking on Add a Menu Item, you can select Add Page or Add Custom URL. Via Add Page, you can add the pages that are already created in the system easily. By Add Custom URL, you can add either Zeevou Pages (that can be added via Add Page easier), or other pages.
Note that if any of them have already been there, you can edit them by clicking the pencil.
Add a Blog Post
To add a blog post, go to Websites -> Blogs tab and click on Create a Blog Post.
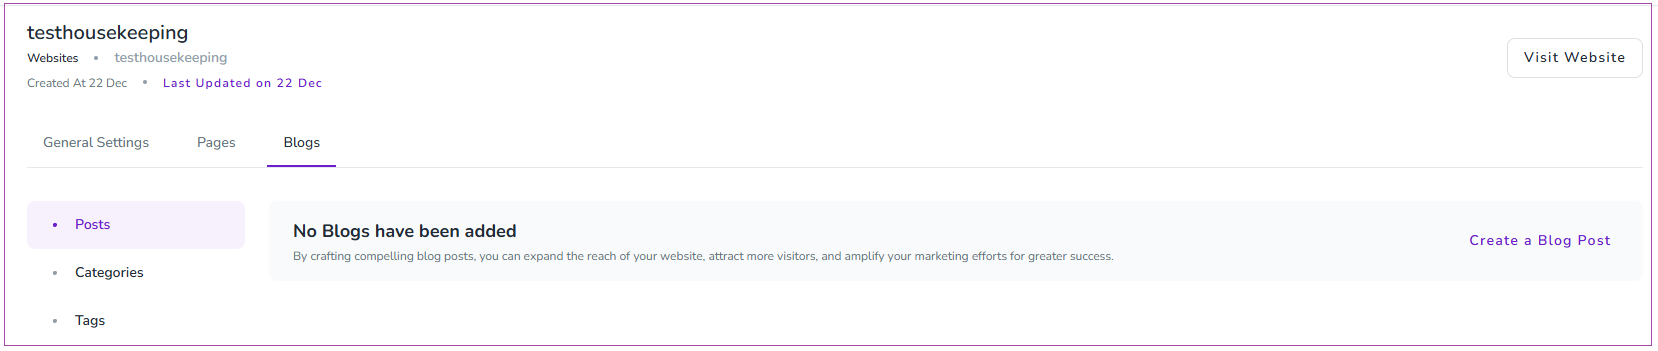
On the open page, you can enter Post Content, Blog Post Details and Settings, Finally, click Save & Close.
Zeevou’s Custom Website Builder lets you design every page of your website using a simple drag-and-drop editor. You can add, move, rearrange, or remove sections to match your brand—no developers or external tools needed.
The Custom Website Builder is an organization-level add-on.You can activate it from either location:
Websites page → select a website and activate the add-on
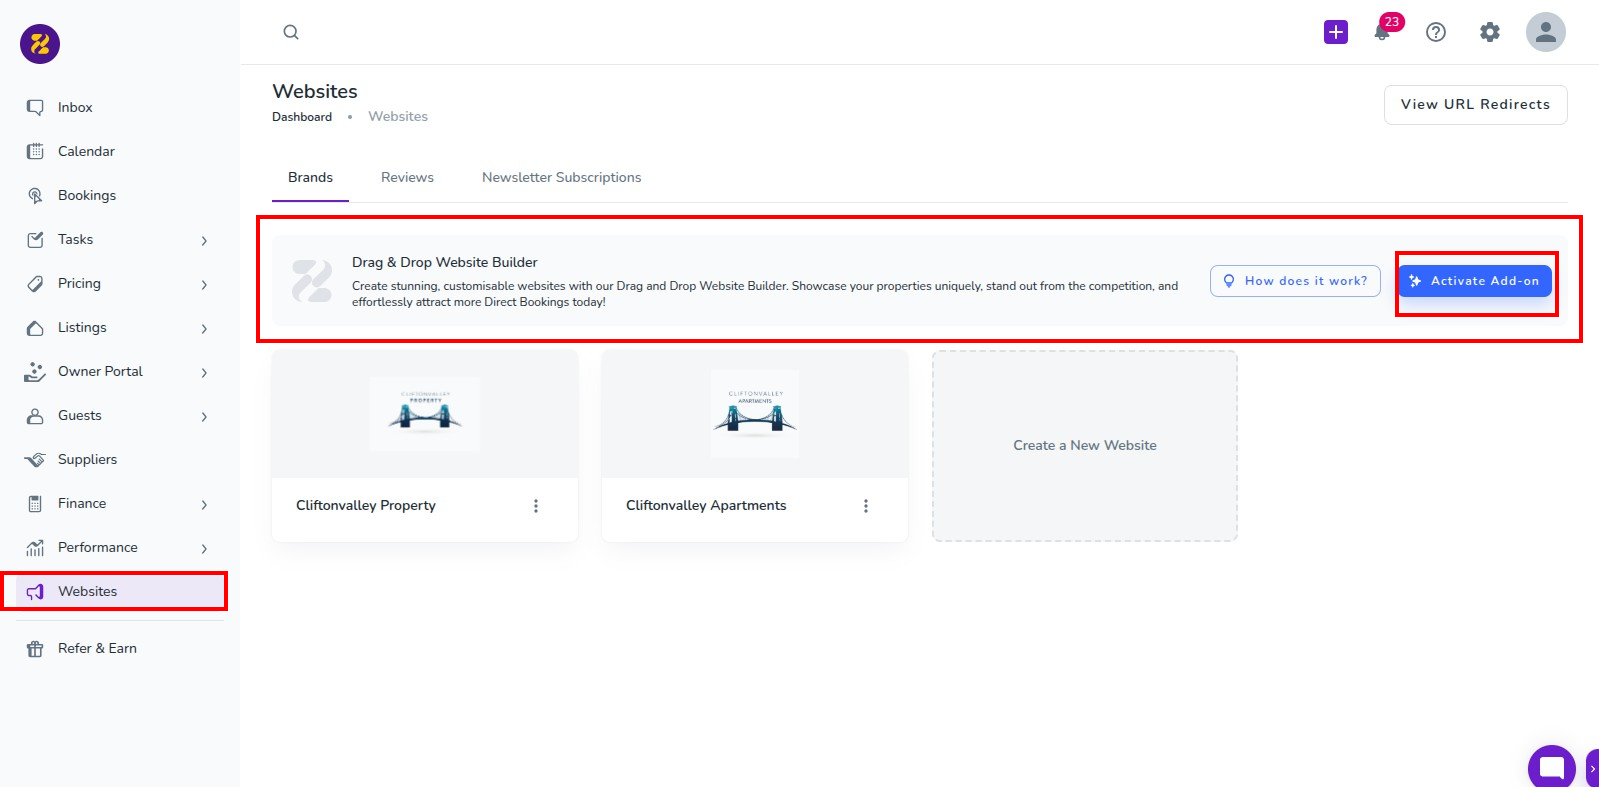
Account → Add-ons tab
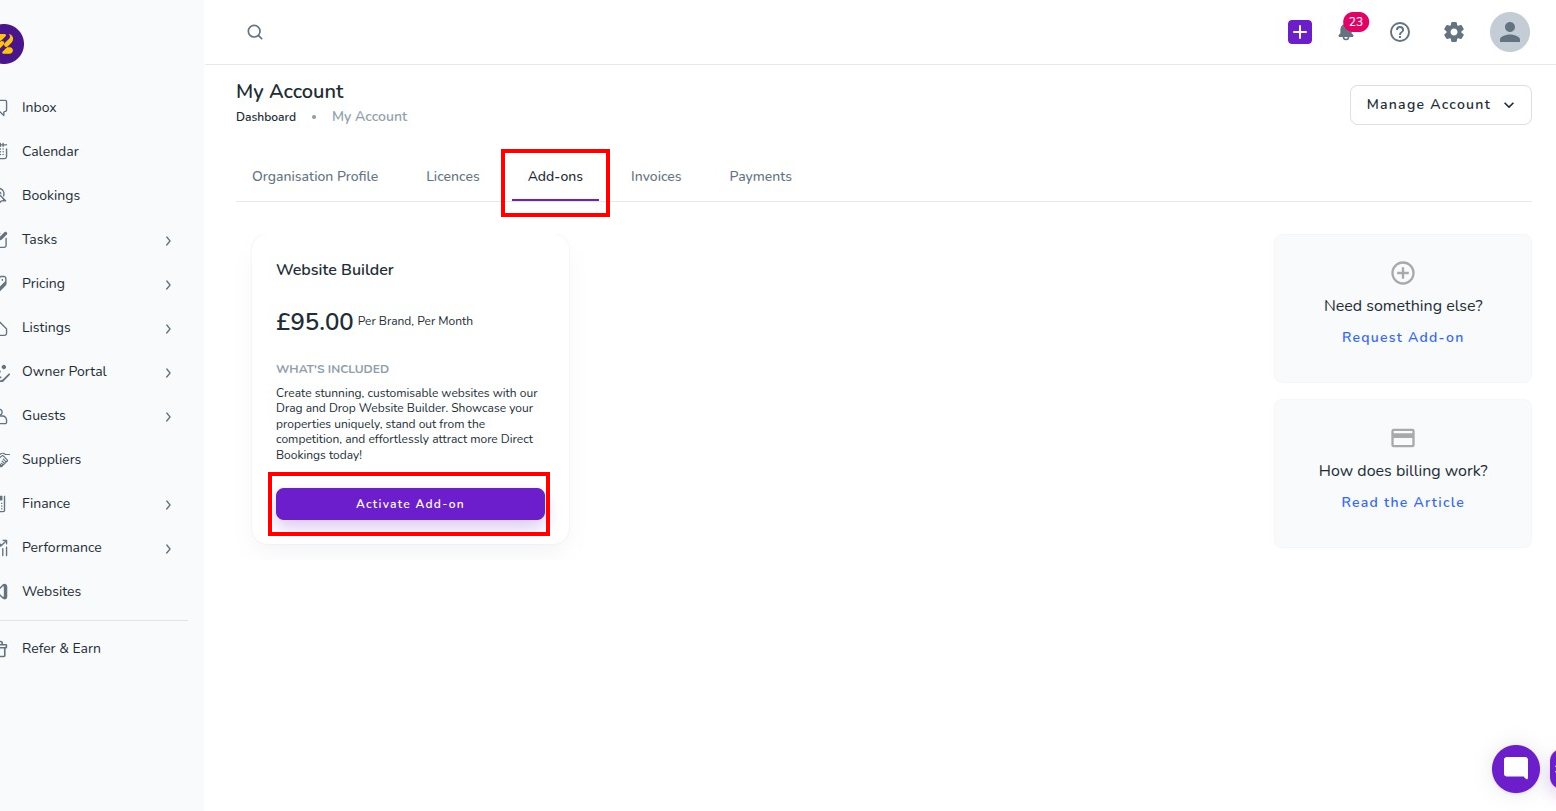
Note: If your organization has multiple brands, the add-on must be purchased for all brands. (In the future, it will be available per brand.)
Once activated:
The Customize the Design button is unlocked
The button appears at the top of each Website Settings page
Clicking it opens the Website Builder
Open Customize the Design
Select the page you want to edit
Drag and drop sections to redesign the layout
Add or remove design blocks as needed
Preview your changes
Click Publish to make them live
Left panel: Add new blocks and sections
Right panel: Edit settings and content with styles
