There are six icons on the top right of the landing page (Left to Right):
Booking
Notifications
Settings Icon
Profile
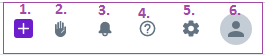
Booking Icon
When you hover over the Plus icon (+), the Create a Booking name appears.
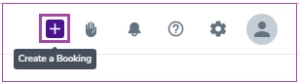
If you click on the plus icon (+), a box will open in which you can create a booking.

Get to know our top right landing page icons
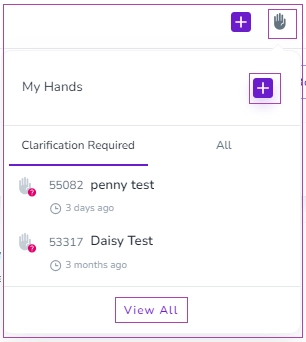
Raise a Hand
When you click on the Hand icon, a window will open in which you can view My Hands in two groups: Clarification Required and All. In the opened window, there is also a plus sign which is not practical. Instead, use the message button at the bottom-right corner of the page to request assistance .You can click on View All to view more hands.
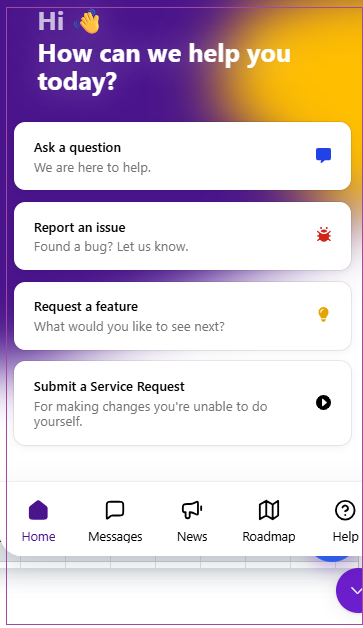
When you click on the Message button, a window will open in which you can Ask a question, Report an issue, Request a feature, or Submit a Service Request.
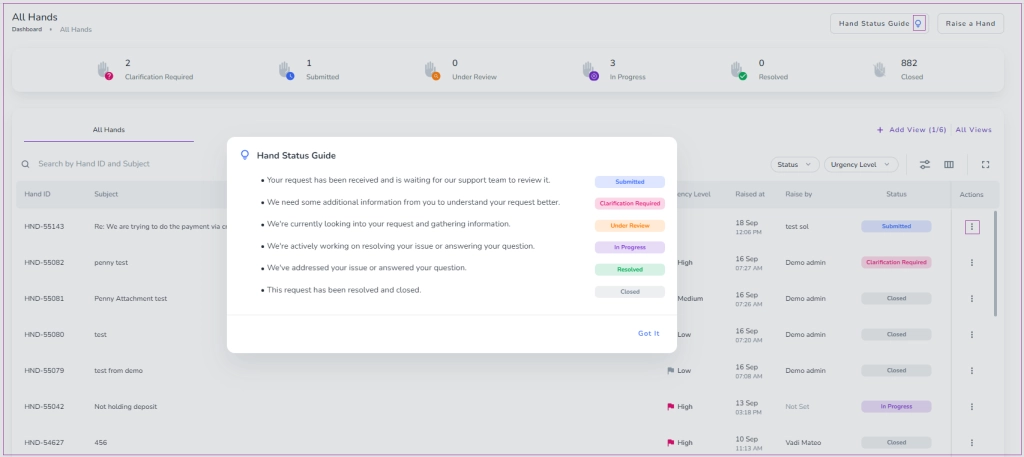
By clicking on View All , you will be directed to the Hands Dashboard. On the Hands Dashboard, you can Raise a Hand, view the panel of Hands Status and view each hand in a separate page.
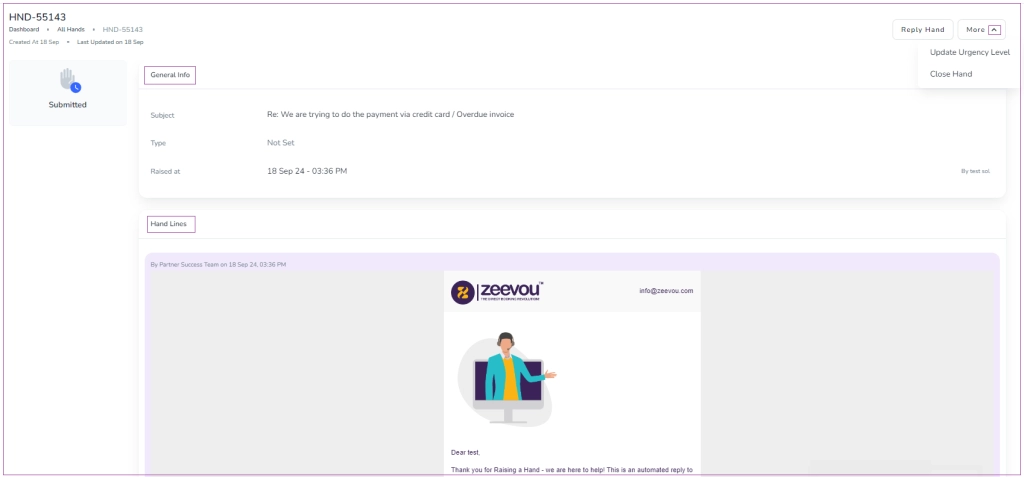
If you click on the three dots of each hand, you can select to View or Close the hand. When you click on View, you are directed to the hand page with two cards, General Info and Hand Lines. General Info includes the Subject, Type, Hand Source and the Raised at date. Under Hand Lines, you can follow the hand history.
You can can click on Reply Hand or More arrow to select to Update Urgency Level or Close Hand.
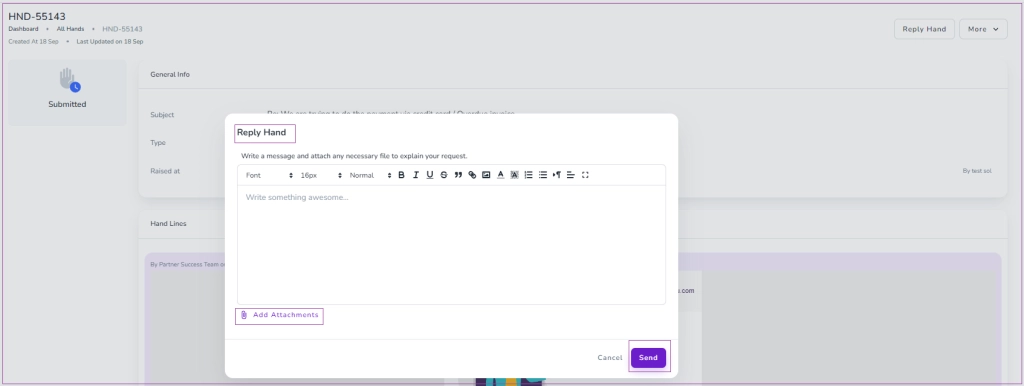
If you click on Reply Hand, a window opens in which you can write a message and attach any necessary file to explain your request. Finally, click on Send.
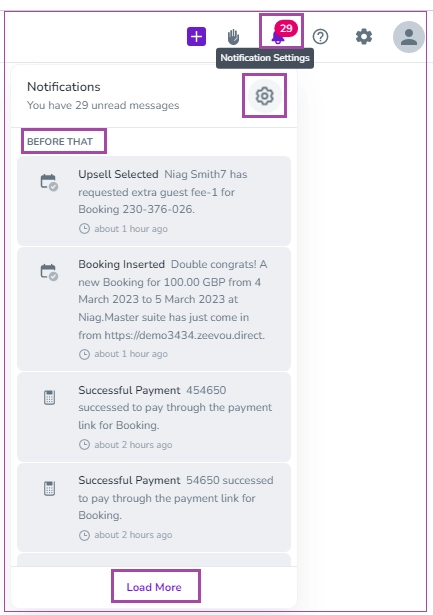
Notifications Icon
If you click on the Bell icon, the box of Notifications will open. You can view the recent ones and click on Before That to view older notifications. If you hover over the Settings icon in the box, the Notification Settings box will appear. You can click on that for configuring the settings.
Zeevou Support
When you click on the Question icon, you are redirected to Zeevou Support to find the help articles and FAQs.
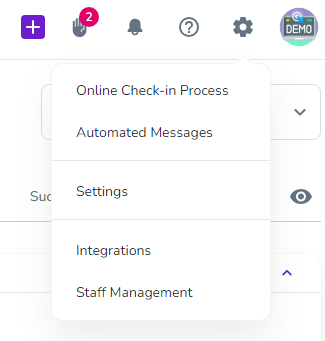
Settings Icon
When you click on the Settings icon, a box will open up for you to configure the settings in the following areas:
Online Check-in Process
Automated Messages
Settings
Integrations
Staff Management
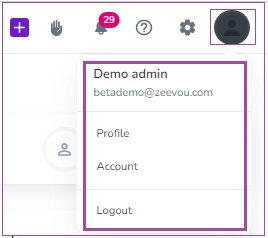
Profile Icon
When you click on the Profile icon, a box will pop up in which you can view your logged-in role. You can also click on your Profile or Account to make changes or Logout.