Invoices show the payments a guest needs to make for a booking. You can find each invoice on the Booking View → Finance tab.
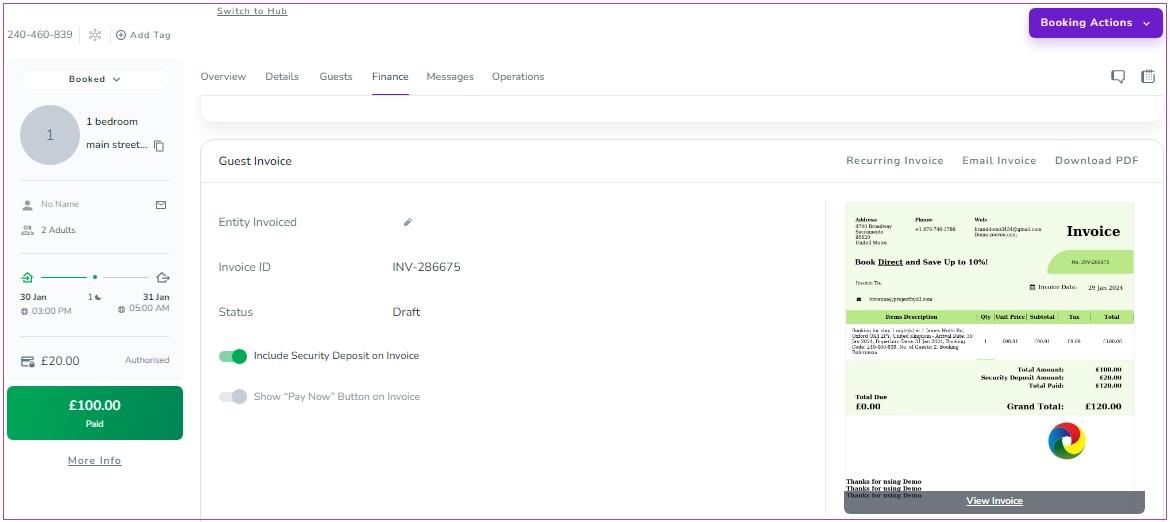
Open the booking.
Go to the Finance tab.
Locate the Invoice card.
Click Email Invoice.
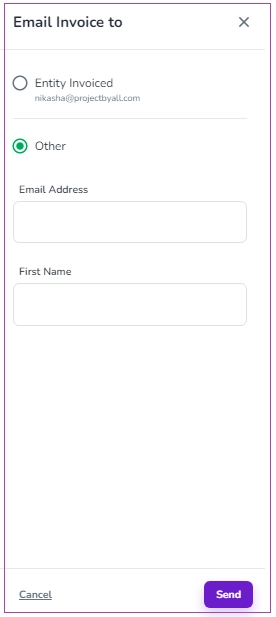
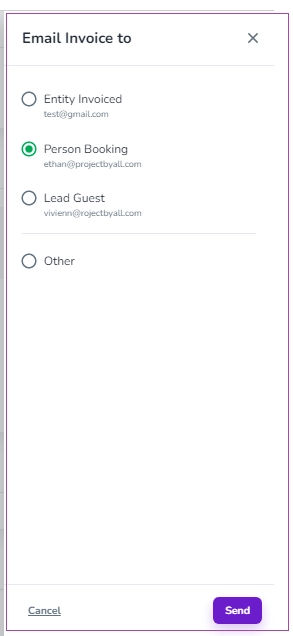
If multiple recipients are available, choose one of the following:
Entity Invoiced
Person Booking
Lead Guest
Company
Other (enter Email Address and First Name)
Click Send to email the invoice.
A window will appear in which you can select Entity Invoiced or Other. For Other, you should insert Email Address and First Name. Finally, click Send.
For recurring invoices:
Click the three dots next to the invoice.
Select Send Invoice.
Choose the recipient.
Click Send.

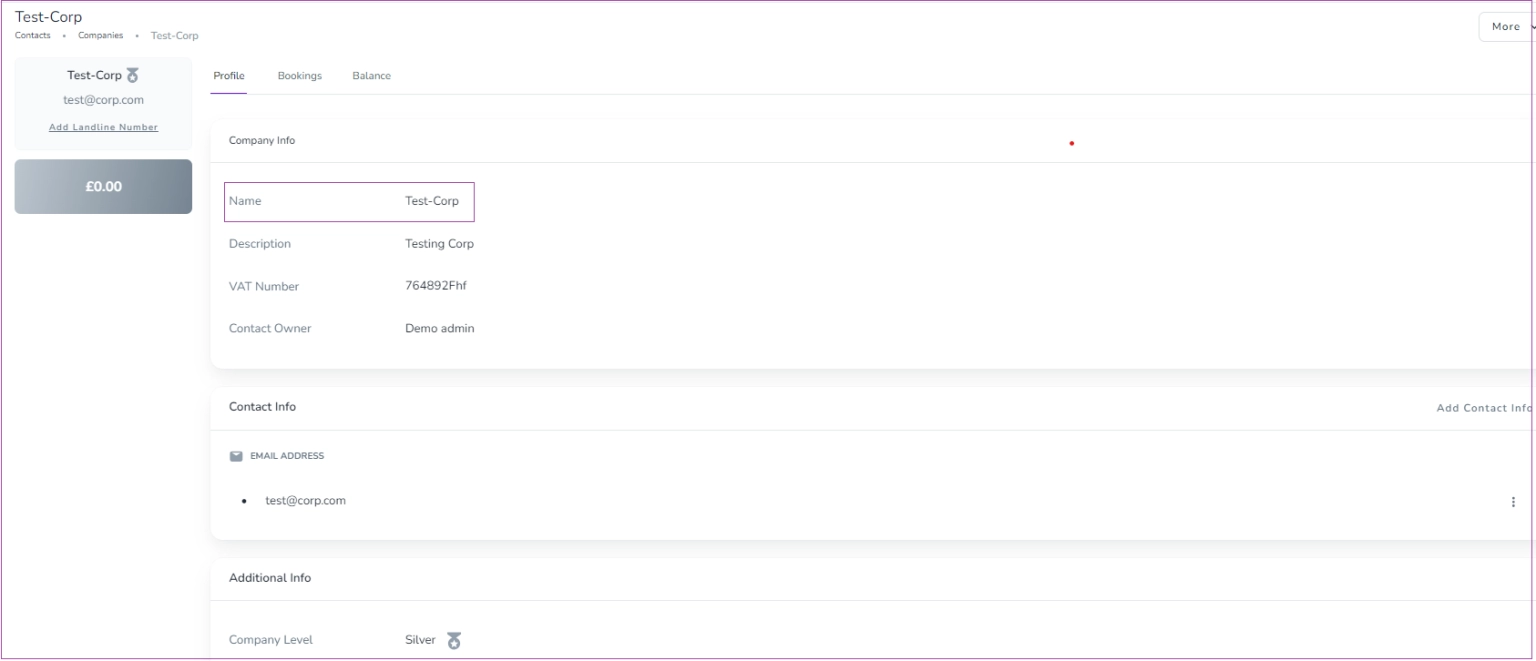
To set the company as the recipient of the invoice, please make sure that Zeevou Company has been created beforehand.
Note 1: The company must be created on Guests -> Companies. If it’s created but still not showing, try refreshing or checking the details.
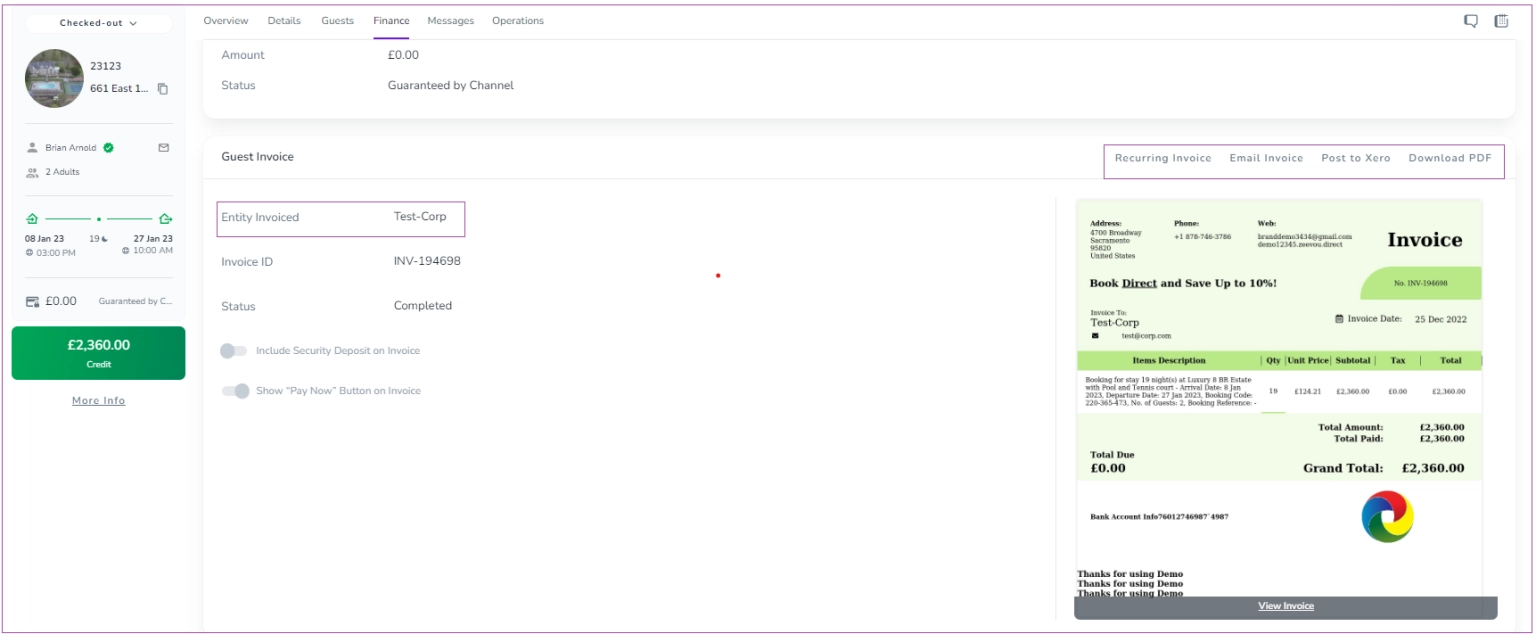
To see the invoice, go to Booking View Page-> Finance Tab -> Invoice card. Click the pen icon to edit the Entity Invoiced and set the company as the recipient. This will generate the invoice for the company, not the guest. You can click Download PDF or Email Invoice to send the Invoice to the company.
Note 2: You should go to the Details tab and add the Company in the booking source section to be shown in the Finance tab.
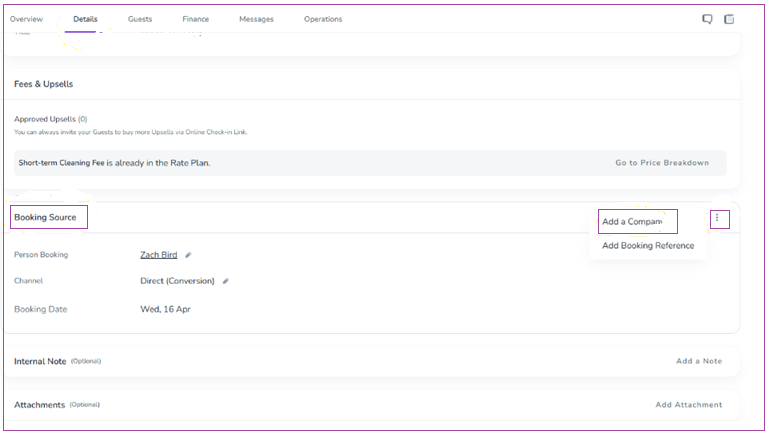
Note 3: You can change the Entity Invoiced and regenerate the invoice.
To view the Invoices grid from the Zeevou menu, go to Finance -> Invoices. You can view the Invoices Table, including Recipient, Doc No & Status, Date Range Covered, Amount, Booking No., Remote No., Xero Status, Description, Created At, and Action.
In the invoice page, you may see different statuses for an invoice: Draft, Completed, Posted and Voided.
If the Doc Status shows Draft, the invoice is still subject to new changes. You can click the More button and select Re-generate Invoice to generate the latest version of the invoice.
If the Doc Status shows Completed, the guest has checked out and the invoice changes have been finalized. If needed, you can click the Post to Xero button. Please note that Post to Xero button is available only if you have activated your integration with Xero. For the Completed status, you can also click the Change to Draft button and click Re-generate button to apply the latest changes.
If the Doc Status shows Posted, the invoice has already been posted to Xero. In these cases, the Void button will appear to let you void the posted invoice.
If the Doc Status shows Voided, the posted invoice has been voided. You can apply new changes, regenerate the invoice, and post it again.
You can search by Doc or Booking No. through the Search bar or different filters. There are two default filters for Start & End Date. You can apply other filters by clicking on the Filter icon. You can also click the Download icon to have the invoice in XLSX or CSV file format.
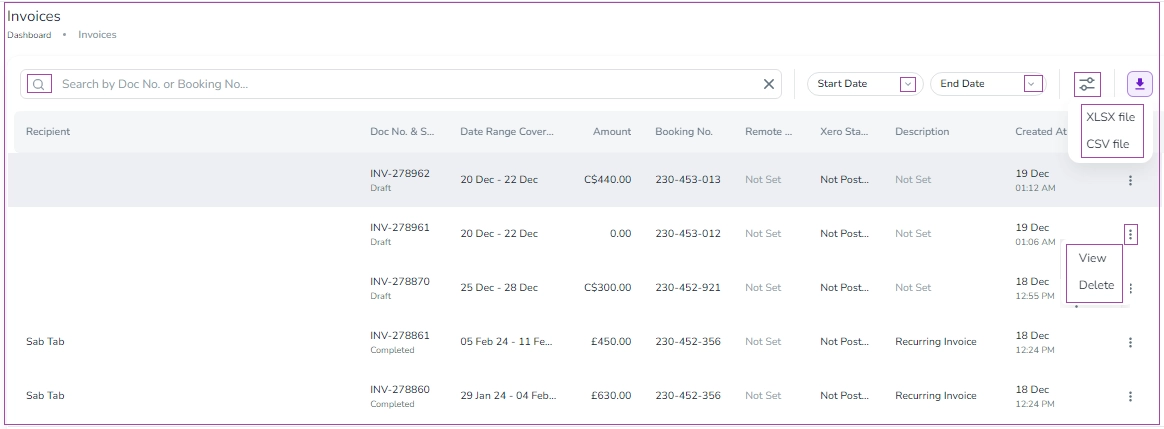
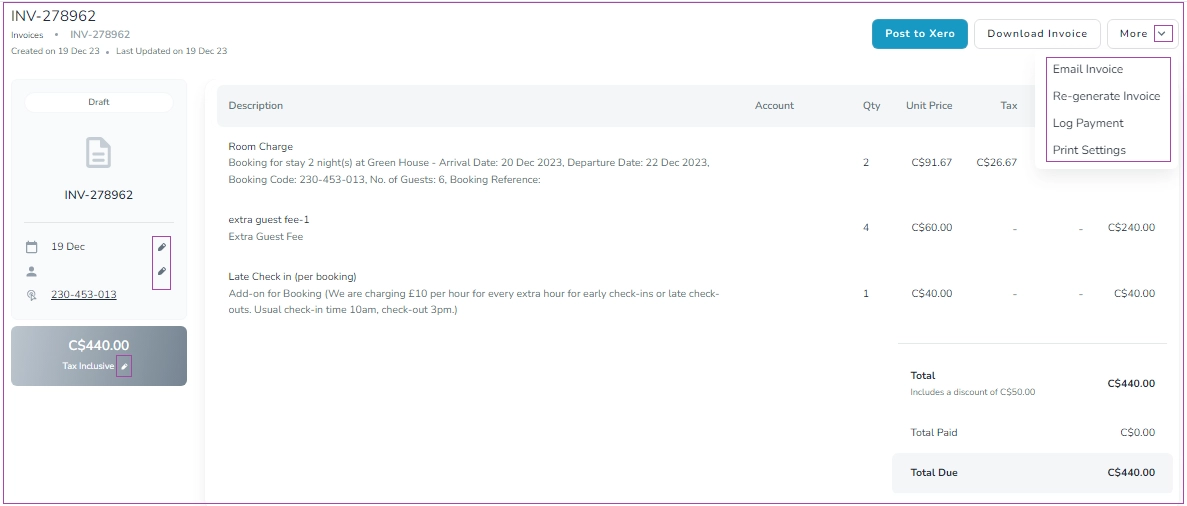
You can click the three dots under Actions to View or Delete each invoice. You can also click each invoice to view it. On the opened page, you can view invoice details including Description, Account, Quantity, Unit Price, Tax, Discount, and Total.
You can also click Post to Xero, Download the invoice or More, to select Email Invoice, Re-generate Invoice, Log Payment, and Print Settings. Moreover, you can edit Doc Date and Entity Invoice by clicking their respective pen icons.
You can also set up a Recurring Invoice for a booking in the Finance tab by following these steps:
Open your desired booking.
Navigate to the Finance tab.
Locate the Invoice card and click on Recurring Invoice.
Choose Weekly or Monthly (Note that if the booking is longer than a week, “Weekly” will appear, and if it is longer than a month, Monthly will appear too).
Select the Start Date as either First Day of Week or Booking.
Click Process to review the Recurred Invoice.
Click Save to finalize the setup.
Set your logo, slogan, bank account information, and footer note to be displayed on your invoices. To do so, navigate to Organisation’s Settings> Finance tab> Invoice Card and turn on the toggle of your desired item.
