Creating an expense in Zeevou lets you capture costs accurately (booking-related or any other Creating an expense in Zeevou allows you to accurately record costs (booking-related or otherwise), categorise them using custom Expense Types, link them to accounting accounts, and apply tax codes.
You can allocate expenses at property, unit, or booking level, ensuring precise reporting. All recorded expenses automatically feed into Monthly Profit Reports, giving owners clear visibility of profitability.
To get started:
Log in to app.zeevou.com.
Go to Finance → Expenses.
You will be directed to the Expenses landing page.
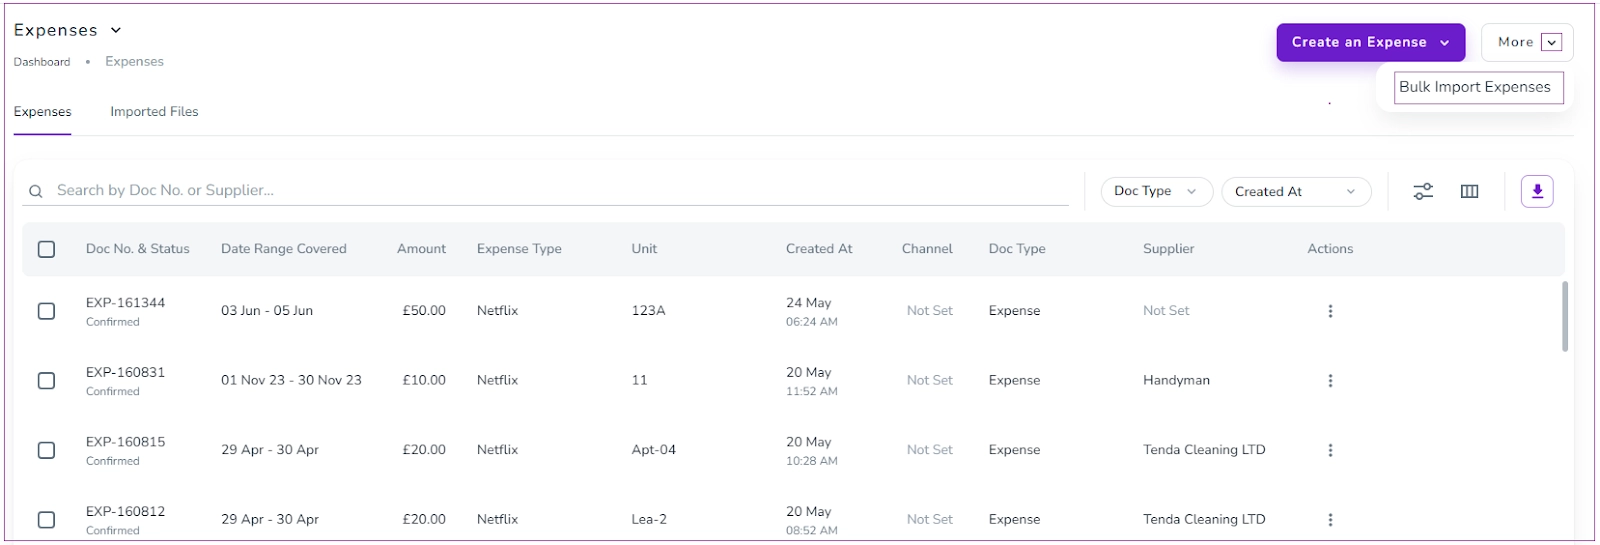
On the Expenses page, you can view a table displaying the following columns:
Doc No. & Status
Date Range Covered
Amount
Expense Type
Unit
Created At
Channel
Doc Type
Supplier
Unit Allocation Strategy
Actions
This table gives you a complete overview of all recorded expenses.
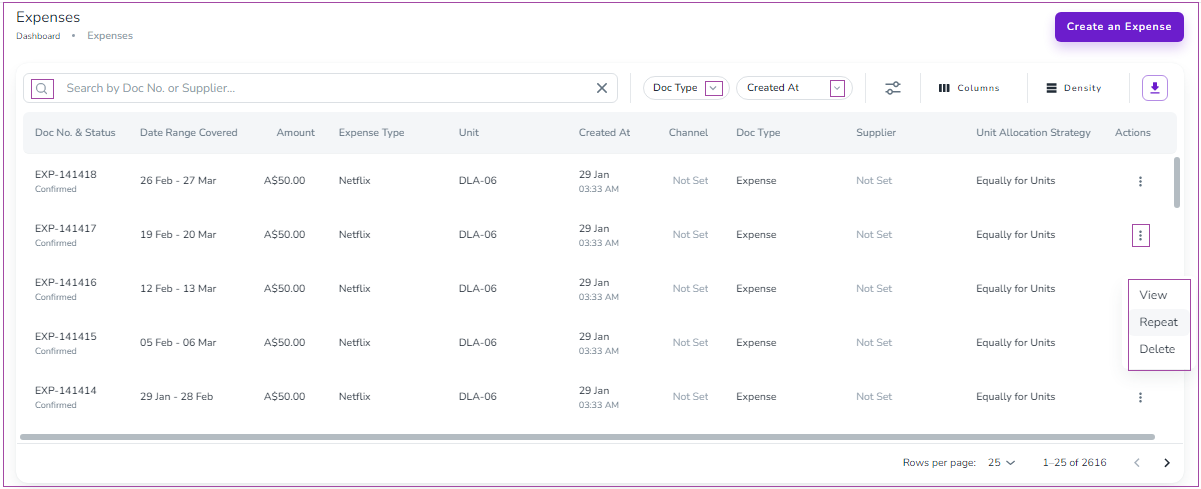
For each expense row, click the three dots under the Actions column to:
View
Repeat
Delete
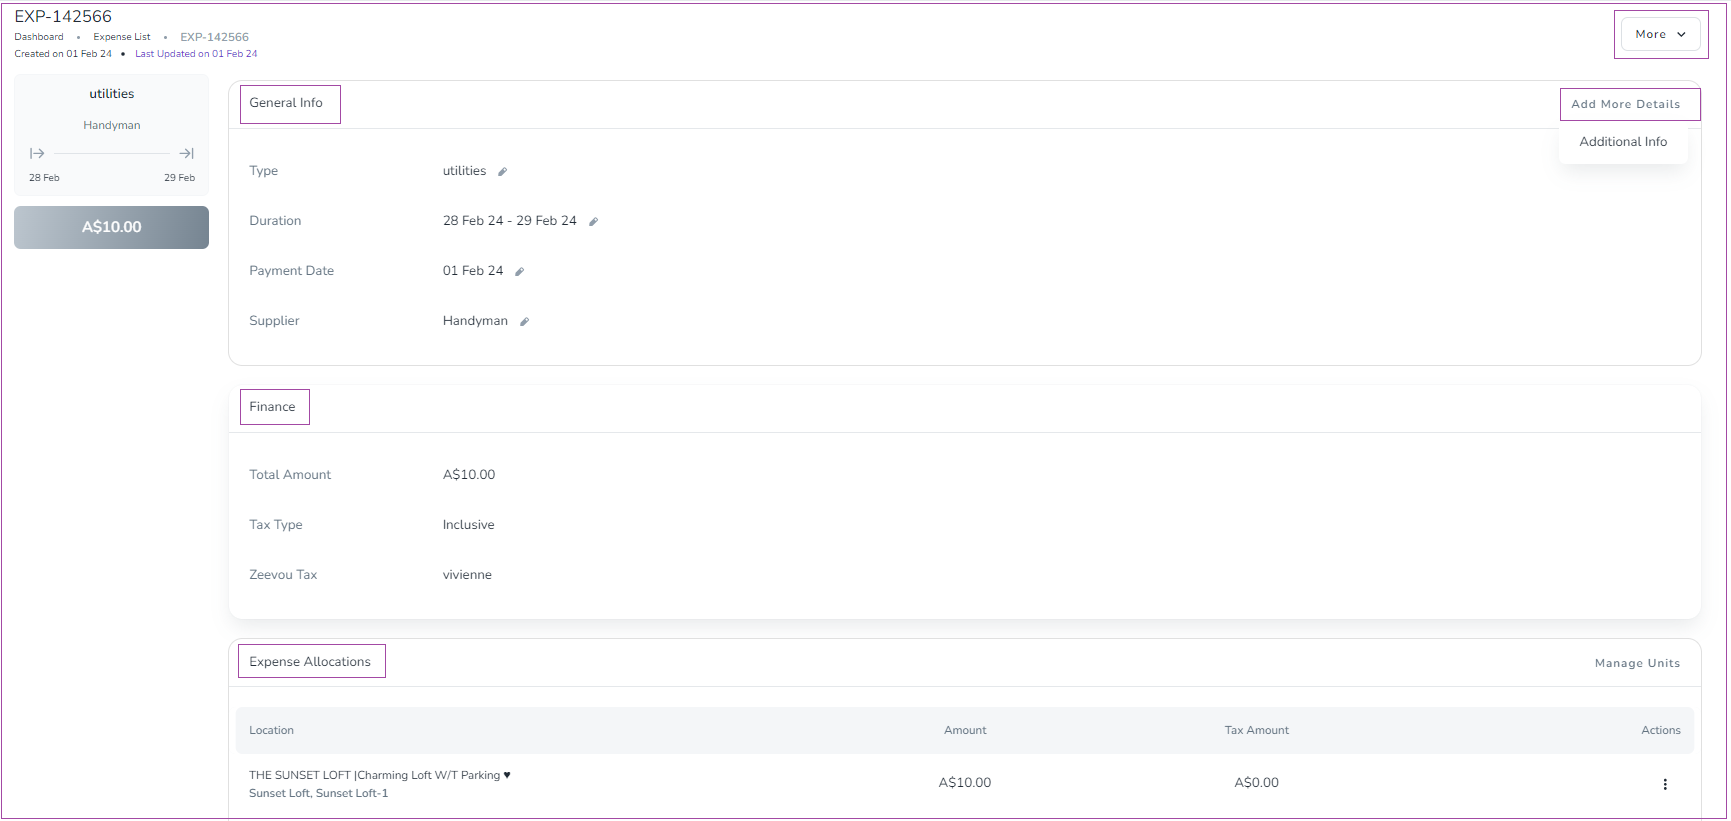
If you click View, the expense page opens, where you can review and edit information inline.
The page is organised into three sections:
General Info
Finance
Expense Allocations
You can edit the information directly within these sections.
Important: You can adjust the individual expense amount, but not the total calculated amount.
In the General Info section, you can click Add More Details to include additional information if needed.
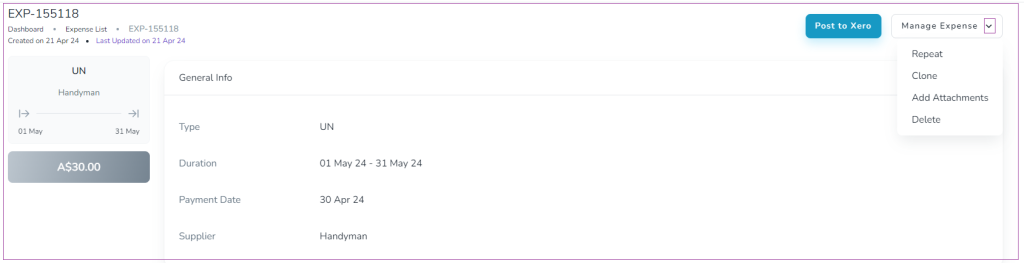
Within the expense page, click the Manage Expense dropdown to access:
Repeat
Clone
Add Attachments
Delete
If you select Clone, you will be redirected to a new expense form with certain fields pre-filled based on the original expense. This helps you save time when creating similar entries.
If you select Repeat, a scheduling window will open.
Set the repetition schedule.
Click Preview Schedule to review the recurrence setup.
Click Save to confirm.
This is useful for recurring expenses such as regular cleaning fees, management fees, or subscriptions.

To add a new expense:
Go to Finance → Expenses.
Click Create a New Expense in the top-right corner of the page.
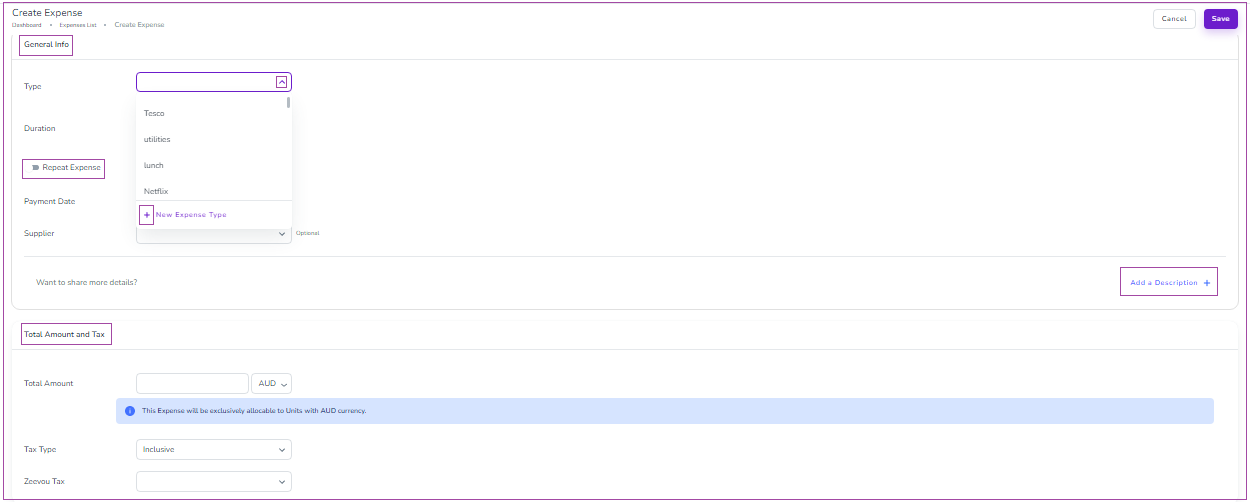
A new form will open where you can complete the following sections:
Select an Expense Type from the dropdown menu.
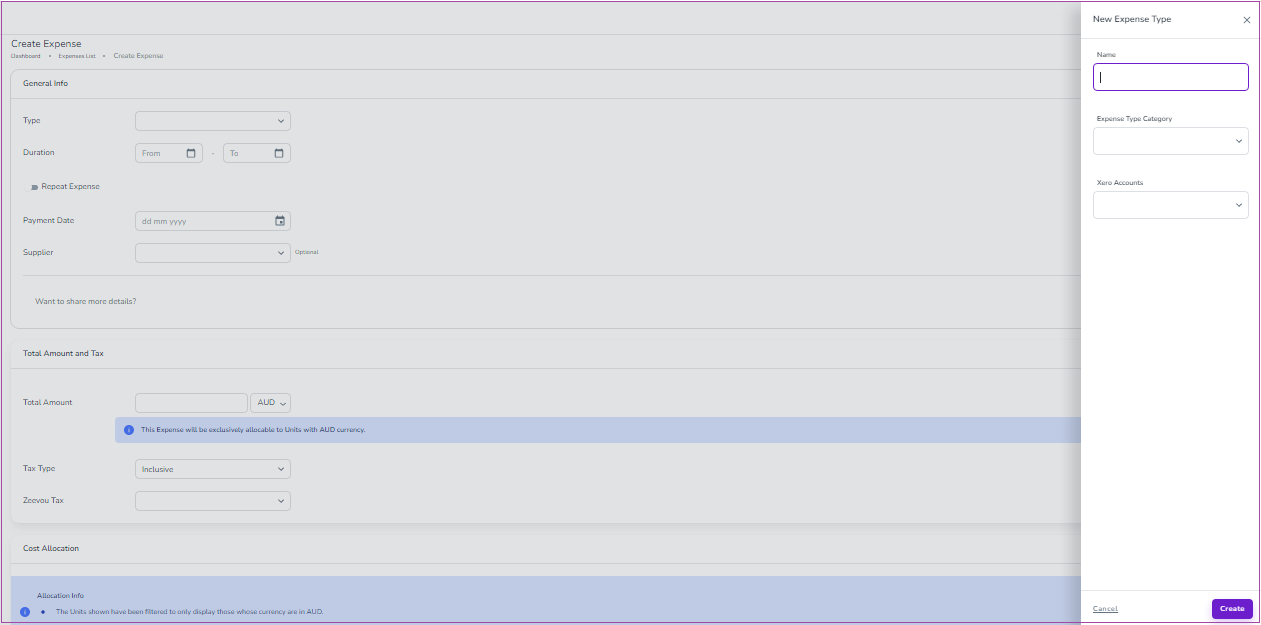
If needed, click New Expense Type to create one.
When creating a new Expense Type, a drawer will open where you must:
Enter the Name
Select an Expense Type Category
Choose the relevant Xero Accounts
Click Create
After selecting the Expense Type, complete the remaining General Info fields:
Duration
Payment Date
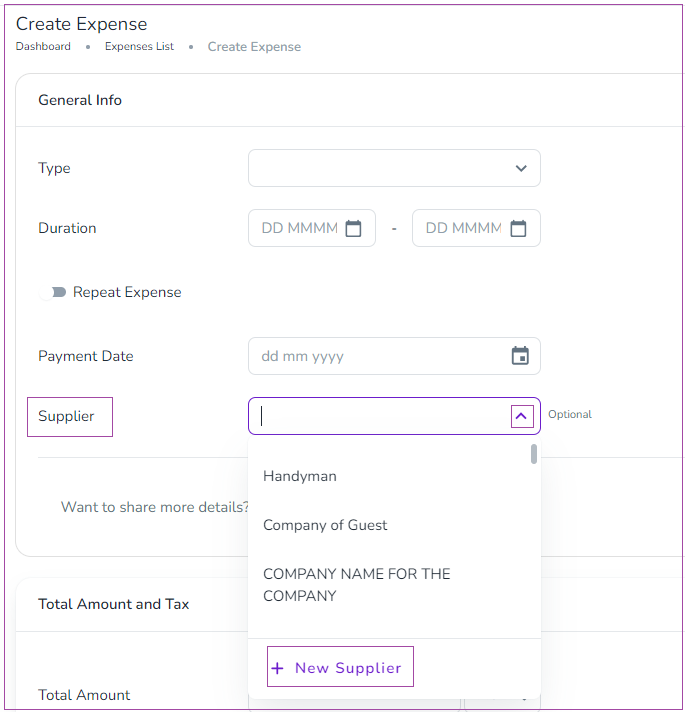
Supplier
You can also enable the Repeat Expense toggle if the expense is recurring.
Select a supplier from the dropdown menu, or
Click + New Supplier to create a new one.
Enter the Total Amount.
Select the appropriate Tax Type.
Choose the correct Zeevou Tax from the dropdown.
Make sure the tax configuration matches your accounting requirements.
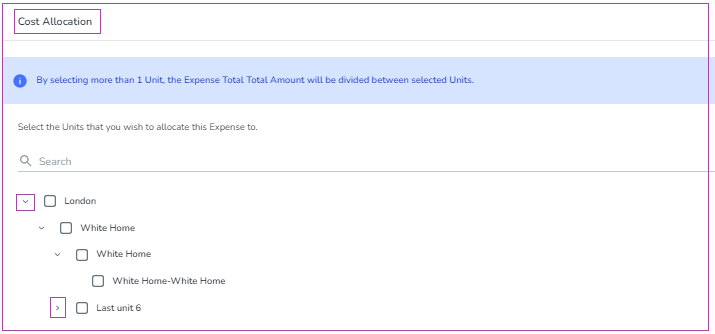
Select the Unit(s) you want to allocate the expense to.
This ensures the cost is reflected accurately at property, unit, or booking level and flows correctly into your Monthly Profit Reports.
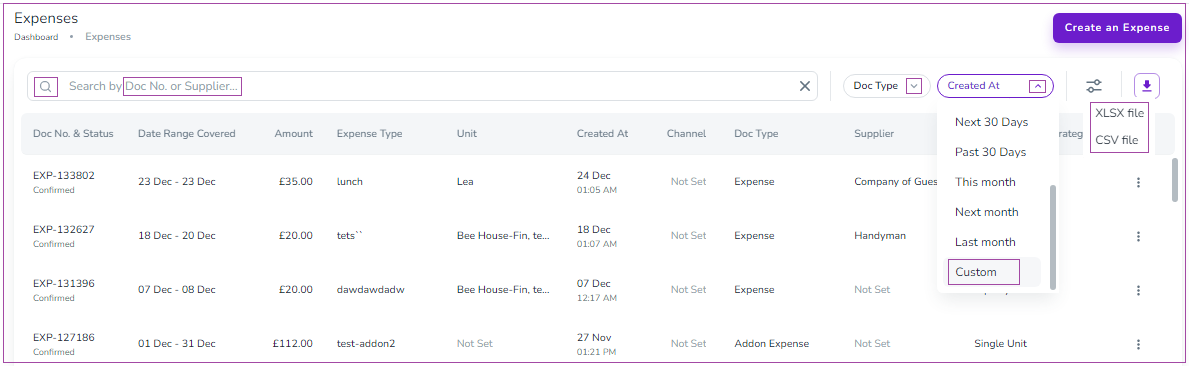
On the Finance → Expenses page, you can quickly locate records using the Search bar or filters.
Search by Doc No
Search by Supplier
Doc Type
Created At
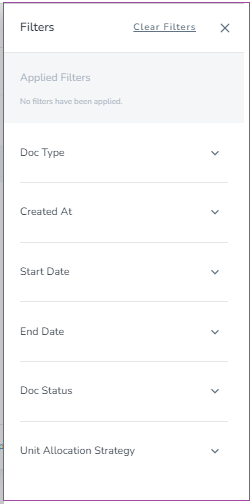
To apply additional filters:
Click the Filter icon.
A drawer will open.
Use the dropdown arrows to select your desired filters.
You can also click the Download icon to export your expenses in:
XLSX format
CSV format
If you want to create a recurring expense, follow these steps:
Log into your Zeevou account.
Navigate to Finances, then Expenses on the main menu.
You can make it recurrent in three ways on the Expense Dashboard:
A. Click the three dots under Actions and select Repeat.
B. Click the three dots under Actions and select View. Then, click Manage Expense in the top right and select Repeat.
C. Click Create an Expense. Turn on the Repeat Expense toggle on the General Info card.
After selecting any of the above options:
A scheduling drawer will appear.
Choose how frequently the expense should repeat.
Click Preview Schedule to review it.
Click Save.
This is ideal for recurring costs such as management fees, subscriptions, or routine services.
If you need to apply one expense to multiple existing bookings within a specific timeframe and location:
Go to Finance → Expenses.
Click Create an Expense.
Select For Existing Bookings.

Fill in the required fields and click Save.
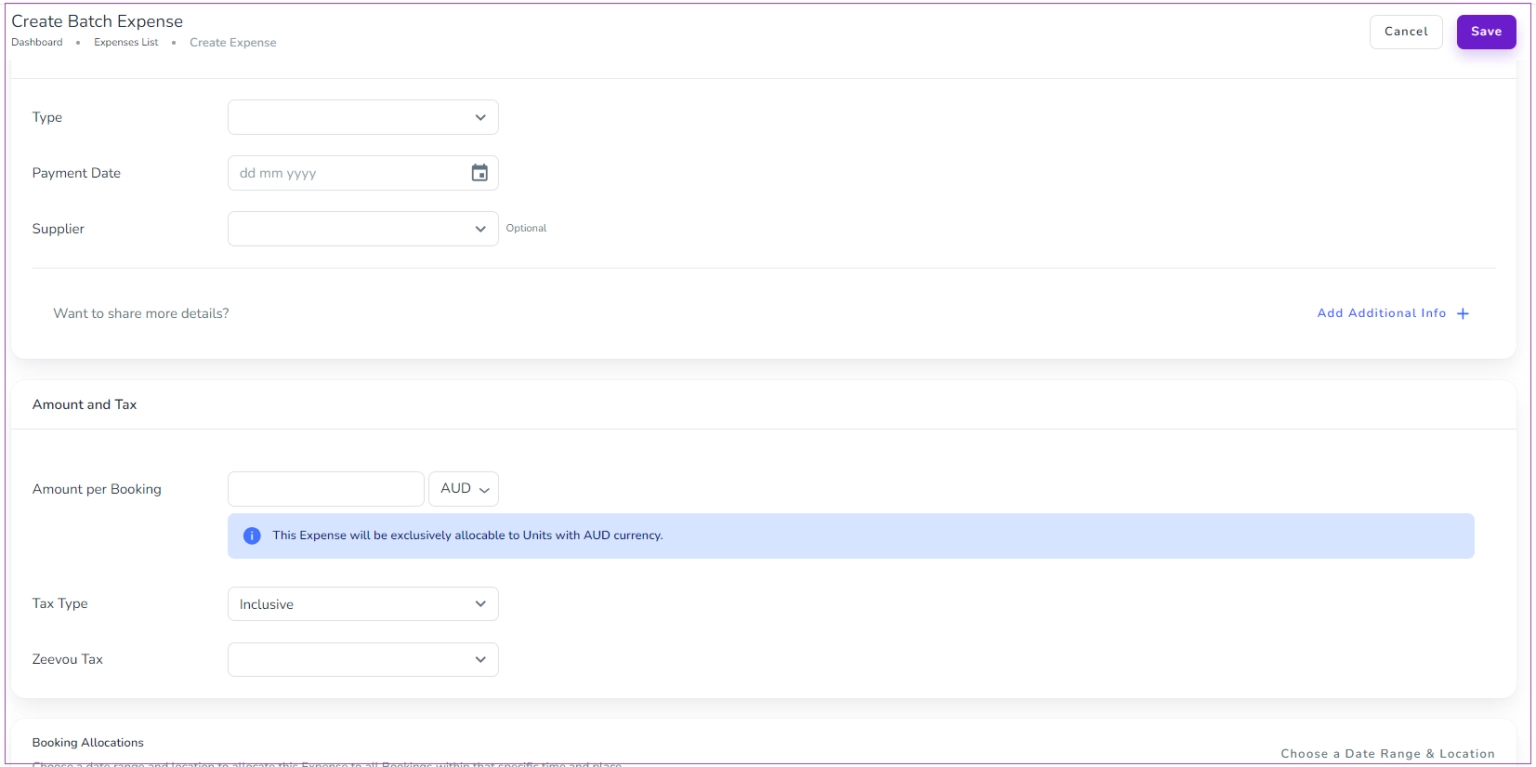
On the Booking Allocation card:
Click Choose a Date Range & Location.
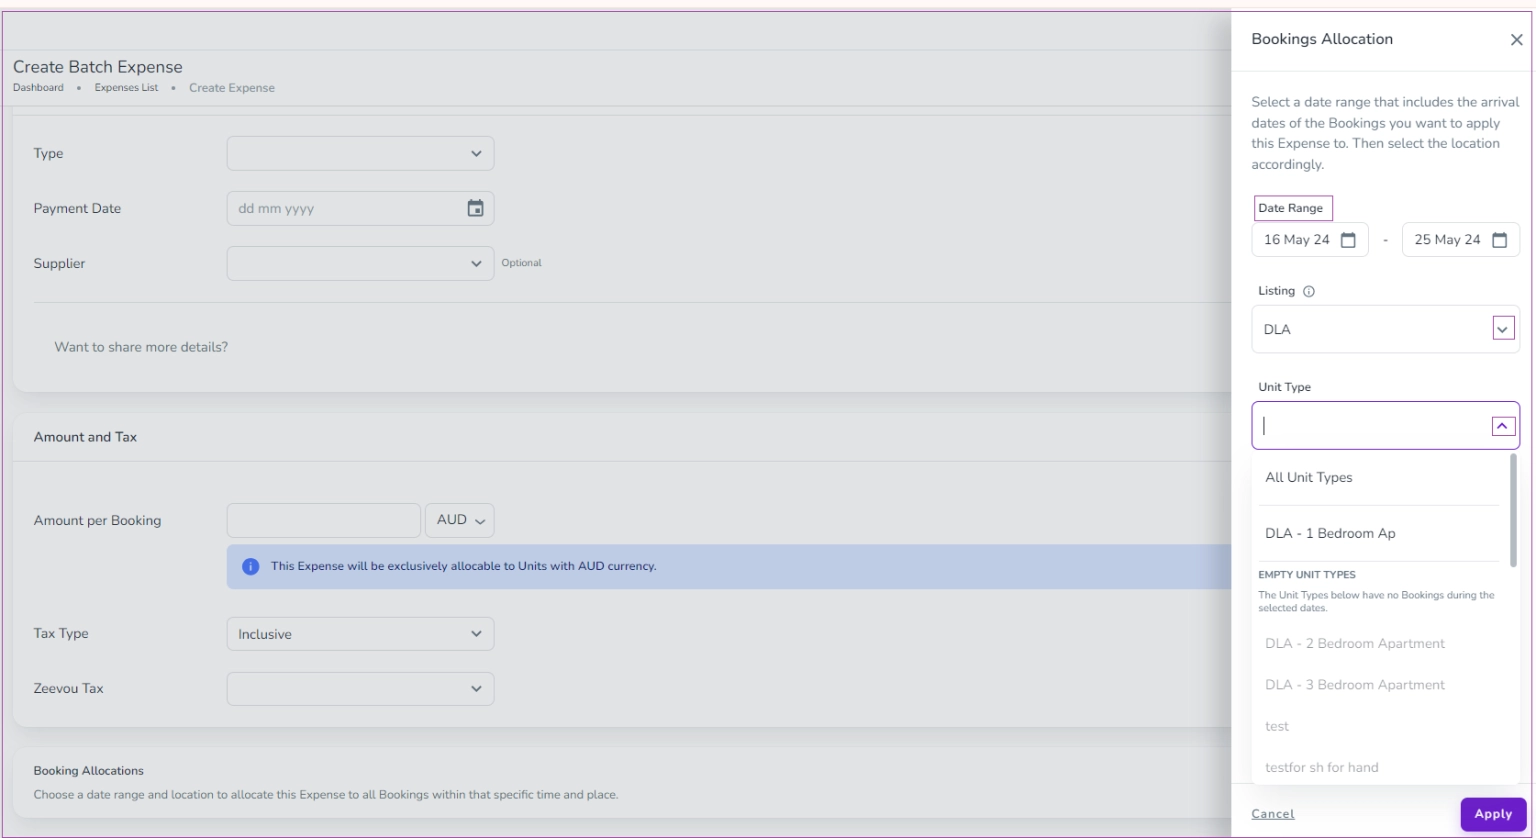
In the drawer, select:
Date Range
Listing
Unit Type (optional)
Specific Unit (optional)
Click Apply.
You will see the bookings which the expense will be applied.
You can also edit the data by clicking Change Duration & Location.

If an expense is created directly within a booking, it automatically inherits the From and To dates from that booking.
These dates cannot be edited, and changes to the duration will not be reflected.
To create a one-day expense, use Create an Expense → For Specific Location from the Expenses list instead.
To import multiple expenses at once:
Go to Finance → Expenses.
Click the More arrow.
Select Bulk Import Expenses.
Download the provided template and enter your data.
If you already have a completed template, you can skip the download step.
Upload your file.
Imported Files Dashboard
You can track file statuses such as:
Transferred
Ready for Transfer
Containing Invalid Data
For files marked Ready for Transfer or Containing Invalid Data, click the three dots to:
View
Delete
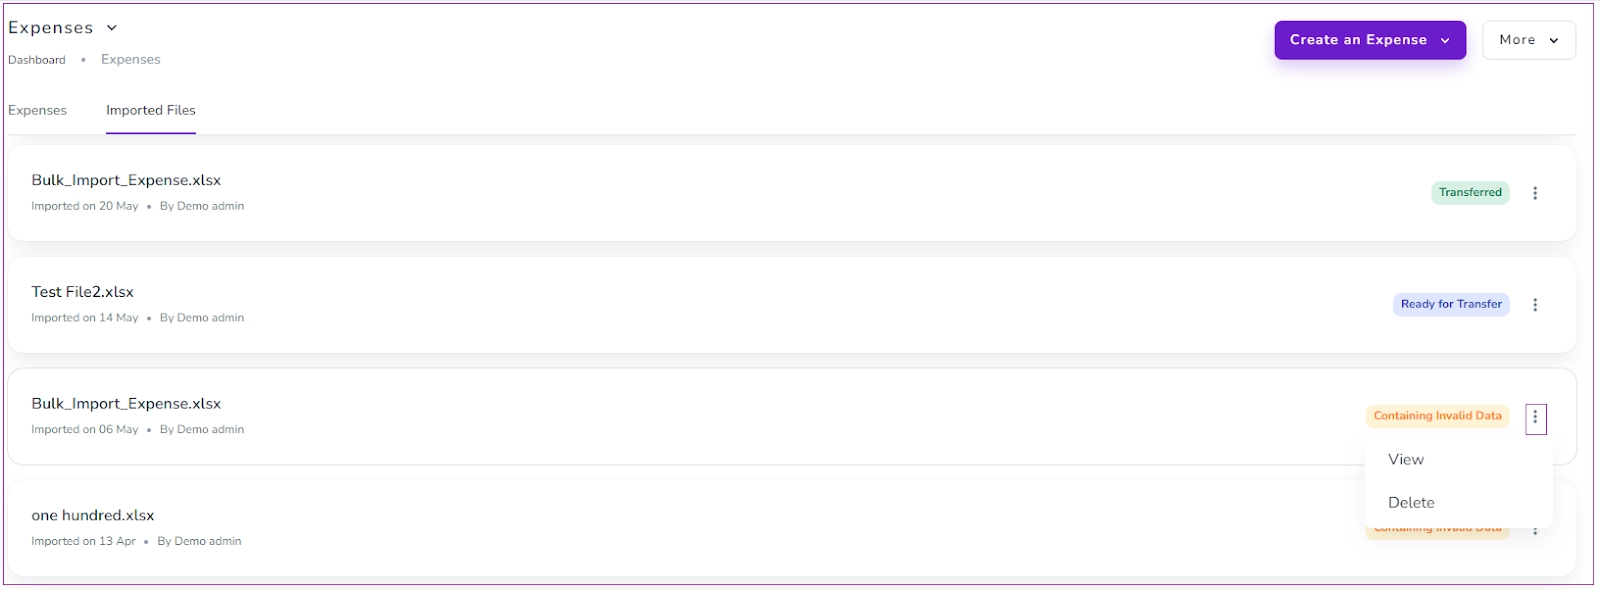
If there are invalid records, correct the Excel data and reprocess the file to successfully transfer the expenses into the system.
