Now that you've reviewed how the Calendar works, the next step is to set your rates.
Important: If your rate plans are connected to booking channels, changes you make in Zeevou may be sent to those channels. Before saving, make sure you're updating the correct rate plans.
Yes — if you want to control your rates yourself in Zeevou.
No — if you intend to use a Dynamic Pricing Provider to automatically adjust your rates. In that case, continue with Enable Dynamic Pricing.
Watch this video tutorial to learn how to set your rates in Zeevou:
When you create a Unit Type, its rate plans automatically provide the starting prices used for your accommodation based on the Default Rate.
You can then customise your rates for specific dates or date ranges. When you set a rate for specific dates, that rate can override the rate previously applied to those dates.
If you change a rate-plan price later, Zeevou may ask whether you want to apply the change to existing rates or keep the rates already set for those dates.
Editing the Default Rate will not change the rates for any specific dates for which you have set manual overridden rates.
There are two ways to set or adjust rates:
Rates & Availability Calendar: Best for quick changes to one or a few dates.
Calendar Toolbox: Best for creating rates across a date range or applying different prices and restrictions by day of the week or month.
Use the Rates & Availability Calendar when you want to update a rate or stay restriction for one or a small number of dates.
Go to Calendar → Rates & Availability Calendar.
Select the date or date range you want to update.
Enter the new Price, Min Stay, or Max Stay.
Click Save.
You can select dates in either of these ways:
Drag across your preferred dates on the pricing row.
A pop-up will appear.
Enter the new Price, Min Stay, and Max Stay.
Click Save.
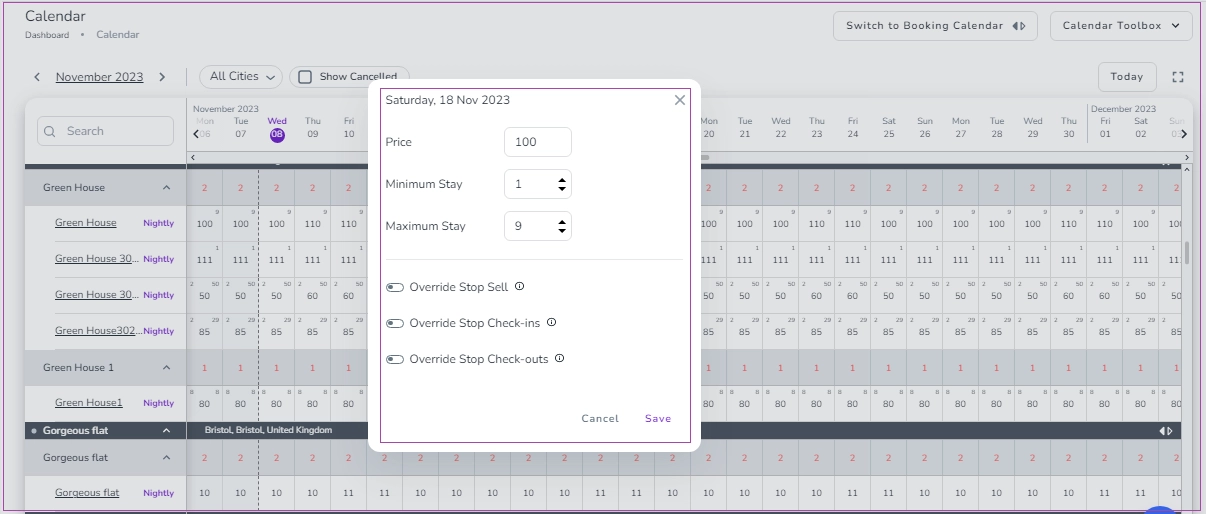
Double-click the date you want to update on a specific cell.
A pop-up will appear.
Enter the new Price, Min Stay, and Max Stay.
Click Save.
When you set a new rate for specific dates, it can override the rate previously applied to those dates.
Use Calendar Toolbox when you want to create or update rates across a longer date range or apply different prices and restrictions based on the day of the week or month.
Go to Calendar → Rates & Availability Calendar.
In the top-right corner, open Calendar Toolbox.
Select Create a Rate.
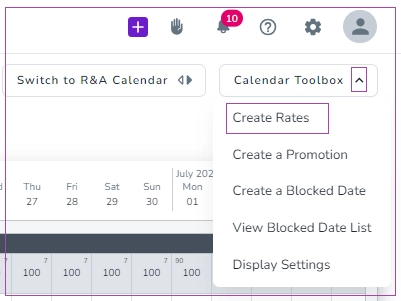
Choose the rate type: Nightly, Weekly, or Monthly.
You'll then be taken through two configuration steps:
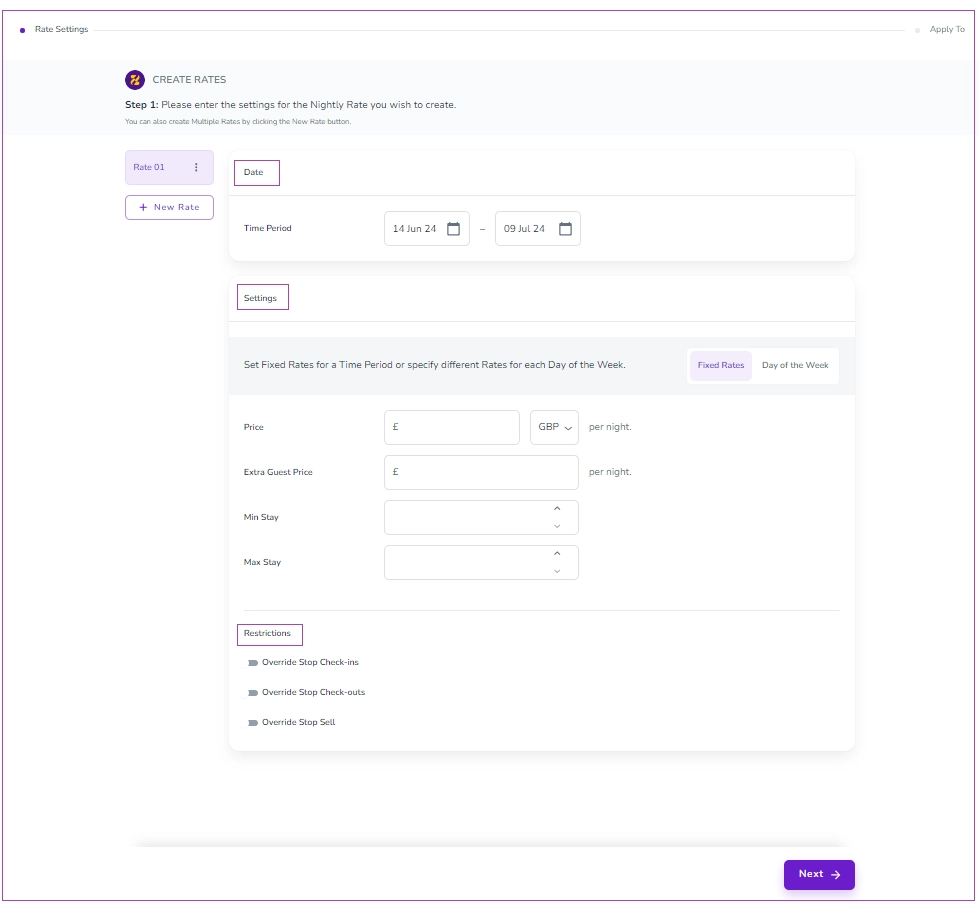
Select a time period:
Click the Time Period field.
Select the dates you want the rate to apply to.
Choose How to Set the Rate
Depending on the rate type you've selected, you can configure your rates in different ways:
Option A: Fixed Rate
Apply the same rate for the entire selected period (not available for Weekly Rates).
Price: Enter the nightly rate.
Extra Guest Price per Night: Set additional charges for extra guests (optional).
Min Stay: Set minimum stay requirement.
Max Stay: Set maximum stay limit.
Set Restrictions (optional):
Override Stop Check-Ins: Guests cannot check in on selected days.
Override Stop Check-Outs: Guests cannot check out on selected days.
Override Stop Sell: Guests cannot book on selected days.
Option B: Day of the Week / Month of the Year
Set specific rates for different days or months (not available for Weekly Rates).
For each row, you can configure:
Price
Extra Guest Price
Min Stay
Max Stay
Relevant booking restrictions
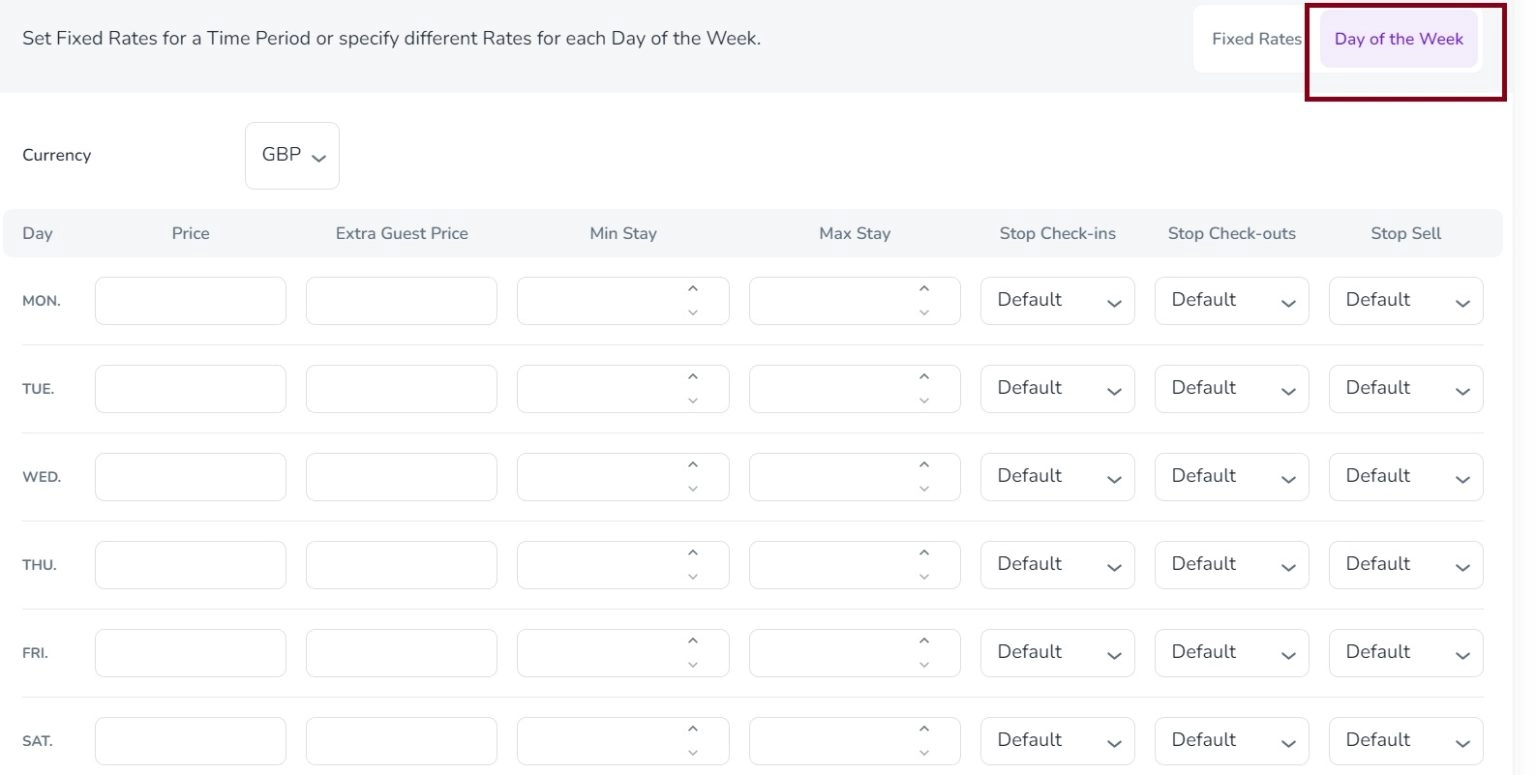
Note: When you fill in the first row, the data will automatically be copied to the rest of the rows. You can manually change the data in each row if needed.
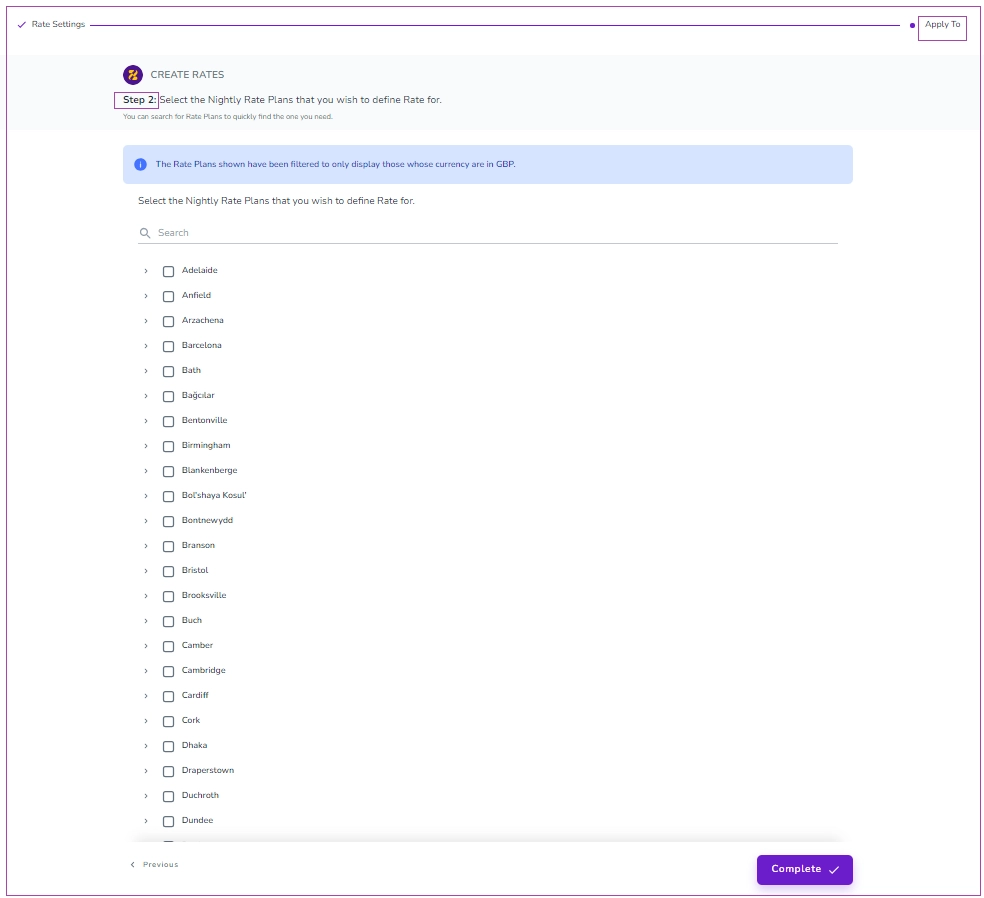
Choose which Rate Plans should receive the new rates.
Select the relevant Nightly, Weekly, or Monthly Rate Plans.
Expand the sections to check that you're applying the changes to the correct rate plans.
Review your settings.
Note: Rate Plans are filtered based on the selected currency.
Your new rates will appear in the Rates & Availability Calendar.
Once you have created your rates manually, you can continue with the rest of your Calendar Set Up.